Category Archives: layout

My Top 5 ‘must-have’ items for Paper Crafting

I wanted to start of 2019 with a post about my all-time must-have items for paper crafting! These are items I use on the daily in my crafting- cards, scrapbooking or home decor- these are ALWAYS close by!
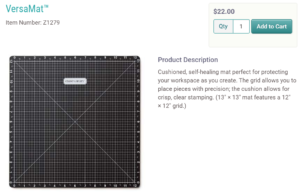
Versamat

I have not one, but two of these on my desk surface at all times. They allow me to measure and line up elements of my pages or cards with ease. They also are cushioned on the back, an aspect that makes them vital for crafting- especially if I am working on a plastic table and not a solid wood surface. I only need one for cardmaking but two are best for scrapbooking two-page layouts.

Memory Protectors

These may seem an odd choice but I promise you they are not. Close to my Heart makes the BEST memory protectors. They have a sturdy feel and will not tear – no matter how many times your books are looked at and enjoyed. They will also protect those beautiful pages you have made. I prefer the side load (we also offer top load which is more traditional). The side load prevents anything from getting in the top- it would be very difficult for anything to sneak in through the inside edge of a protector.  I have visions of my kids spilling something on the shelf where my books are kept and that seeping into the top of my albums- side load ensures this nightmare never occurs!

Are you a fan of strap-hinge albums? These have a big fan base. Did you know that we offer memory protectors for these albums as well?  Same CTMH quality but designed to work with the leading strap-hinge albums- try them, I guarantee you will LOVE them!
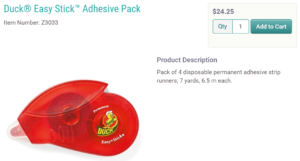
Duck Adhesive

I have written about this before in an earlier article on adhesives. This is my GO TO, never disappoint, hold forever, adhesive. In most situations, I prefer a tape adhesive and this one holds really well. They are not refillable (I do wish they were) but the hold is what keeps me coming back time and time again. I do not want to flip through an album year down the road and find all the pictures have slid off the page- these projects need to last and this adhesive will ensure that they do.
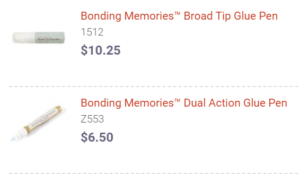
Bonding Memories

There are times that a good wet adhesive is required. I keep a broad tip and fine tip bonding memories glue pen for those occasions. Small strips of paper. A paper that will require a LOT of glue. Certain embellishments work well with this glue as well- I find that vellum, in particular, does not show this adhesive as much as it will show others. This glue also has a ‘dual’ purpose. Applied blue it will hold long term, allowed to dry until it is clear then it acts as a non-permanent adhesive- a great option when you are not sure about placement on a page or require a mask when stamping.
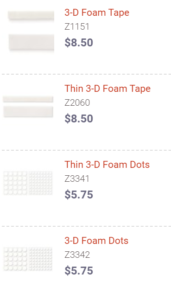
Foam Tape

If you have not tried out foam tape you are missing out! This adds a ‘lift’ to elements of your project- something that allows you to add layers and lots of fun. I rarely have a project that I do not use foam tape with. We offer two varieties- tape and dots (personally I use the tape as I can cut it to the size I prefer). It also comes in two thicknesses- thin and regular. This allows you to create more than one layer. If you like the look of foam but don’t want your pages to be too thick- then use the thin tape and save on space. The options with this are endless!

All of my top 5 ‘must-have’ items can be purchased in my shop.

Do you currently use any of these items?

What are your top ‘must-have’ items for paper crafting? Tell me in the comments!

Until we craft again, The Brae-er


Cross Canada Blog Hop: How to Books

Welcome to the Cross Canada Blog Hop featuring the fabulous How to Books that Close to my Heart offers customers! If you have come from Lucy’s blog then you are on way across our beautiful country! Just read on and then I will lead you to the next blog.

For my project I decided to take the card How-to book, ‘Wishes’ to create a layout. I find the card layouts the perfect fit for single pages and since I only had one photo of my daughter to scrapbook I could only do a single page. Here is the pattern I chose.

embossed blog hop 2

Now here is the layout I created using the pattern. I kept it simple and complemented the colours of my daughter’s dance costume (our blushed paper was the perfect fit for this) AND since another blog I follow was doing a challenge to use embossing folders- I added embossing to the squares of cardstock framing the picture. Simple but sweet.

embossed blog hop

embossed blog hop 3

Now hop on over to Cheryl to see what she has created for you!

Until we craft again, The Brae-er


Brae-er Team Blog Hop: Get it Before it is Gone!

It is always sad to see an idea book come to a close- especially when it has been FULL of product you have loved (or in this case, that I have LOVED!).  This is where we find ourselves this month as many of the items in our Seasonal Expressions 1 book are no longer available after the end of March….

My team decided to take a positive spin on this sad occasion and celebrate with a blog hop that features some of the pieces that we love best in this book! Celebrate with us and be sure to order any items you see that you love… after all soon they will be gone!

My favourite item in this whole book is 100% the hopscotch paper- I have loved it for so many things! Here is I used it in a Vacation album workshop- 10 beautiful scrapbook pages all created with this beautiful paper! (For more details on the workshop portion please visit my Papercrafting Workshops/Kits tab).

vacation album page 1 vacation album page 2 vacation album page 5 vacation album page 6 vacation album page 7 vacation album page 8 vacation album page 9 vacation album page 10 vacation album page four vacation album page three

Now if you want to see the rest of the inspirational work that my team has produced then visit Chris’s Blog next! A full list of hoppers can be found here.

1. Brae Montgomery http://wp.me/p4htXJ-D9

Until we craft again, The Brae-er


One Word Layout

You may not have heard but Jeanette Lynton (founder and CEO of Close to my Heart) has a new blog and challenges every week! They get announced on Monday and challenge you to use your creativity! You can find her blog here if you want to play along in these challenges (a new FUN one was just announced).

Last week she challenged everyone to create a page or layout showing their ONE WORD for 2015- the word that would be the driving force behind what they do. My one word is YOU- it represents my focus on others this year- my customers, my team and my family. I am not going to work super hard for a trip or for an award at convention (although maybe they are a happy offshoot of my new focus) instead I am going to focus on helping my customers create artwork that will cherish their memories and helping my team to achieve their goals and dreams.  I am actually really excited about this new focus and already find it a little freeing and rewarding!

To remind me of my one word I created this layout with mini goals and my one word featured in the art- as well as a cute selfie pic of me and Monica Wihongi COO at Close to my Heart.

one word layout

Do you have a goal or one word for 2015? I would love to cheer you on- share with me in the comments!

Until we craft again, The Brae-er


Valentine Layout: Dream Come True

While perusing Pinterest I saw something that made me stop and head on over to the craft room (love those inspirational pins!).  I found some photos and got to work creating this adorable one page Valentine layout!  (and if you follow me on Pinterest- link on the left- then you will see my inspiration in my Layout Inspiration board).

For this layout I used the CTMH Heartstrings paper, complement, assortment and a variety of accessories: Chalk it Up stickers, puffy stickers and some red bakers twine.  I love, love, love, LOVE how it came together!
dream come true layout

 This layout using a lot of layering and foam tape to add some dimension- most of my photos are popped up off the page as well as many of my stickers. The photos below show more of that.

dream come true close up 1 dream come true close up 2


All of my main squares were cut at 3 1/4 by 3 1/4 and then I used smaller pieces to hide behind them or under photos. It gave the look of larger pieces without cutting up all my pretty paper. I may have to try this valentine layout style with some other photos and patterns – so fun!

Until we craft again, The Brae-er


Minnie and Ellery

minnie and ellery layout


This post doesn’t feature much new stuff- the glitter paper, thistle cardstock and a little bit of seaside paper are all that is current- but it does feature the sweetest little girl and her love for Minnie Mouse! The paper was a past special- Dotty for you.  The dots were perfect for a layout all about Minnie. I used the one non-CTMH cartridge I own (I think it is called Mickey and friends) and made Minnie Mouse heads with cute glitter bows!

I mixed it all up to tell the story of my sweet girl and her love of Minnie- I cannot count how many times she has gone to school all dressed up like Minnie Mouse. I love it (even if I seem slightly embarrassed at the time).  I love how she has no idea that most people don’t wear costumes out- she wears it with pride and a big smile!

This year she will also get to meet Minnie Mouse thanks to Close to my Heart- I cannot wait for this moment! I know it will be very special and one that she carries with her for a long time!


minnie and ellery close up

Until we craft again, The Brae-er


Another Advisory Board Layout using Ariana

Another layout today using Ariana and featuring some of my Advisory Board photos- this one is a single page layout with my photo from the photo shoot! I used a layout that I saw on Pinterest for my inspiration (if you follow me on Pinterest you will see that I keep one board FULL of layout inspiration).
AB single layout

Ariana paper, complements, and one of the CUTEST stamp sets we have this idea book! All together made a really sweet one page layout!

Here is a close up of the kite- I used the blending pen to colour in the image (did you see my Technique Tuesday featuring it? If not find it here)

AB single layout close up

Here are some of the items I have been featuring the past few posts:

Screen Shot 2014-03-14 at 10.42.16 AM Screen Shot 2014-03-14 at 10.42.34 AM  Screen Shot 2014-03-24 at 11.06.40 AM Screen Shot 2014-03-24 at 11.06.53 AM


Until we craft again, The Brae-er


Advisory Board Layout using Ariana

Here is another layout featuring the Ariana paper- I really like the different blue papers that are featured in this kit! I also used some of the complements from the die-cuts that you can purchase seperately AND if you have been following my blog (and if not what are you waiting for! Sign up on my sidebar!) you know the spray pen technique I used.

These photos were taken last fall at our Advisory Board retreat- the Advisory Board is a group of consultants with Close to my Heart who are chosen to give advice on tops throughout the year.  Being picked to be an AB member is a huge complement and I am happy and proud to be part this year! We had a lot of fun with our photos- and used the fact that our group had the first male AB member! Phil was our ‘Charlie’ in one photo and the reason to be shocked in others- what a great memory!
AB layoutAB layout close up

My term ends this summer and I will definitely miss all that this opportunity has brought to me.

Until we craft again, The Brae-er


This and That- Ariana Layout

I am trying very hard to show you things beyond my favourite paper pack- I love them all but tend to gravitate toward the Skylark paper.  HERE is a layout done with the Ariana paper which is so pretty and also very versatile.  I especially LOVE the complement die cuts that you can purchase to go with this paper (that is where most of my embellishments for this layout come from).

this and that ariana layout


I used my spray pen and re-inker to create the background spritz.  The layout itself was from a magazine challenge (that I created and forgot to send in LOL!). I like how it all turned out and worked so well with my pics- and the very serious expression that my daughter had that day 🙂

Until we craft again, The Brae-er


Jubilee Layout

Keeping with the post from yesterday I wanted to post another layout – this time using Jubilee paper and complements- that is simple and easy!  This one was inspired by some of the artwork released by Close to my Heart for the Jubilee paper and accessories- I adjusted a few things to fit my photos and papers.

My layout uses the following items:

  • Make it from Your Heart Volume 2, pattern 10
  • Jubilee paper
  • Jubilee Complements
  • Jubilee Assortment
  • Bakers twine

jubilee layout with complements

This paper is fun (and like all our papers it is versatile)- it worked perfectly for pictures I took a few springs ago when we visited a farm over the Easter weekend!

Screen Shot 2014-03-14 at 9.07.34 AM Screen Shot 2014-03-14 at 9.07.46 AM Screen Shot 2014-03-14 at 9.07.56 AM

Until we craft again, The Brae-er