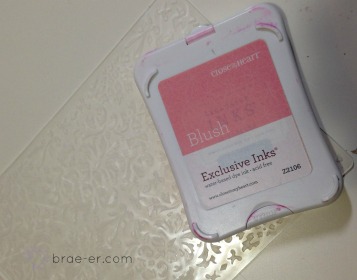
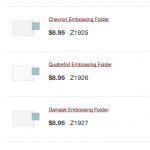
Today I am going to share with you a new technique: Embossing with Ink! I am also going to share with you the Damask Folder we have- very pretty!!
Embossing with ink is a very simple technique and only requires you to have the embossing folder of your choice, some ink (I recommend our dye based ink for these projects as they are easier to clean up than the pigment) and your project paper.
Open your folder and rub ink on the side of your choice- for my card I chose to rub the ink on the raised damask pattern (you will get a different look depending which side you use ink on so play around and have fun!)
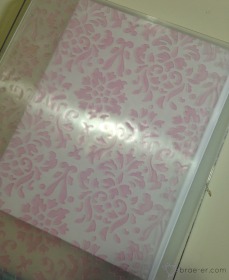
Next, I placed the front of my card on the non-inked side so that I could get the placement just right- I didn’t want ink to get on my project until it was begin embossed. This is how it looked before going through my Cuttlebug.
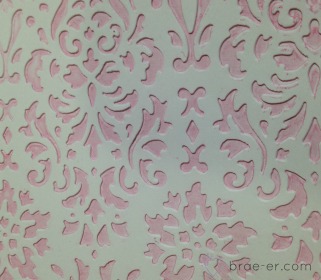
and this is how it looked once embossed! All the ink is now IN the damask print- so pretty!!!
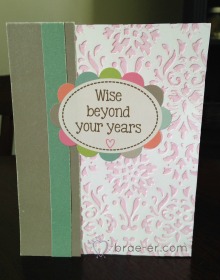
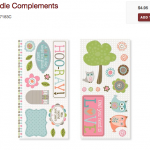
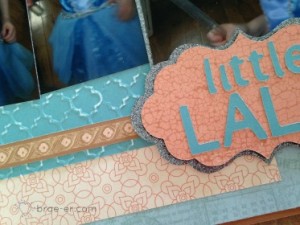
Of course I finished this up with some cardstock that I sanded to soften the look- and a sentiment from the Lollydoodle complements!
Yesterday I showed a project using just plain embossing – of course there was nothing plain about the project itself! Today I want to introduce you to the sanding technique. Although this technique can be used even if you have not embossed it looks gorgeous when you have! Emboss your paper as usual and then take some sandpaper or our sanding block and lightly sand over the raised areas- because our card stock has a white core this will reveal that. It creates such a nice finish and can take plain cardstock and really bring it to life!
Here is a close up of the blue piece of paper that I used with the sanding technique.
Other items used on this page- Balloon Ride paper, grey glitter paper, clear epoxy bubbles.
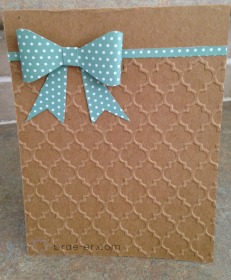
Yesterday I introduced you to the new embossing folders that CTMH has recently produced! Today I want to share some art with you using the embossing technique at its purest- just plain embossing. I LOVE the look and the FEEL that embossing can give to a project. In these cards I did the same thing for each- I placed the front of my card in the embossing folder (about 3/4 of the card front in the folder). Once I placed the folder through the machine it came out with such a beautiful texture – this pattern is our ‘quatrefoil’- my FAV of all of them!
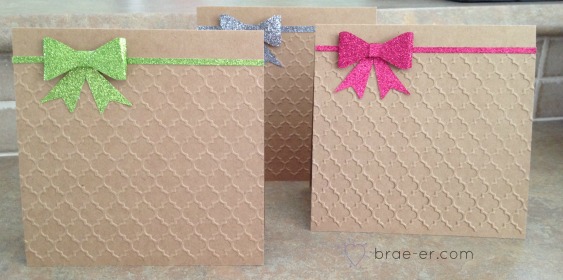
I then added a small strip of paper and a bow cut on the Cricut Artiste to finish of my card. So simple and yet so pretty! So much so that I had to try it a bunch more times and with glitter paper- these are my new fav cards!!!
Tomorrow be sure to come back to see the sanding technique with embossing!
Embossing has been around for years and like any aspect of Papercrafting it comes and goes with the trends- right now it is ON! Add to this that Close to my Heart is now offering a variety of embossing folders and life is good!!
All this week I will be sharing different projects created with our folders- AND I will be sharing fun ways you can use these folders. To start us off here is a video on our NEW embossing folders (all are available to purchase on my website and for the remainder of this week when you purchase two packs of card stock you get one embossing folder FREE).
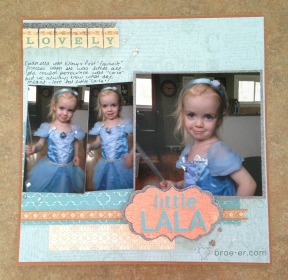
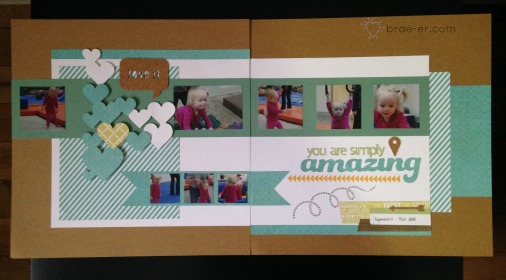
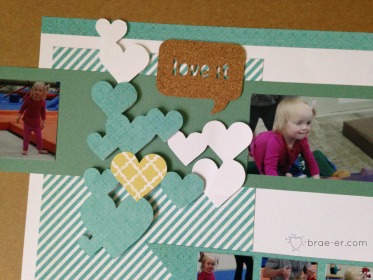
Yes you may have guessed by now that my favourite paper pack is Skylark! I love to use it as it is so versatile and goes with EVERYTHING! In this layout I use Skylark and the Cricut Artbooking cartridge (as well as a few other items) to share the amazement I feel as I watch my daughter grow and develop- the things she can do are simply amazing!
My layout it fairly simple- it is one of the patterns that is featured in our Make it From Your Heart-Volume 2 book (if you have not picked one of these up I highly recommend it! It is full of layout patterns with cutting directions AND has card patterns as well!)
I added a few things to my layout – sparkle flourishes, Midtown Cork Shapes, One-Way Borders stamp set and pigment ink to stamp with (gives the colours a bit more ‘pop’). I also used the Cricut Artbooking cartridge to create my title AND the heart cluster. I have used this heart cluster a few times- it comes from a larger overlay cut on Artbooking- I cut it in different papers and then hand trim off clusters and lay the layers together. I really like the look!
I am sure that you LOVE your Close to my Heart Cricut cartridges as much as I do- I almost use them exclusively as there is VERY little not on one of the three. The collections they come in are just as useful- the stamps and die-cuts that coordinate perfectly with the cartridges are my ‘go-to’ sets time and again.
Here is a compilation of some of the projects I have done in the past year using our cartridges- more information on them can be found on the CTMH Cricut Collections Page of the website OR you can order any of these on my Shop page.
TWO of the projects are new to my blog! I hope you enjoy all of these and would LOVE to hear from you in the comments below – what would you create if you had one of our cartridges??
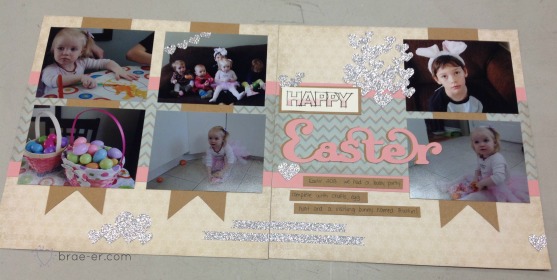
The first is an Easter layout I created using the Frosted paper we carried in the last Idea Book- I used glitter paper and the Artbooking cartridge to add some fun detail like the hearts and my title. I also used stamping and ‘inked’ in my ‘Happy’ image with my blending pen and ink picked up from my blush stamp pad. I also added some Kraft paper- it does go with everything after all!
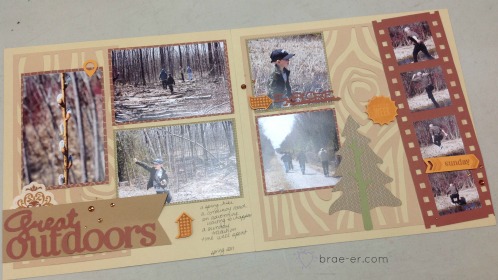
This layout also using Artbooking and features the Huntington paper from the last Idea book- I LOVE the wood detail combined with the film strip (which worked perfectly for the series of photos I took of my Dad jumping a stream). All the other elements also came from the Artbooking cartridge!
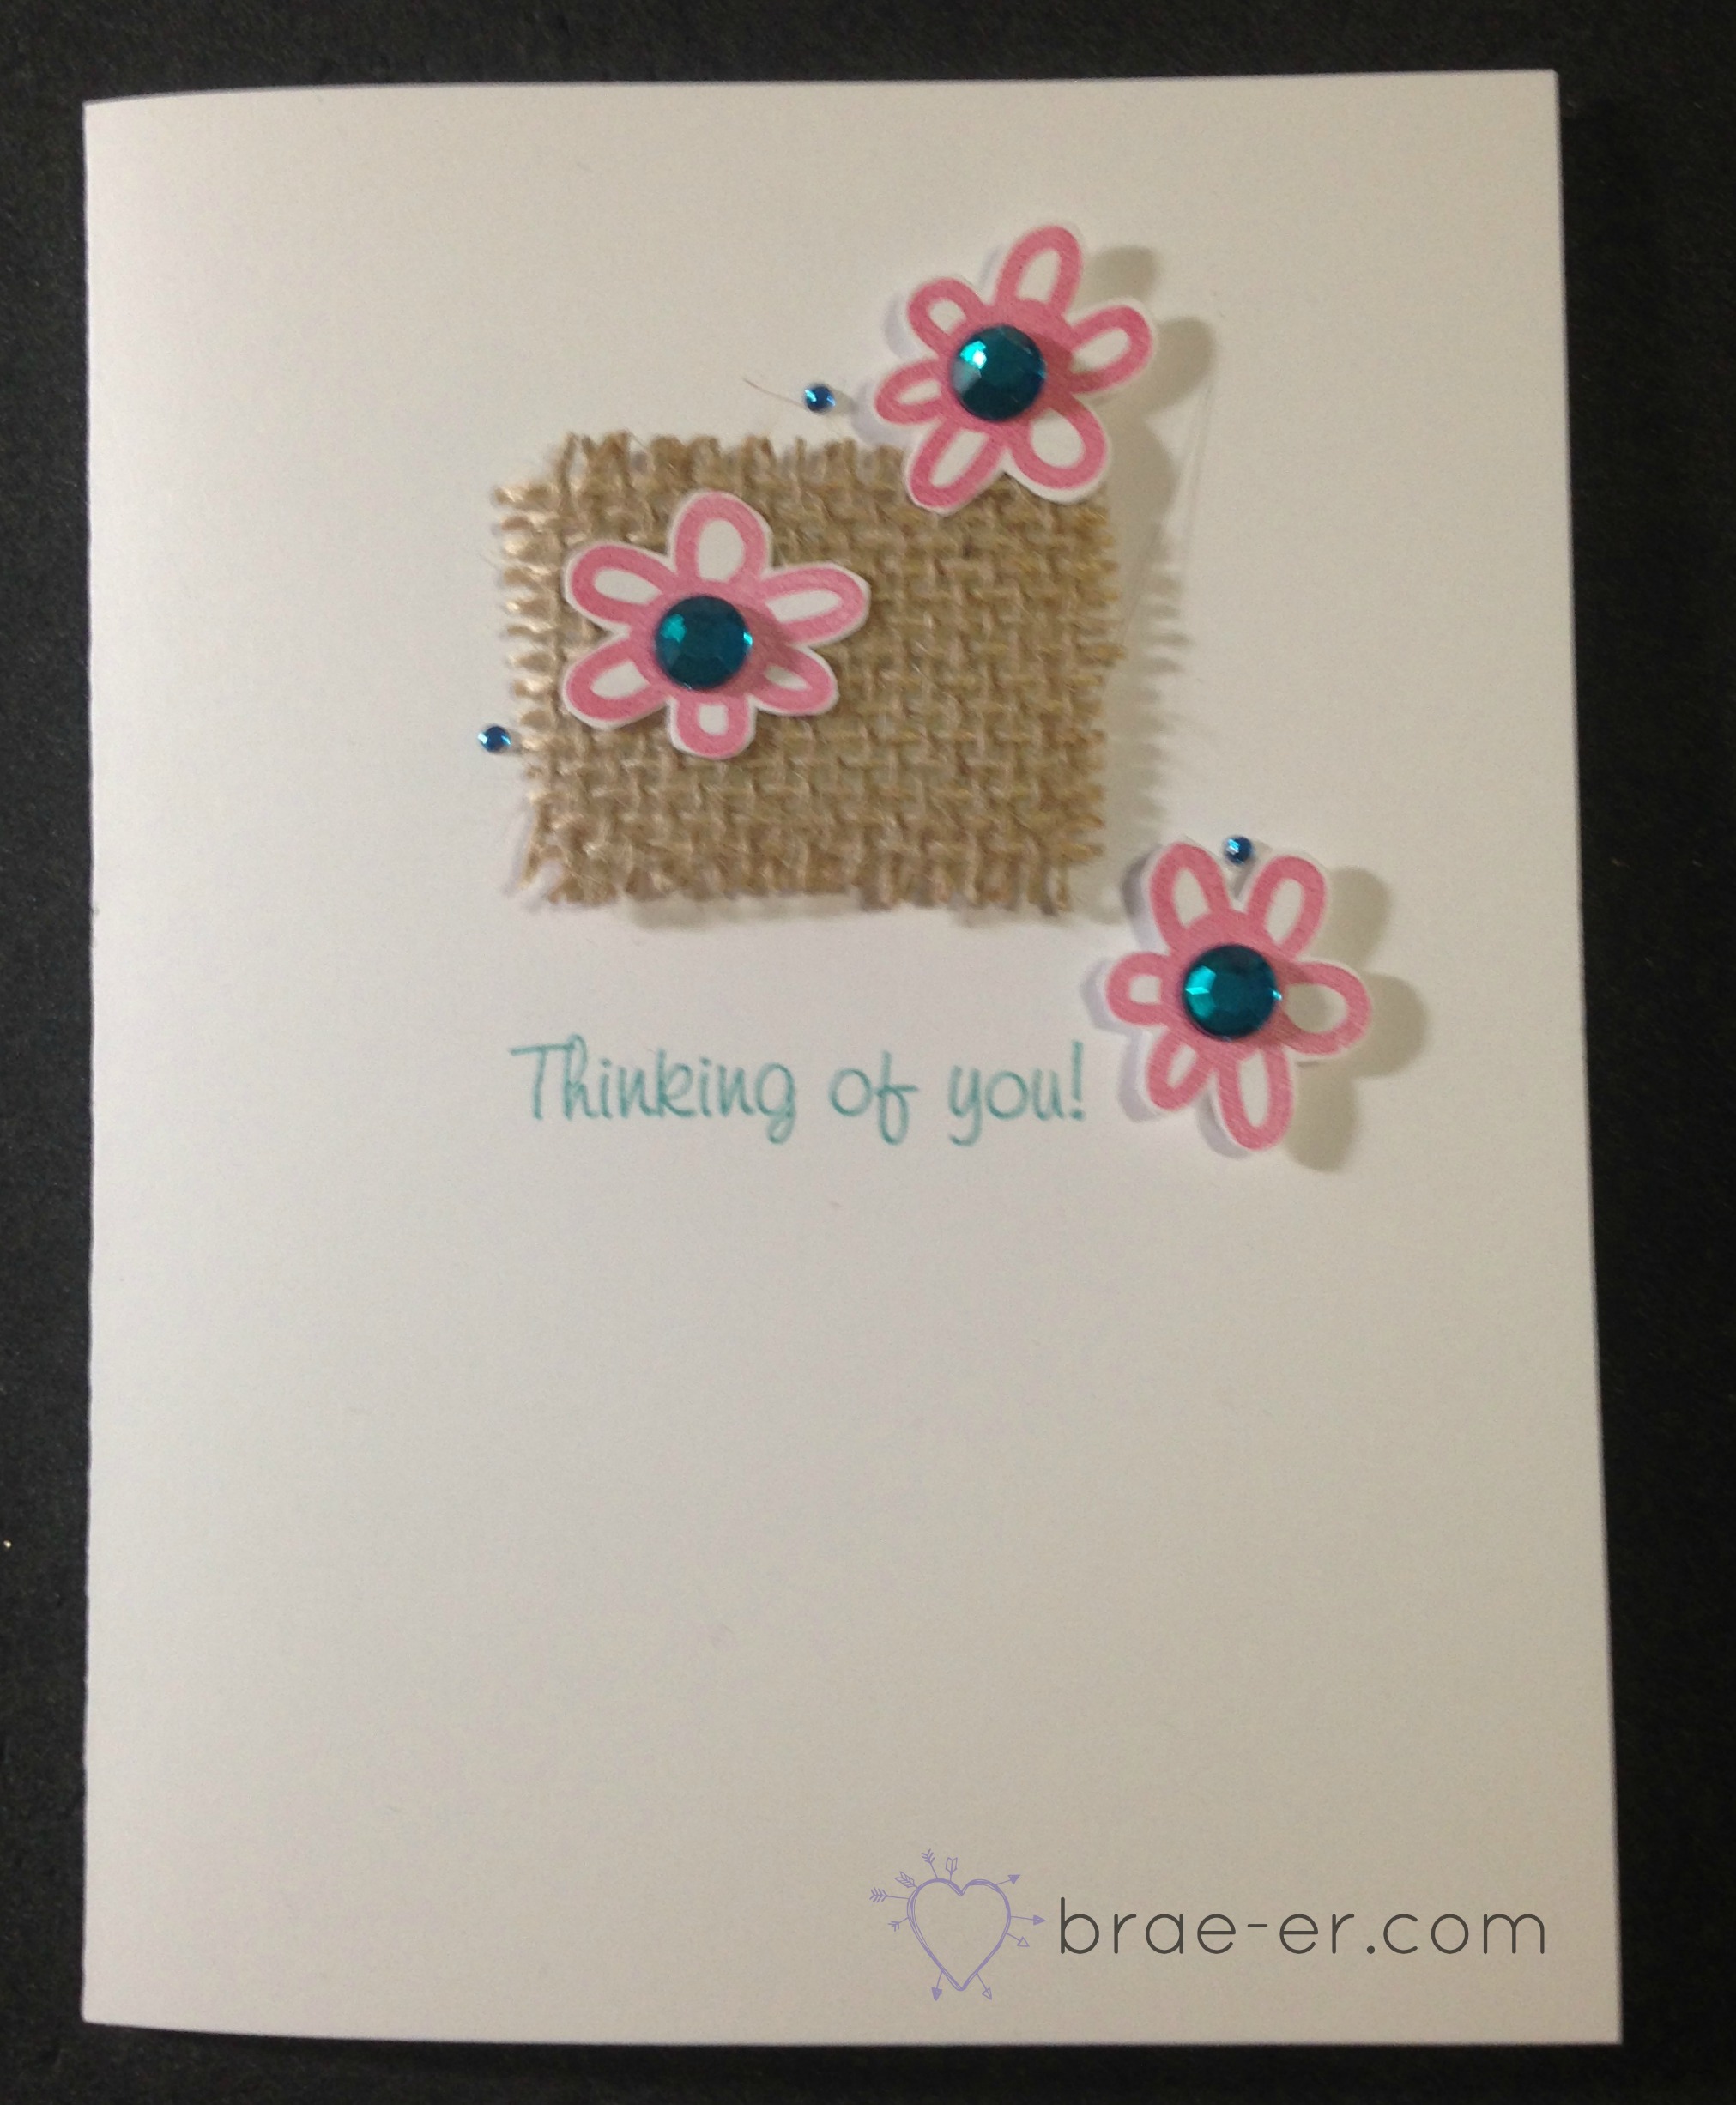
This card was inspired by one I saw on Pinterest (you can see it if you follow my pinterest boards in ‘Card Inspiration’)- I loved the simple use of just a bit of burlap. When I went to create this I was surprised though that I did not have ‘even a bit’ left! I love burlap and our burlap ribbon is one of my fav’s- I had to go and borrow a piece from a fiend- crafter problems! I stamped three flowers from one of the stamp sets and then popped them up with some foam tape. I added a simple sentiment and some fabulous bling to finish it all off!
Where do you find your inspiration? I would love to hear so please post in the comments below!
AND if you don’t already be sure to subscribe to my website
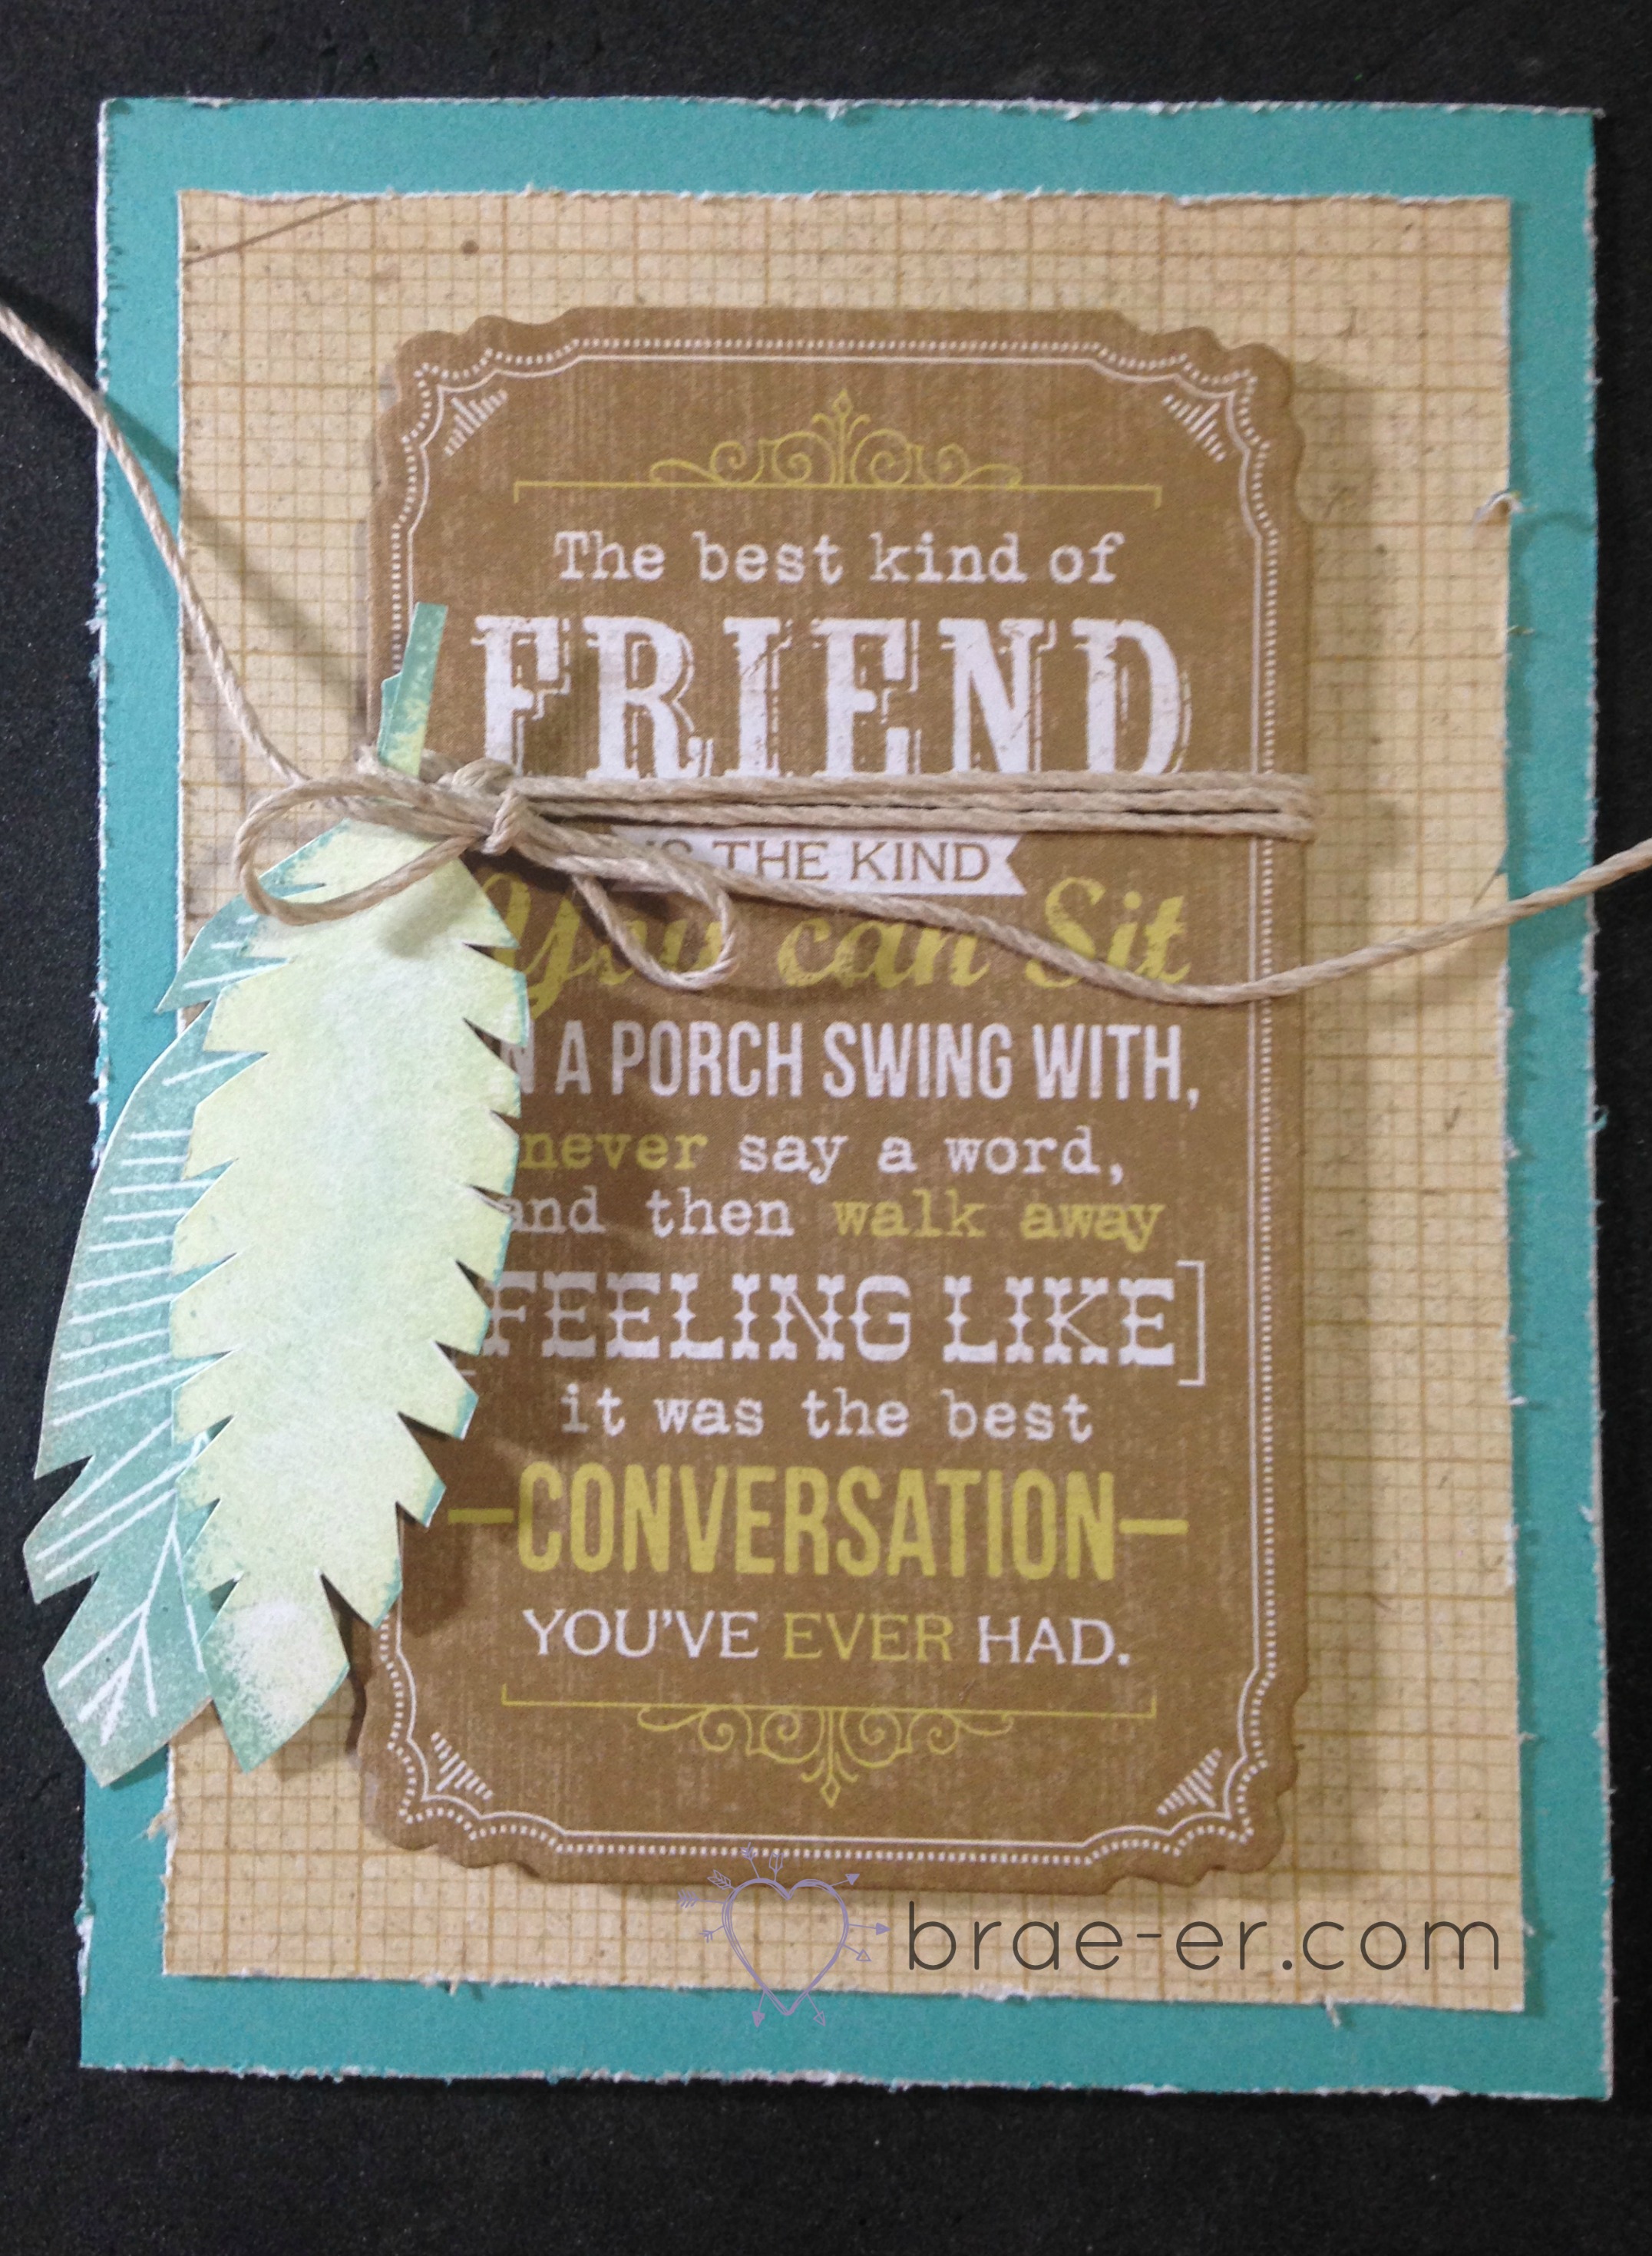
You know what they say about Birds of a feather….. they usually become the best of friends!
This card was made using the Skylark paper and complements, the feathers stamp set and some natural hemp. The edges of my card were distressed by scissor distressing (carefully running your scissors across the edge of your paper in ONE direction- I don’t recommend a back and forth motion as this tends to cause rips in the paper).
Being a Close to my Heart Consultant or How I found my dream and live it everyday!
I know- cheesy right?!
BUT – so true!!
I do love my career with Close to my Heart- it has brought me so many great things!
trips to destinations I could never have even dreamed of seeing (like the Mediterranean Cruise where I got to see the Sistine Chapel!!)
a wonderful income (more on this later)
a sisterhood- of fellow consultants and downline. These ladies (and even a few precious gentlemen) are so much more than someone I work with or someone I earn income from. They are family- people I can laugh with, cry with and even cry for! They are ladies who go above and beyond to help a fellow consultant in hard times and join together got rejoice in happy! Most importantly, they are truly the only people who understand my love for this company and this product because they suffer from the same ‘affliction’ I do!
product- well of course! This is what first brought me to CTMH. I wanted so many of the pretty things in the Idea Book! When I first saw the product I was at a home party that my friend Lisa was hosting (I really should thank her). I had a pathetic $10 to spend… maternity leave and a new baby were making short work of my income. Then I opened the idea book…. and I was doomed! It was all so nice and unlike anything I had ever seen. When the consultant (now my BFF Sarah!) mentioned signing up I jumped…. and have never looked back!
Personal growth (yes another cheesy thing but it is true). I started in this business a completely different person. I was a fairly ‘shy’ person at the beginning and tended to keep my thoughts to myself. Through the years I have grown and found my voice (in a good way I assure you). I no longer feel ‘shy’ and have no problem standing up in a room full of people and discussing CTMH (or even other things as what I learned with CTMH has also helped me in my day career).
and the money thing? what about that?
Well, a few years ago CTMH had us call out our BHAGs at a meeting- I remember sitting in the room (I think we were in Las Vegas) and they encouraged us to say it out load- that Big Hairy Audacious Goal!! I paused… for a long time… too shy and scared to say what I really wanted to say. But my BFF Sarah kept poking me. So, I called out, “TO QUIT MY DAY JOB.” Wow! I had said it and found I really did mean it. Don’t get me wrong I love my day job (I am a full time teacher) and it comes with a wonderful income and wonderful benefits BUT someday I would love to leave all of this for my DREAM JOB- CTMH! Who wouldn’t? To say, ‘Yep, I quit my teaching job to sell scrapbooking products and other fantastic craft products’ and ‘Nope, that did not hurt our finances at all, in face I am making MORE now’ – that would be AWESOME!
Now I should add to this that as a Canadian teacher I make a very good salary and I also have excellent benefits- these have kept me in my day job and will likely keep me here longer as my family has medical needs that are costly and I need the sanity of a place to go everyday. BUT, I am close to the point that I could go part time (and if we didn’t need those benefits I could take the full leap!) How exciting is that!!!
Today is one of those days that I am ‘gushy’ and proud of my choice to be a CTMH consultant- I had to record it and share it with all of you! I don’t do this because I want you to join me – I simply want to share my feelings and my joy! But- if this does make you wonder… then please contact me or click on the link in my tabs “Join my Team”- there is so much this company can bring to you too!
and because the product was and will always be a big part of the ‘why’ to join here is a video I made showing all the goodies that comes in the Consultant kit!