Monthly Archives: July 2013

Bibbidi-Bobbidi-Boo!

Bibbidi-Bobbidi-Boo, my daughter is turning two!

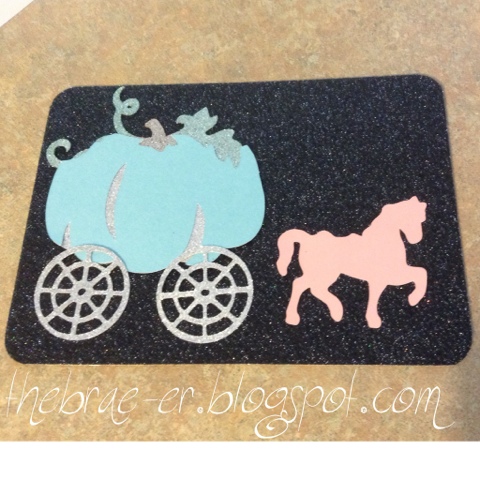
AND since she is obsessed right now with Cinderella we are having a Cinderella themed party (complete with an attending Princess).  The party is quickly approaching so I finally sat down and made the invites- I am VERY pleased with how they turned out!
The base of the card (which is a postcard style invite) is CTMH black glitter paper.  All of the images on the invite were cut with the CTMH Artiste cartridge or the CTMH Artbooking cartridge- I love that with a little imagination I was able to find everything I needed! 
Invite size is 5×7
Pumpkin image- Artbooking, cut at 3 1/2 real dial size
Carriage wheels- Artiste, cut at 1 1/2 (they are actually meant to be the carousel base)
Horse- Artiste, cut at 6 1/2 (this cuts you two horses)

Obviously piecing the invite together was easy after everything was cut- the last thing I did to add some detail was coloured part of the pumpkin with a cheap marker. You can see the brown and green detail at the top of the pumpkin.

NOW to get ready for all the other pieces that will pull this party together! 

Until we craft again, The Brae-er

Base and Bling Hair Clip- How to make a flower!

I am so excited that we are offering Base and Bling craftable Jewelry! How fun to make your own stuff- my daughter is going to be decked out in cuteness and I LOVE it!

Want to know how to make a big full flower for the hair clip (or for other pieces)? Read on!
Step 1: cut MANY circles. Mine are two inches in diameter (hint: I used the base of the hair clip to measure one out and then used that one as a template for the others.  Also- use our microtip scissors, they are VERY sharp and will give you a clean edge.)

 Step 2: cover the base of your hair clip with one of the circles (just to cover all the metal bits).  Use one of the large red dots for this (we sell these and they are super strong adhesive circles and strips!)  I placed another red dot on the top for all the little pieces to stick too-but also used hot glue so the last one was probably not necessary.

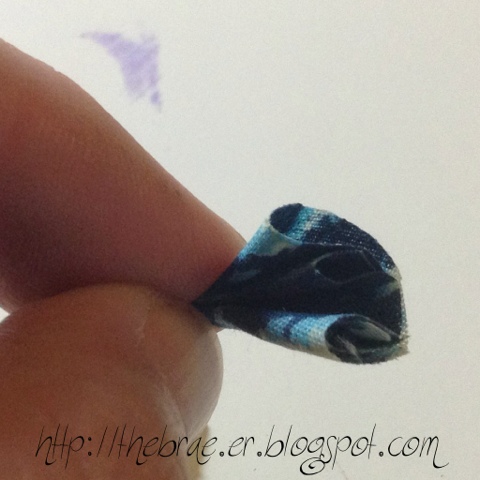
Step 3: take one circle and fold it in half, fold it in half again and now one more time.  You should have a blossom of similar size and shape to what I have in the top picture.  You can use hot glue to glue that onto the  top of your base- I placed mine in an outer circle and then built up and in from there – this allowed it to grow into a full flower. 

Here is my flower part way through construction- coming together nicely!


And the finished look! You could add sparkle or any accessories you like- I  really liked mine just like this!

This is another item that will be available on August 1st- be sure to check back here as well as I will be showing MORE pieces over the summer!


Until we craft again, The Brae-er


CTMH Artbooking and Big Picture Classes

I am so excited that Close to my Heart is teaming up with Big Picture Classes again for a fun Pajama Party- if you missed out on the first one then you missed out on fun, prizes and a really great project! 

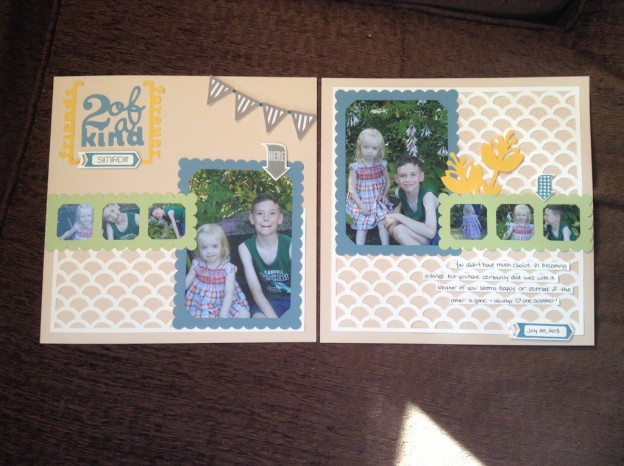
This July 31st they are doing another and this is the project they will be creating- now the key product for this (the artbooking cartridge) is not available until the next day so you can order it that day from me and come back here to create the layout OR you can order a kit now for $10 and get all your pieces and create along with the party!

Key things to know about this project:
  • this layout was created using ONE KEY on the artbooking cartridge- ONE!! 
  • fast, simple and easy- the layout came together in about 20 minutes! Took longer to round up my kids and take their pics for the layout!
to order yours (on August 1st) visit my website or contact me

Until we craft again, The Brae-er


Sarita and Washi Cards

I have just been LOVING all the new product I have- so much fun!  These were created with a variety of product- see the recipe below and you can order any of this product on my website as of August 1st at http://braemontgomery.ctmh.com

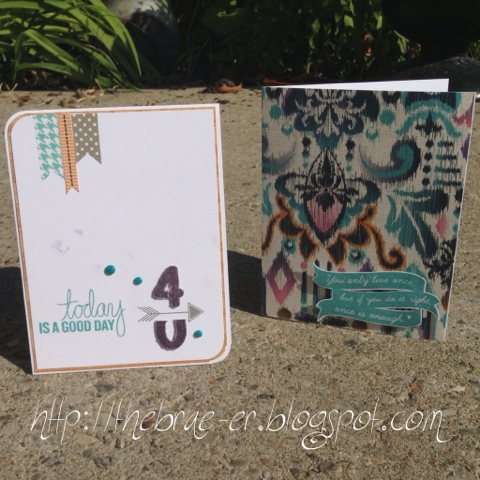
Today is a good day 4U card: Sarita paper and stickease, lagoon washi tape, slate washi tape, aqua dots, canvas alphabet, All the Details stamp set
Live Once card: Sarita paper, You Only live Once Stamp set (hostess exclusive stamp set)
Live Card: Lagoon Washi tape, Slate Washi tape, You only Live Once stamp set (hostess exclusive), aqua dots, bronze shimmer trim
Live How you want to be remembered card: Lagoon Washi tape, Slate Washi tape, Bronze shimmer trim, You only Live Once stamp set
I LOVE these last two cards especially- so simple, yet so gorgeous!!

Until we craft again, The Brae-er


NEW Monthly card kit!! August- ‘Love This’

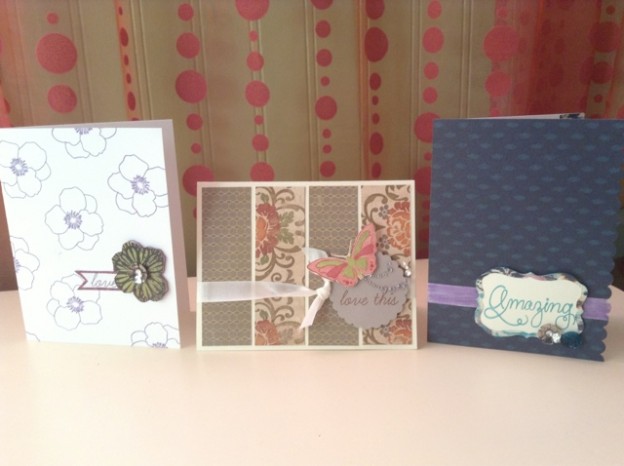
I am pleased to share with you the first three cards of my NEW monthly card kit! This will be August’s kit (and I will be sharing September’s later this week since we are waiting for my son to have surgery and the date has not been given to us yet).  

How does the card kit work?

You can purchase the kit of the month for $25.00 each month.  The kit comes with the following items:

  • the featured B size stamp set
  • the card bases and envies to make the cards
  • all pieces precut
  • all accessories 
  • emailed instructions (or a video if necessary)
  • shipping to your address
The card kit does take 2-3 weeks to get to you as the stamp sets will be ordered as orders come in and then I will have them in the mail to you!  Feel free to order ‘booster’ packs of cards, envies, accessories and precut pieces for $5.00 for a set of three (a great way to stock up on your cards!)

August’s Kit features the “Love This” stamp set found on page 67 of the fall/winter Idea Book.

Until we craft again, The Brae-er


Decor Display- a MUST buy!!

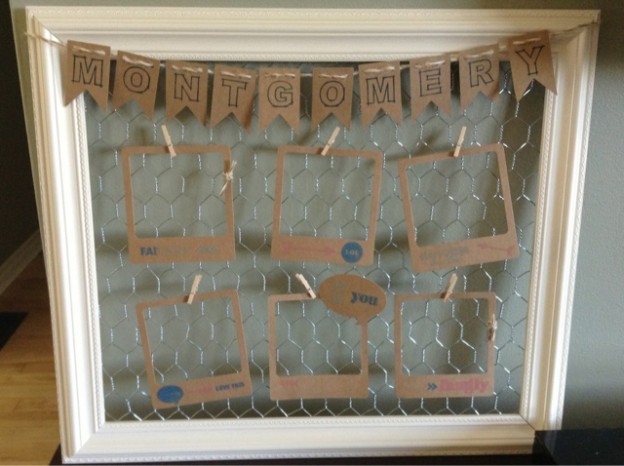
So I was very excited about these when they were announced at convention but now having seen one and completed the one that ones as a kit- WOW I love these!!!
These decor frames come in two styles- colonial white with chicken wire or black with clothesline wire and they retail for $26.95- did I mention they are wood, very sturdy and an amazing quality!! The one I have created above ones as a kit- you get the frame, Kraft pieces, mini clothes pins,the hemp and a stamp set for only $35.95! An excellent deal!! I love mine so much I may need to get new family photos done to place in the photo wells. 
Here is a close up of some of the stamping- because this item will hang on the wall it is recommended that you stamp with pigment inks ( they will not fade). 
Order this item and more on August 1 st at http://braemontgomery.ctmh.com

Until we craft again, The Brae-er


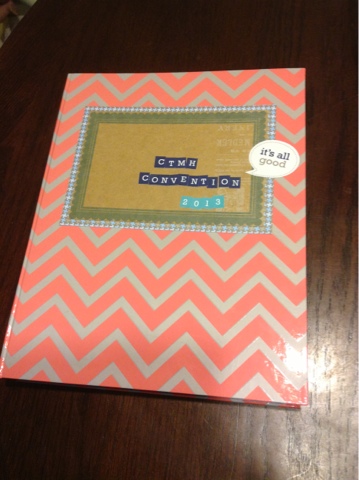
‘Crush’ing on Convention

Well I am one of the lucky few who managed to get this great product before they went on back order!!
Today we had a busy day of traveling to the city of Toronto and LOTS of waiting while there for doctor’s and other support people.  During that time I wanted to challenge myself to create with my Crush book.  This is what I completed throughout the day (and a bit once I got home since I was having SO much fun!!)

I decided to document my trip to convention recently- it was quite a trip and I think it deserved it’s own book!

In setting this up I wanted to remember a few things about using a Crush book:
1. Have fun- don’t overthink things!
2. Remember when you used to scrapbook years ago? When you put whatever fit onto your pages to help tell your story? GO THERE and DO THAT!
3.Lastly- there are no rules…just tell your story!

So I am not done the book yet- still have LOTS of pages to fill (but I am tearing some out as I find I don’t need them all and I know that I can find something fun to do with the extra pages – I already used two of them somewhere in my book,,,can you spot them?)
Here is what I have used so far:
My Crush Modville Book
Grey Washi Tape
Love This stamp set
Reel Life stamp set
My Crush Best Day Ever assortment

ALL of this will be available to order on my website August 1st (and yes the Crush books are back-ordered but they are on the way and the wait WILL be worth it!)

Until we craft again, The Brae-er


Atlantic Hearts Sketch #11

Well I am still waiting for more new product to come – I think tomorrow it should be here 🙂 

In the meantime I decided to work in the sketch challenge that my friends Michelle and Darla put together! To see the sketch visit atlanticheartschallenge.blogspot.com

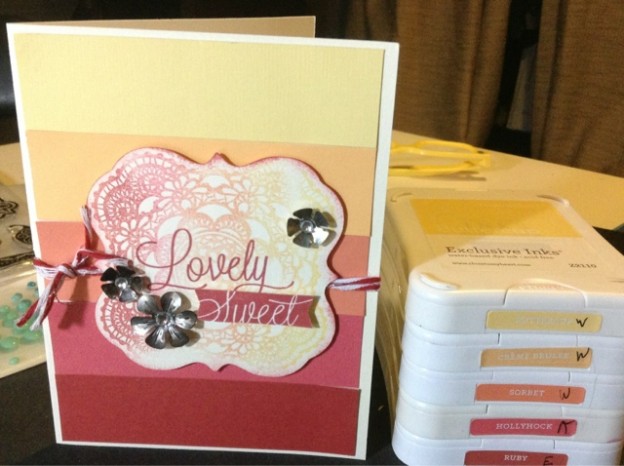
When I saw the challenge I immediately thought OMBRE! Yep- weird! But I pulled this together and love it- all cardstock from CTMH and I added in some accents from the ruby mini-medley and the metal base and bling accessories. The stamp set I used is one that comes with the cricut Artbooking bundle! 
All of this will be available August 1 st on my website at braemontgomery.ctmh.com

Until we craft again, The Brae-er


Artbooking birthday layout

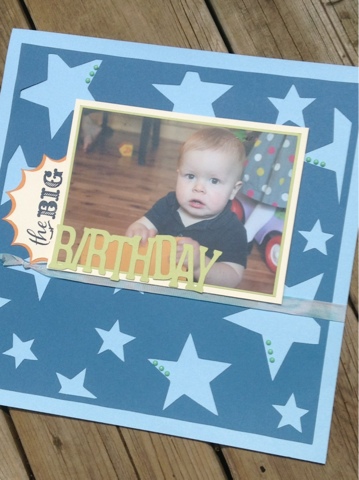
After much deliberation on this layout I am finally finished! For this one I used only cardstock mixed in with accessories and stamping! Stamps used are from the new idea book- the party is on (a hostess exclusive) and All the details. For accessories I used our new aqua dots (so versatile!!) and some seam binding ribbon dyed blue.  The rest was all our fabulous Artbooking cartridge!! 

Until we craft again, The Brae-er

Cards with Babycakes and Artbooking

 Okay I BADLY need the rest of my new product to arrive tomorrow morning!! I have been having lots of fun with card stock and our new Babycakes paper but will soon be out!!

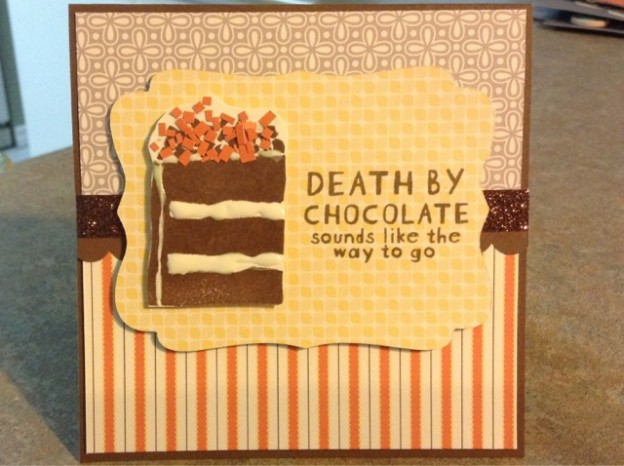
Today is National Chocolate Day and I could not pass up the opportunity to create a card with our August stamp of the month- it was perfect!! Of course I used the Babycakes paper, some bronze shimmer trim and one of the diecuts from the Artbooking set. Finished my cake off with liquid appliqué for frosting and orange paper for sprinkles.

This sweet card was made with the same paper and out Artbooking cartridge – the owl, branch and arrow all came from there. I added some of our new aqua dots for a pop of colour! 
To order any of this product contact me or shop online at http://braemontgomery.ctmh.com

Until we craft again, The Brae-er