
You likely have never given this a thought- that you could possibly create your own photo Christmas Cards using Studio J online software. With our ‘No Limits’ pattern you can do it (and many other things but we will leave that for another day)!
Today I designed and ordered mine and it all took about 30 minutes- easy!!! The best part is that I controlled everything! This was not a pre-designed card from a website or a store. I did not have to choose the best fit and just be happy with it. I did not have to spend a lot of money on a product that I was not 100% happy with (these all were the case for my photo cards last year).
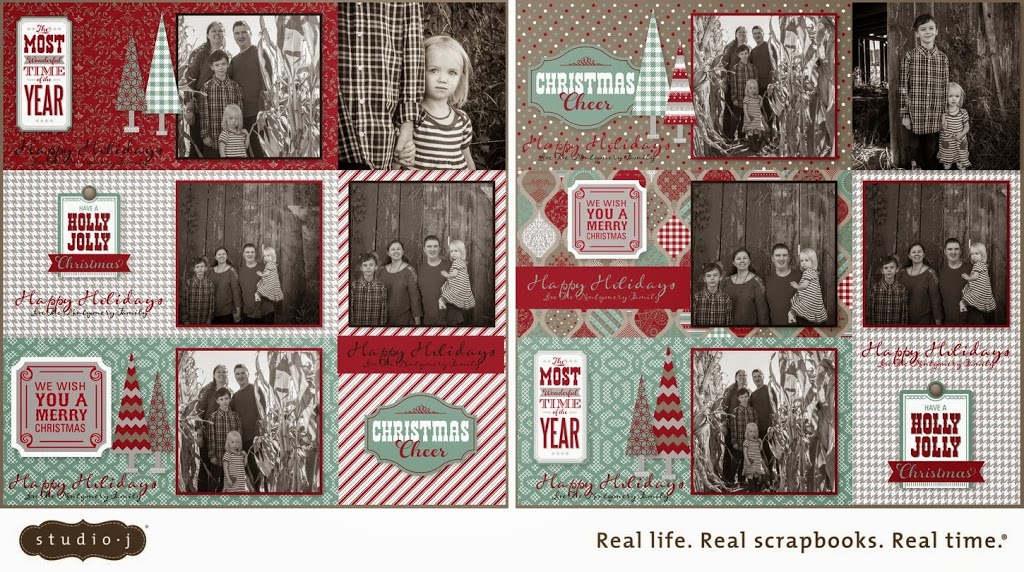
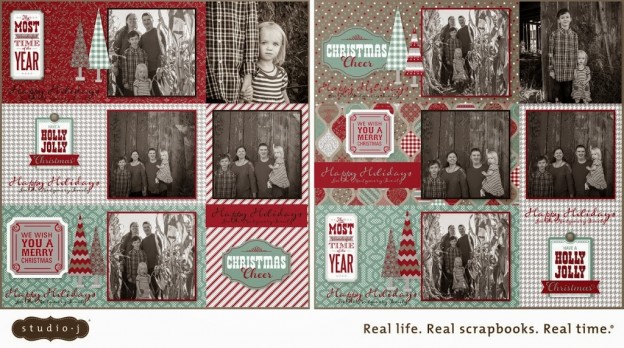
Here are my cards this year (as they appear in Studio J- once I receive them all I will have to do is cut them apart. Want to try this out? Here are the step by step directions for creating your own!
1. Go to braemontgomery.ctmh.com, click on products and choose Studio J from the drop down menu.
2. Once in Studio J- either log in or create an account if you are a new user.
3. Once in- begin a new project. I called mine Christmas Cards 2013.
4. You will then be prompted to upload photos- upload the ones that you would like to use on your cards (I did two different photo styles)
5. The select “create your own custom kit”
6. At this point you will be given lots of options for paper- my recommendation is to go with one of our holiday themed papers so that you will have access to the holiday ‘stickease’ and images that go with that pack. For mine I chose the Sparkle and Shine kit. Choose your kit and click continue.
7. Next you will be given your choice of patterns, chose the ‘No Limits’ pattern and then click continue.
8. Your next option is for a kit mix- yours will all be blank – just click on one and continue to the next screen.
9. Now you will start to create your cards! On the left you will need to click on the text and photo areas. You want to add journaling areas to your layout- just drag the ‘add journaling’ option onto your page. Once it is placed you will have a box appear where you can adjust things- you want to make your card 4 inches by 8 inches. Once you have one box sized and placed (see my sample above for how you can place them to optimize space) you can click on your journaling box and the click copy at the top of the screen. Then hit paste- this will give you a second box of the same size that you can click and drag (and rotate) anywhere on your layout. Do this 8 times until you have your page full. It may look like this when you are complete this step.
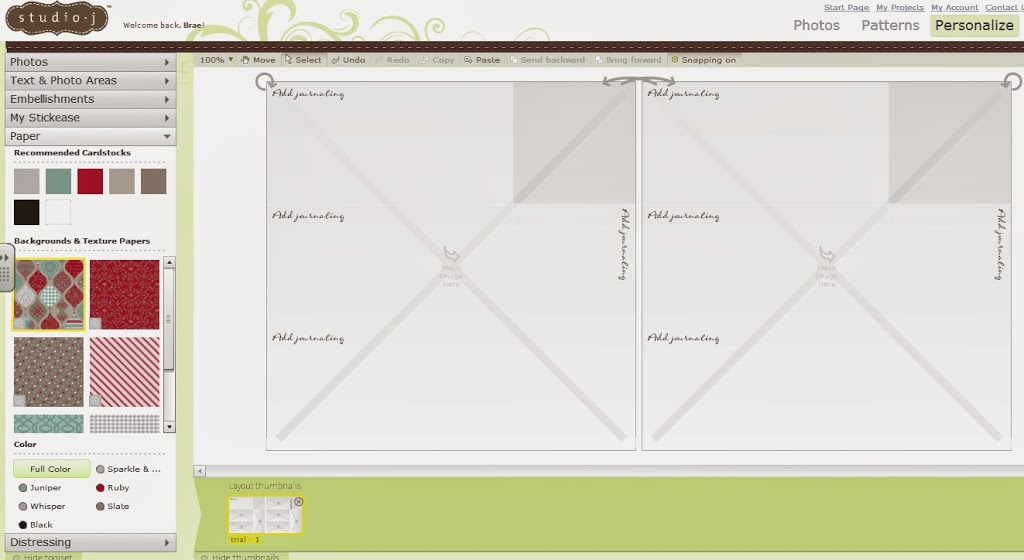
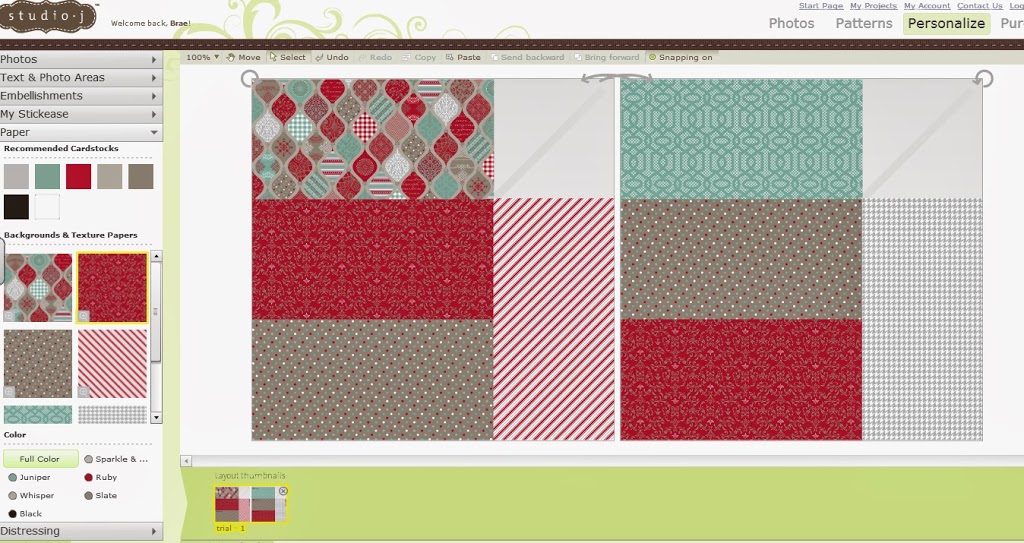
10. Next click on the paper tab on the left. From here you can drag and drop any of the patterned paper or cardstock options for the kit. Have fun with this and feel free to use a variety- after all, you can! Once you have those all in place you will want to get rid of the prompt to add journaling- just click on the box, select edit text, and delete the text. Then click on the next box and do the same. When done you may have something like this.
11. At this point I think it is easiest to go in and begin to add photo boxes- go back to the add text and photo tab. Once there, drag and drop photo boxes onto your cards- I made mine a 3.5 by 3.5 size but you can do whatever size works for you and your pictures. The toobar that appears with each photo box will allow you to add a photo mat if you would like- and you can pick your desired colour. Once you have your boxes and place (and you can copy and paste them as we did earlier) then you can drap and drop your pictures inside them. In the photo toolbar you can add a filter and make your photos black and white or even sepia- have fun with this!
12. Now your photos should all be placed and you are ready to decorate! You will find all the fun things that I used to decorate under the My Stickease tab- use the drop down menu to navigate between different embellishment sizes but remember that you can always resize them by dragging down the bottom right corner of any image. You will also find Holiday quotes and tags in this section that could make your card really come together!
13. Lastly I added our family name. To do that I added a smaller journaling box (you should be a pro at adding this by now) and just typed in the box with the font they suggested. I added colour to some of my boxes and others I opted for none.
Once you are happy with your card you are ready to order them! You may notice that I have two 4×4 photos on mine at the top- it was empty space so I dropped some photos in to fill it out. Once my pages arrive I can use those photos in other projects. When ordering you can order as many copies of that page as you will need for your cards. Your pages will arrive in the mail within a week or so and you are ready to go!
I would LOVE to see what you create- feel free to share a link or email me your completed pics!

Until we craft again, The Brae-er