
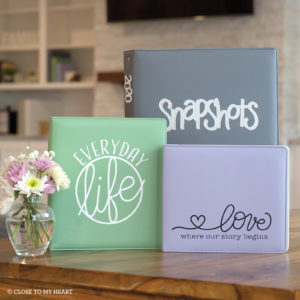
Yesterday, Close to my Heart introduced our newest line of product to the world. It is a fantastic line full of so much goodness! It is hard to pick what to share first. But I have settled on our new Heat Transfer Vinyl- why? Because I am having so much fun with it!! We have a range of colours that come in 12×12 sheets (three sheets in a pack). There are the obvious uses for heat transfer vinyl (some of which I have embraced) and there are the uses with our other products- like our albums (pictured below). If HTV (heat transfer vinyl) is new to you then this post may be of help. Read below to see how to use HTV and make the cute t-shirt I am wearing in the last photo!
Step one: Create your image. We have a number of options depending on what you would like to do. If you want to create the t-shirt I created you can find that project in Design Space.
I also recommend checking out the SVG files that we released yesterday- there are all very cute and perfect for a variety of craft projects. You can find them here.
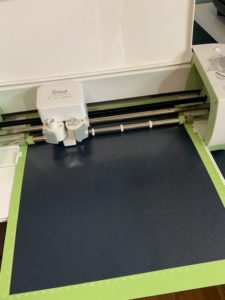
Once you have your image ready in design space you can cut it out. Here are a few, key tips.
*mirror your image
*shiny side of our vinyl is placed down on the cricut mat
*ensure that you select the right material type (your dial should be set to custom). I set my CTMH vinyl to the Everyday Iron-on setting or the Glitter Iron-on setting (depending on the material I was using).
Step Two: Then MAKE IT!
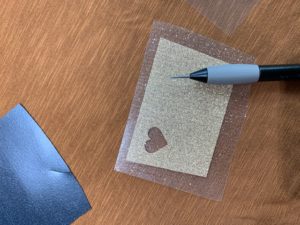
Step Three: Once your images are cut- remove any excess vinyl (set that aside for later projects). You then need to weed the image. I use my CTMH piercing tool to help pick up the bits of vinyl that are garbage. The rest of your image should be left on the clear backing sheet.
Step Four: I place all my weeded images on my shirt so that I can get a feel for where they will be once I press them. If I am happy with them then I will begin to heat set. In this project, I set them piece by piece to ensure it all lined up.

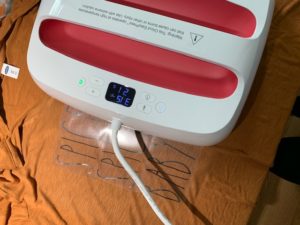
Step Five: Begin heat setting your vinyl.
To ensure I am using the proper settings I use the Cricut heat guide. This guide will tell you the time and temperature and lets you select the material you are using. It also allows you to indicate which easy press you are using. A great resource!
As I pressed each image I would remove the backing to ensure it was secure. I then protected it with the same piece of backing as I pressed each subsequent image. You can see that in the below picture.
You will need to layer the vinyl on the coffee cup (holding pumpkin spice of course). I pressed the white vinyl like all the other and then layered the glitter vinyl. I used excess backing to protect the exposed white vinyl when I pressed the glitter vinyl.

and VOILA! I could not be happier with my new fall, weekend t-shirt. Bring on all the pumpkin spice!
Check out all our vinyl here.
What are your favourite fall vinyl projects? Comment below.
Until we craft again, The Brae-er