Welcome to our December Blog Hop featuring Christmas Decor.
We hope that you will take the time to leave comments on our posts, as we love to get feedback from our viewers….whether it was something that you really liked or some new technique that was used that you would like to learn how to do….by leaving us comments, we get to hear what you like, and what you want to see. Thank you… now on to our hop!
If you have just come from Sheri’s post then you are on the path of Christmas fun!
I LOVE christmas and my favourite part is all the activities- crafting, memory-making and baking! I just LOVE it! Every year I add to my Christmas home decor so here are two pieces that I created just for you (and now for me to enjoy!)
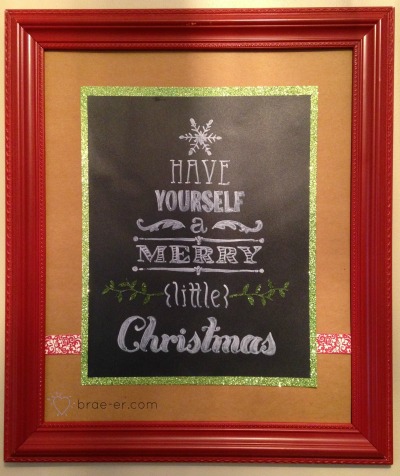
The first project features one of our new magnetic chalkboards. The red frame is just PERFECT for Christmas decor! You may notice that I covered the chalkboard- well I wanted to use it again later and had one piece of our 12×12 chalkboard paper left so I saw the opportunity to reuse this frame for at least two things.
I covered the back with Kraft paper, framed my chalkboard piece with green glitter paper… now how did I do my awesome chalkboard image?? READ below for my tutorial!
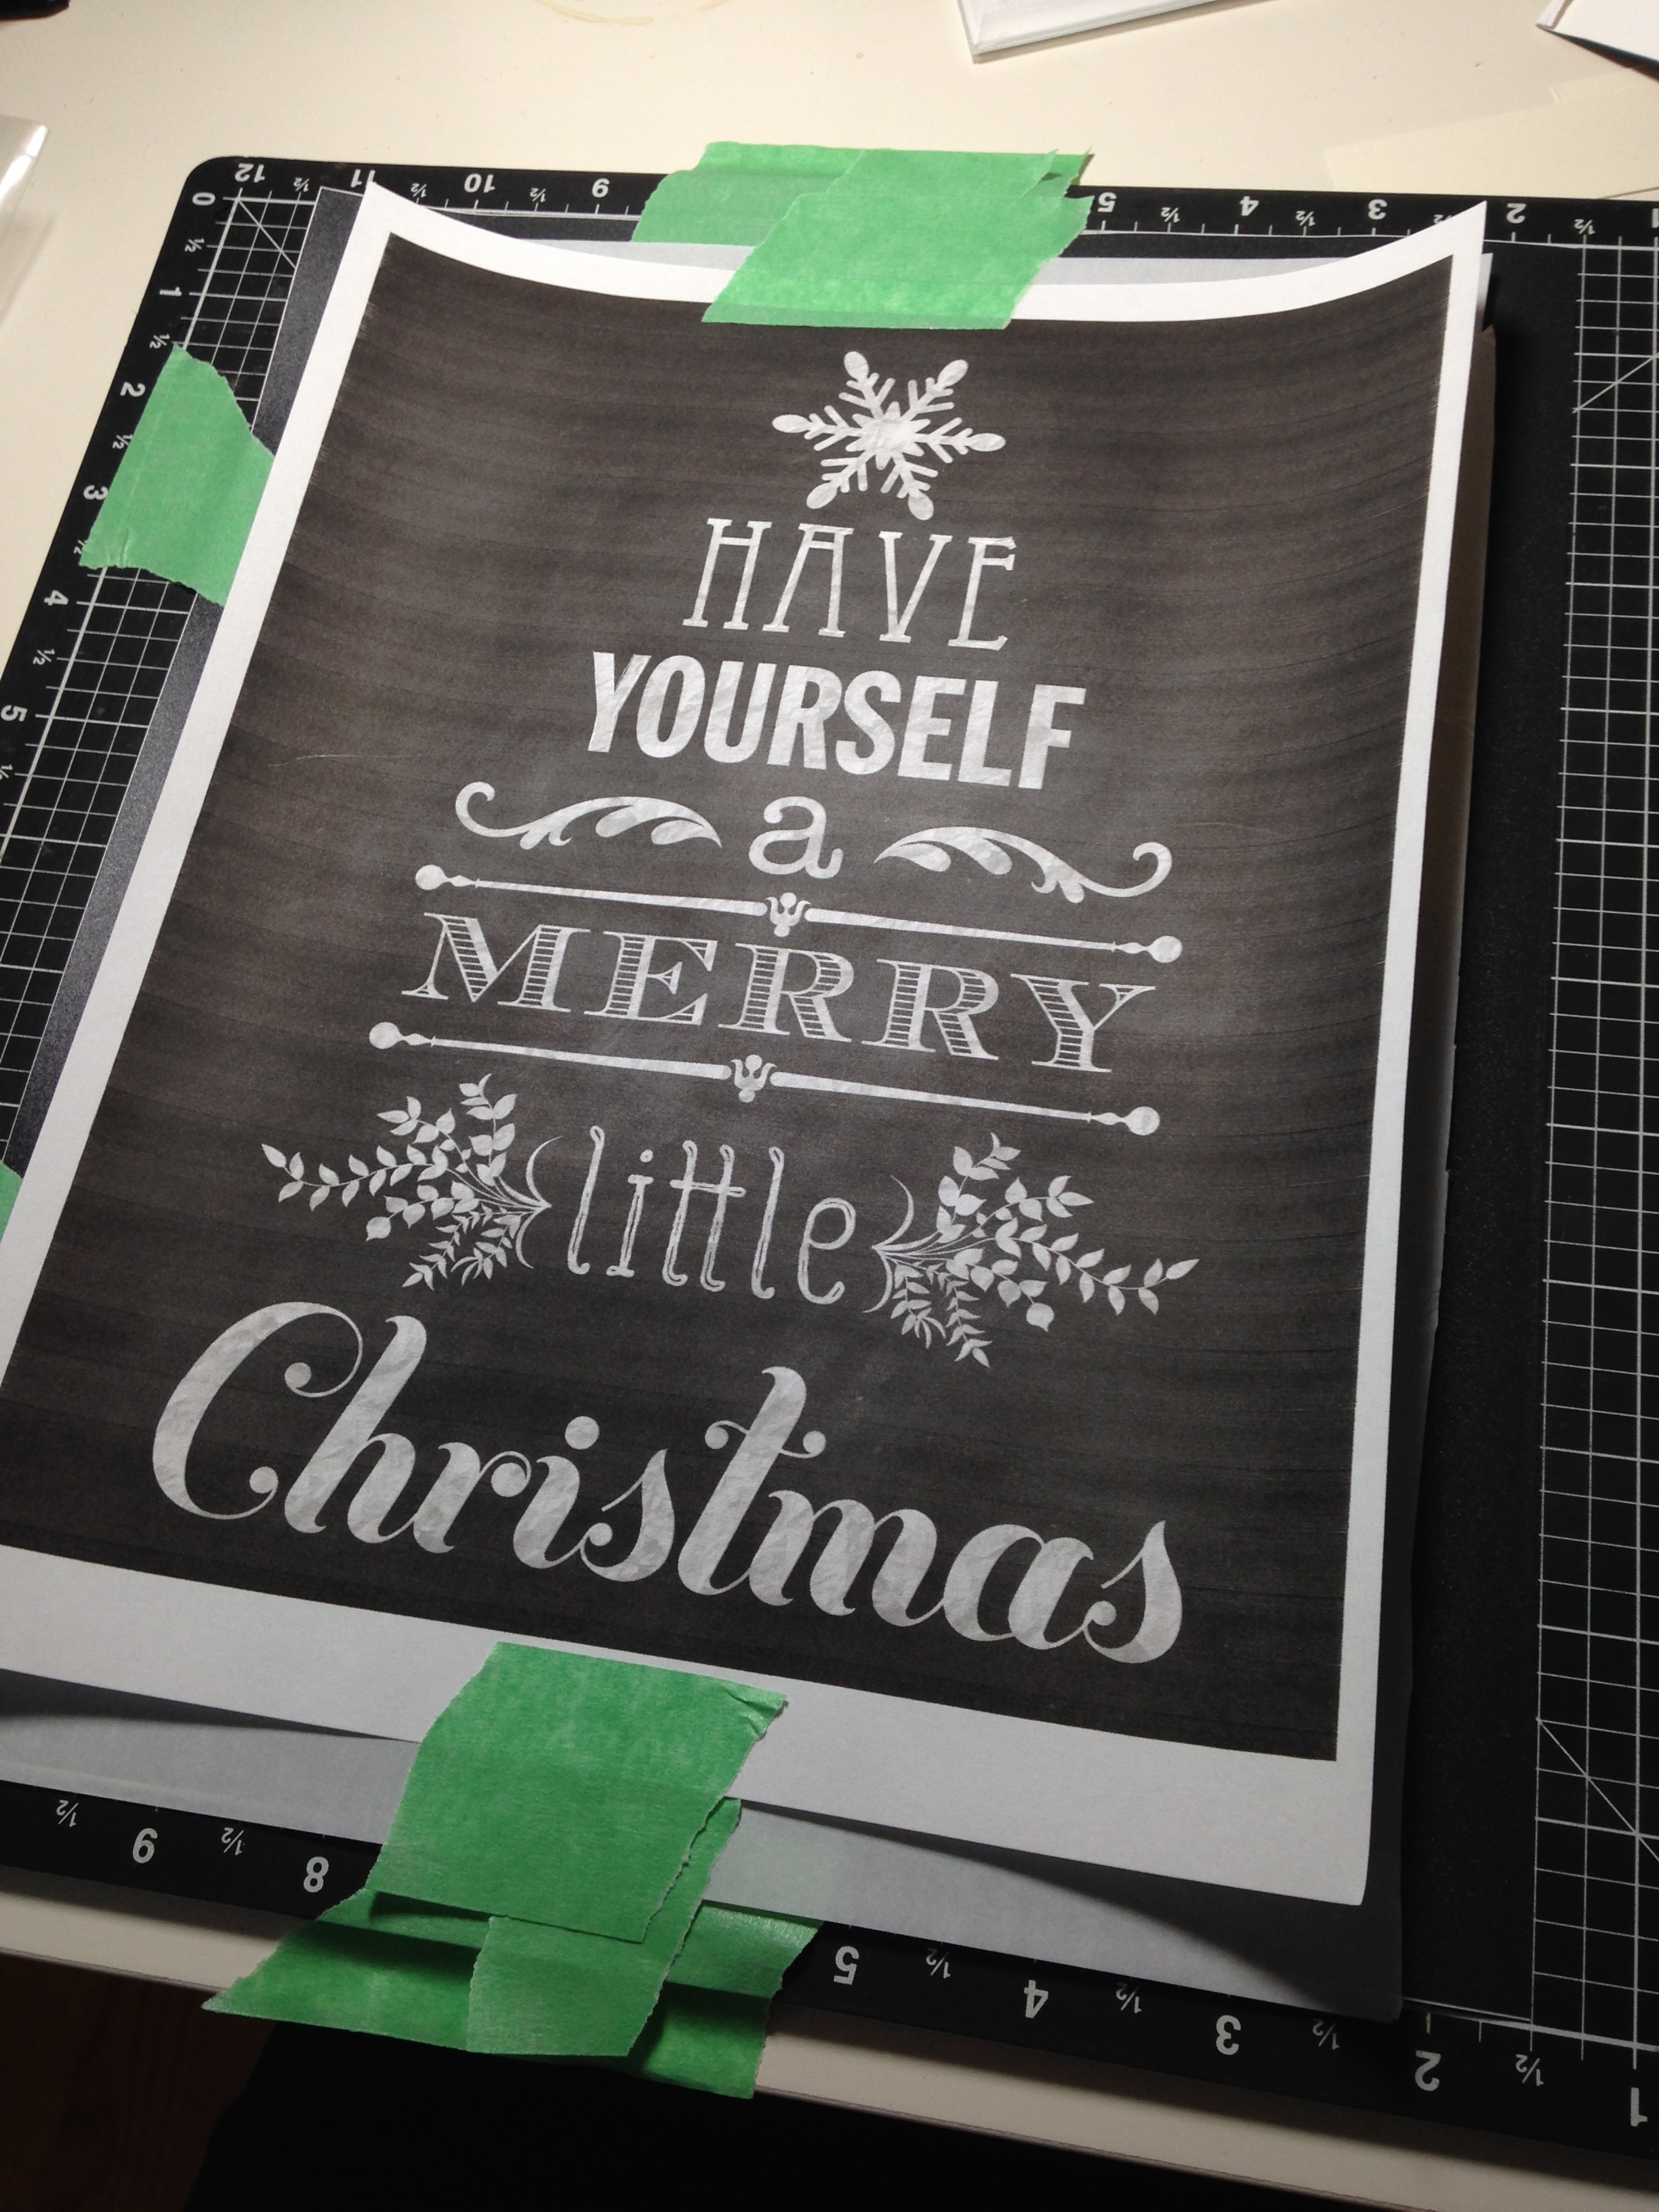
So it started with a pinterest search- free chalkboard printable. I found one I liked and printed it out (note: I used the draft feature on my printer settings so that I did not waste a lot of ink). I then used white transfer paper (bought at the craft store) and layered it between my image and my chalkboard.
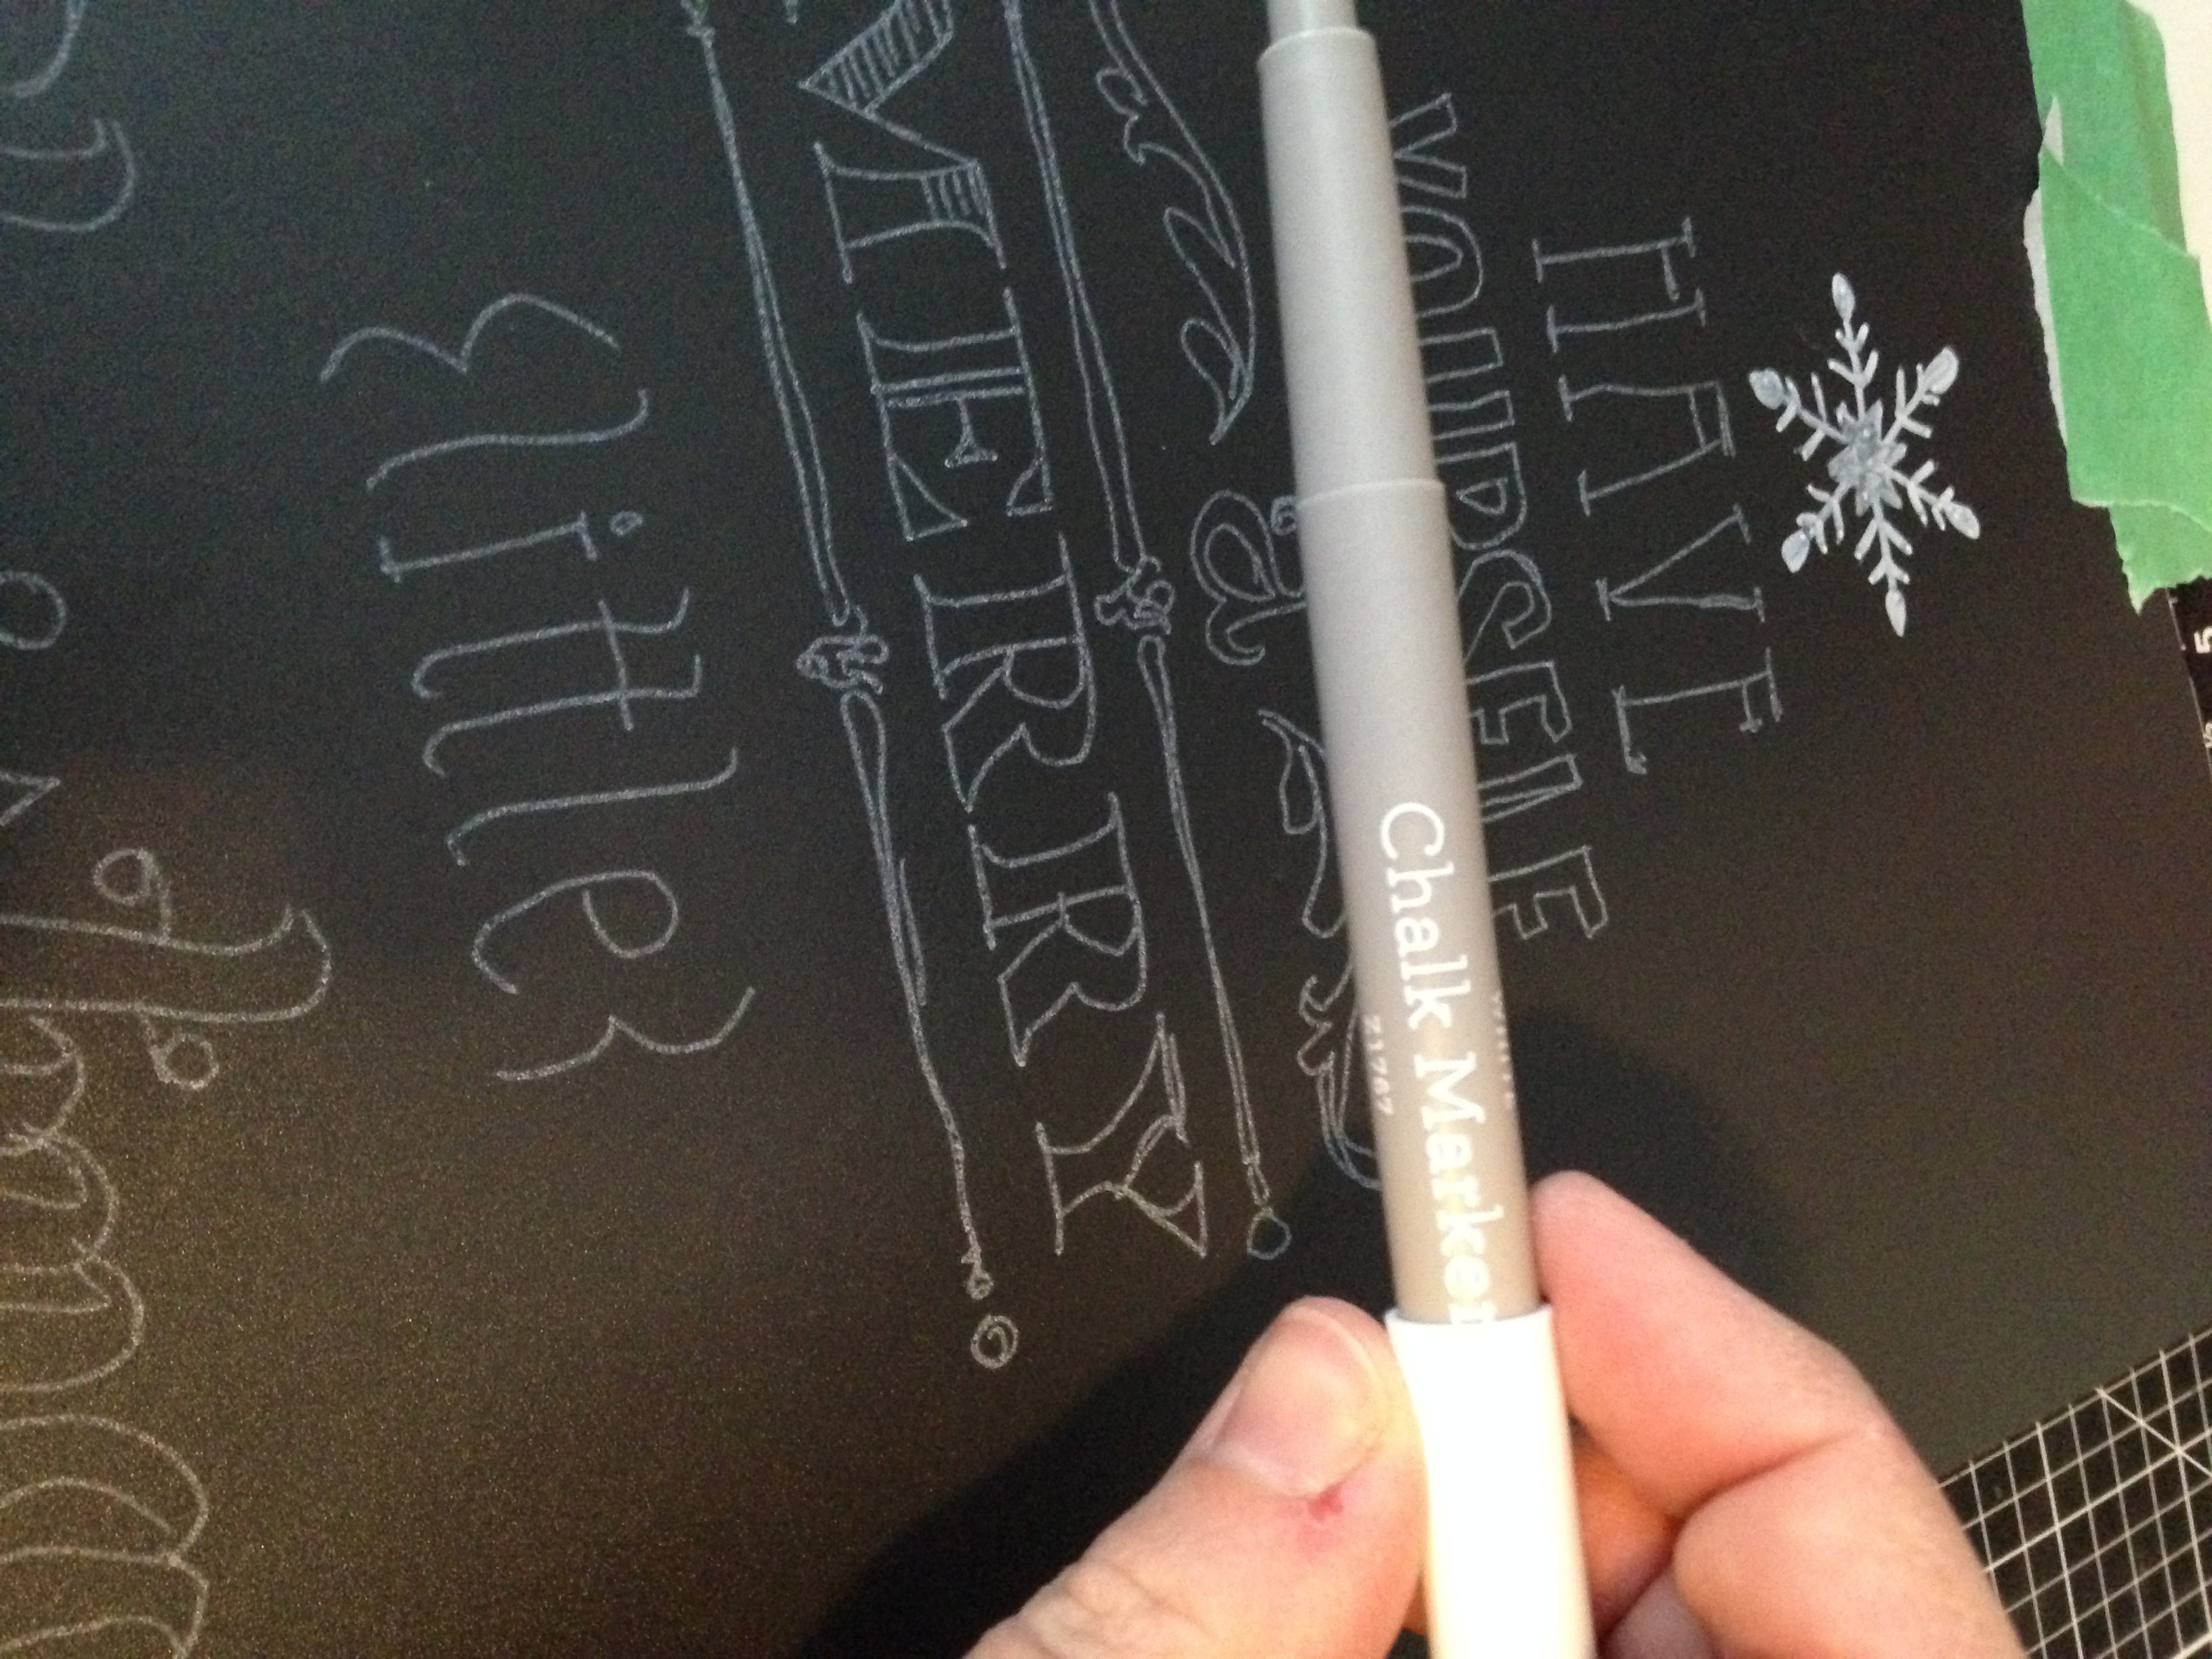
Next I took my Piercing and Embossing tool (embossing end) and went over the image outline so that the white off the transfer paper would do its job… and voila! It worked.
Next I took our Chalk Marker (this baby is permanent so be sure you are placing it where you want it!) and went over the outline and filled in the bits I wanted to fill in. To finish it off I also added green glitter leaves where they had chalk ones- I wanted to make this part easier AND add some colour! This worked great and I have plans to do it again!
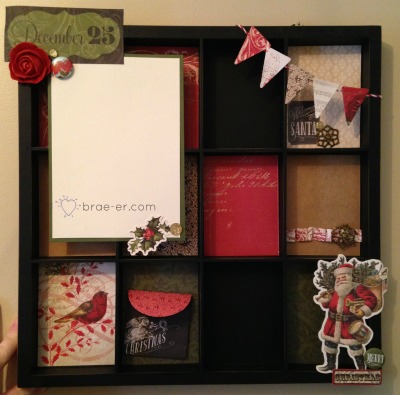
My second project is a Display Tray decorated with Yuletide papers, complements and accessories. These frames have been very popular as gifts over the last few years and our new family photos are going to have a special place in this one. It is a very simple and quick project that looks great no matter what the theme!
Now if you would like to purchase any of these items please visit my SHOP. You won’t have it in time for the holidays but you will have it in plenty of time to craft for next year!
To continue on in our Cross Canada Hop, visit Christine’s blog!
Until we craft again, The Brae-er