This month we are featuring Stitched Together and you will be taken across Canada to view projects created by CTMH consultants. If you came from Colleen’s blog then you are on the correct path- click the link at the bottom of my post to be taken to the next blog.
For my project, I really wanted to feature the Stitched Together Cricut Collection that we offer. This sweet set is very inexpensive but really packs a punch with all of its cute shapes! I used this set for my flowers, greenery, hear, peach frame, and the journaling spot. I also used some of the stickers and paper from the Stitched Together paper pack and added some Stickles (waterfall) for a bit of shine!
You can shop this collection on my website here or get this Cricut collection on my affiliate link which is found on the same website but by scrolling to the bottom and clicking on the Cricut logo.
Now it is time to hop on over to Brandi’s blog and see what gorgeous work she has to share!
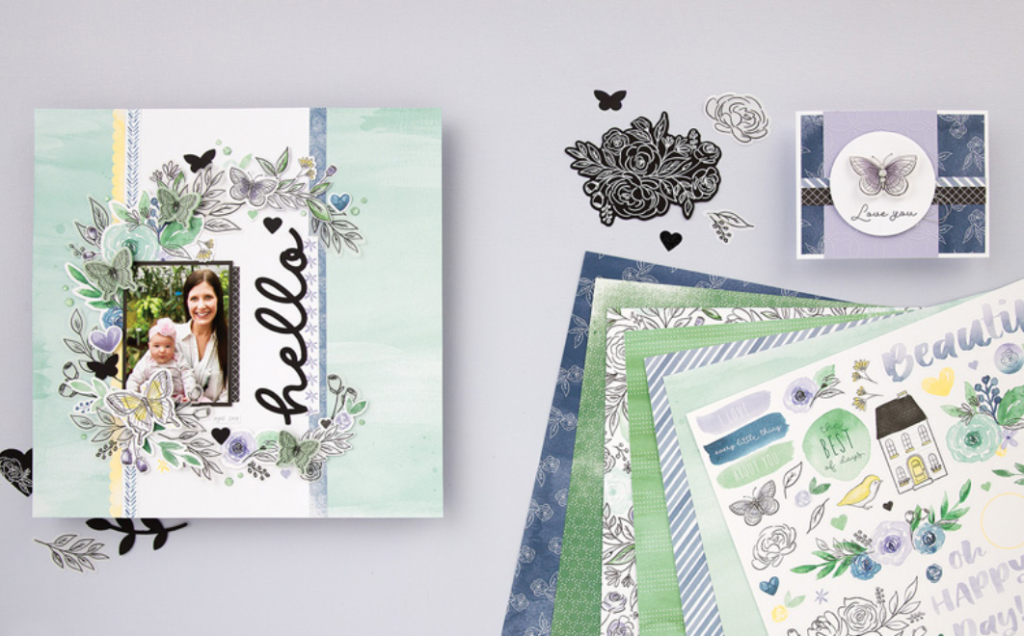
Welcome to the Cross Canada Blog Hop. If you are coming from Sheena’s blog then you are on your path across this great country of ours. This month, we are all featuring one of our new paper collections, Every Little Thing.
This collection is sure to be a hit. Why, you ask? Because it has BUTTERFLIES!!! Vellum and stamp with matching thin cuts are available with this collection and everyone loves those pretty little beings.
Here is what I have done with this collection:
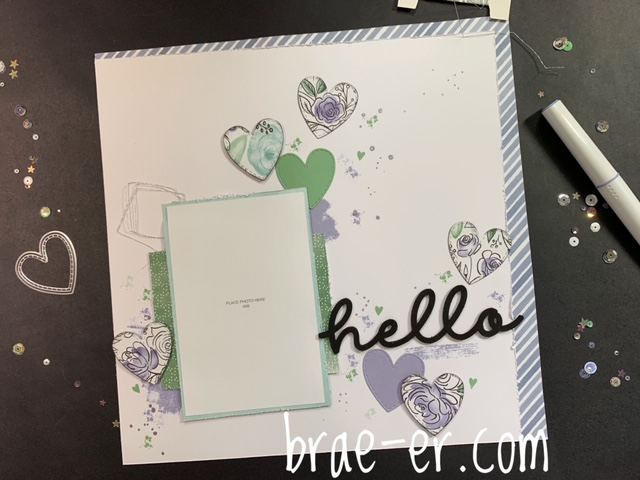
On the first layout I used parts of the Every little Thing collection and combined it with our Stitched Hearts thin cuts, Wisteria shimmer brush and the Strokes of an Artist stamp set. I stamped in Wisteria and Julep ink. Lots of layering and lots of just going with it to achieve this look- I like how it turned out and it is very different from the next look.
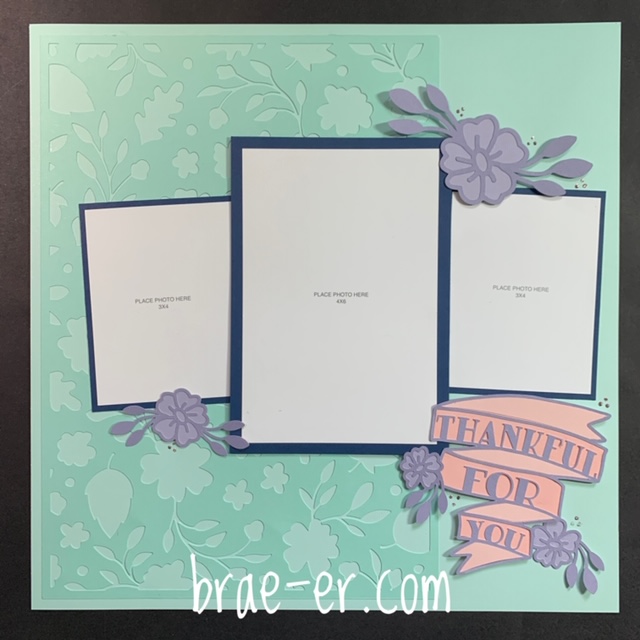
This layout was created using the Complete Creativity CTMH Cricut collection that was just released! It is a fantastic collection of 24 projects that can be broken up and used in so many different ways- like on this layout. In the Cricut collection all of these images are used to create a very pretty card- I ungrouped, resized and created this pretty one-page layout. My only addition was some Pink Taffeta Stickles to add some sparkle! If you want to check this cartridge out then click here.
Feeling inspired by this collection yet? You are not done yet- now it is time to hop on over to Brandi’s blog to see what she has created for you!
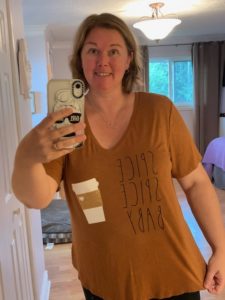
Yesterday, Close to my Heart introduced our newest line of product to the world. It is a fantastic line full of so much goodness! It is hard to pick what to share first. But I have settled on our new Heat Transfer Vinyl- why? Because I am having so much fun with it!! We have a range of colours that come in 12×12 sheets (three sheets in a pack). There are the obvious uses for heat transfer vinyl (some of which I have embraced) and there are the uses with our other products- like our albums (pictured below). If HTV (heat transfer vinyl) is new to you then this post may be of help. Read below to see how to use HTV and make the cute t-shirt I am wearing in the last photo!
Step one: Create your image. We have a number of options depending on what you would like to do. If you want to create the t-shirt I created you can find that project in Design Space.
I also recommend checking out the SVG files that we released yesterday- there are all very cute and perfect for a variety of craft projects. You can find them here.
Once you have your image ready in design space you can cut it out. Here are a few, key tips.
*mirror your image
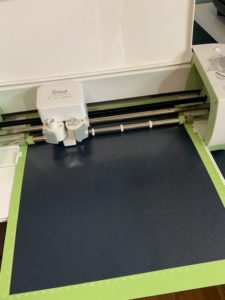
*shiny side of our vinyl is placed down on the cricut mat
*ensure that you select the right material type (your dial should be set to custom). I set my CTMH vinyl to the Everyday Iron-on setting or the Glitter Iron-on setting (depending on the material I was using).
Step Two: Then MAKE IT!
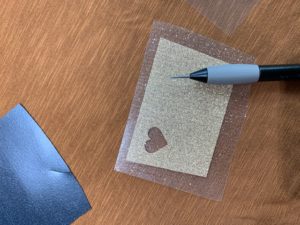
Step Three: Once your images are cut- remove any excess vinyl (set that aside for later projects). You then need to weed the image. I use my CTMH piercing tool to help pick up the bits of vinyl that are garbage. The rest of your image should be left on the clear backing sheet.
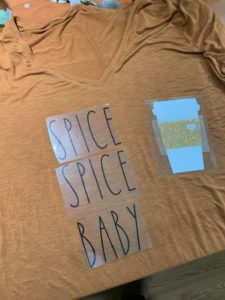
Step Four: I place all my weeded images on my shirt so that I can get a feel for where they will be once I press them. If I am happy with them then I will begin to heat set. In this project, I set them piece by piece to ensure it all lined up.
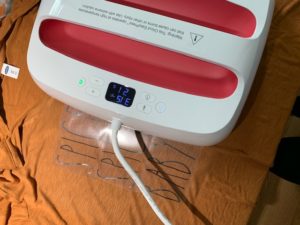
Step Five: Begin heat setting your vinyl.
To ensure I am using the proper settings I use the Cricut heat guide. This guide will tell you the time and temperature and lets you select the material you are using. It also allows you to indicate which easy press you are using. A great resource!
As I pressed each image I would remove the backing to ensure it was secure. I then protected it with the same piece of backing as I pressed each subsequent image. You can see that in the below picture.
You will need to layer the vinyl on the coffee cup (holding pumpkin spice of course). I pressed the white vinyl like all the other and then layered the glitter vinyl. I used excess backing to protect the exposed white vinyl when I pressed the glitter vinyl.
and VOILA! I could not be happier with my new fall, weekend t-shirt. Bring on all the pumpkin spice!
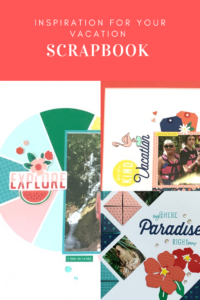
If you are at all like me, you seek inspiration for your scrapbook pages, especially when you are in a rut OR when you feel an album dragging on. That was my recent feeling about my last vacation album. I had a wonderful vacation and was looking forward to re-living it through my album but I could just… not… get… it… done. In response, I have made my album a vacation scrapbook inspiration post so that I can help others who may be afflicted with this (and if anyone has some inspiration for my other incomplete albums please let me know LOL).
Feel free to pin the above graphic so you can easily find this post again.
Now, let’s get on to the good stuff! The inspiration and fun of a vacation album. Now a quick note: all product used is CTMH. Some product is now retired (it has taken me some time to finish this book) but I may have some tucked away so message me if you are interested in anything.
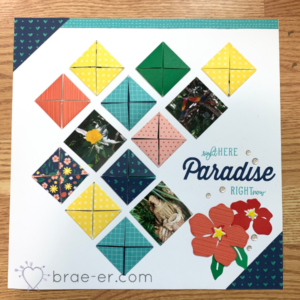
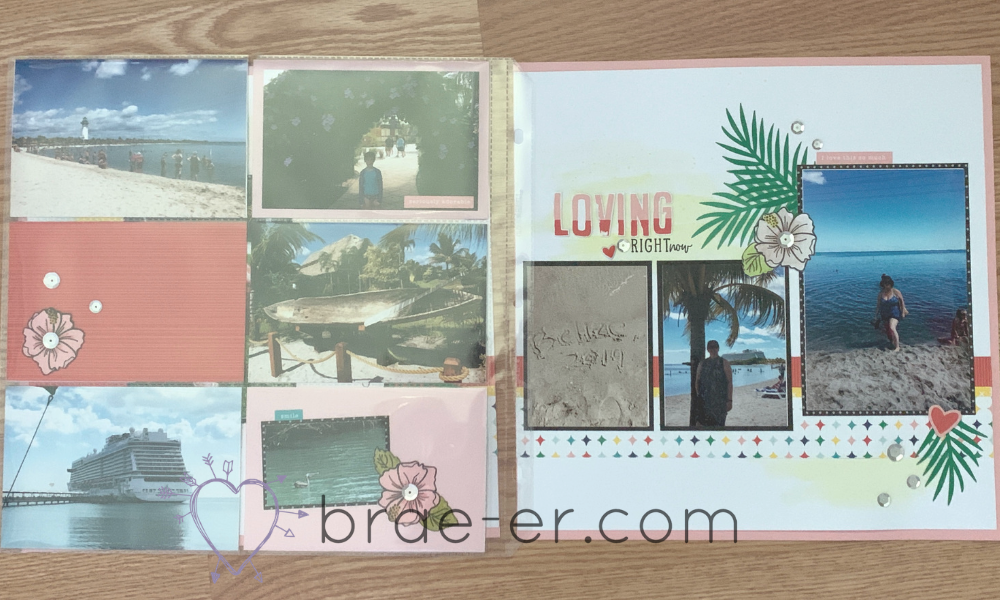
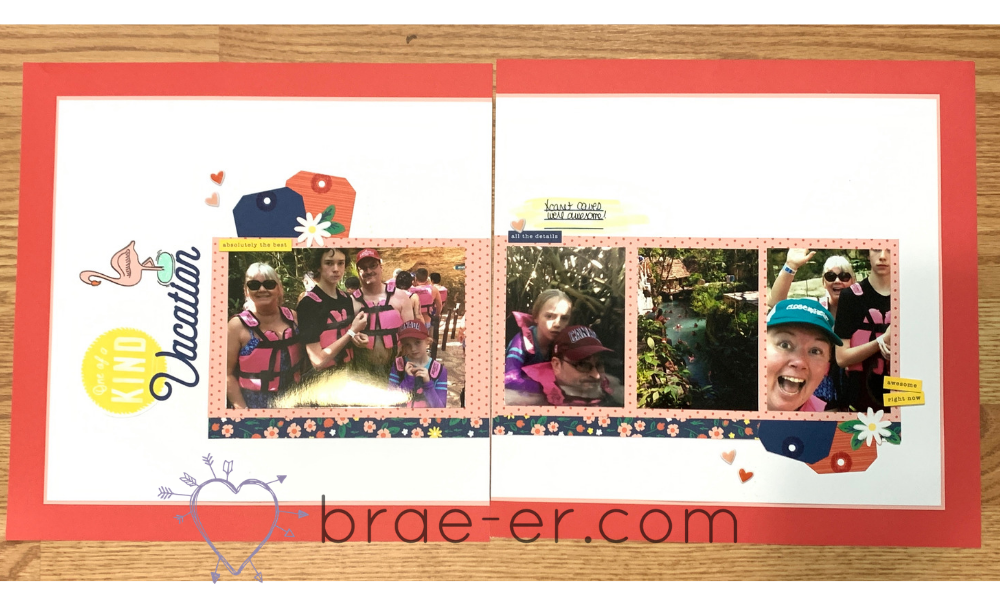
Love this cover page- this one was designed by CTMH art department. As part of earning a trip, we also receive the supplies, directions and pre-cut pieces for part of an album. It is one of the parts I look forward to most when a trip is coming up! This page has little folded squares that add a fun touch to the cover. Nestled among the squares are some of the photos from our trip.
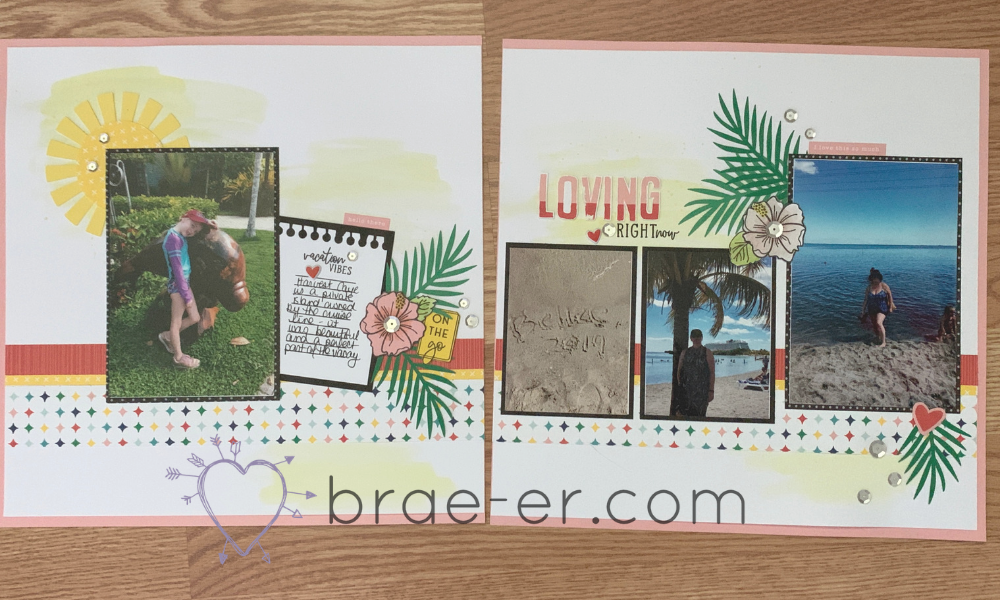
The above three photos are actually ONE layout. I added one of our page protectors intended for pocket scrapbooking as a middle page in order to extend my layout. I made sure to tie it in with colours and embellishments so that it fit the overall look and feel of the layout. This is perfect for when you want too many photos together. You will see a few other options for adding more photos in a post later this week where I will share the remainder of this album.
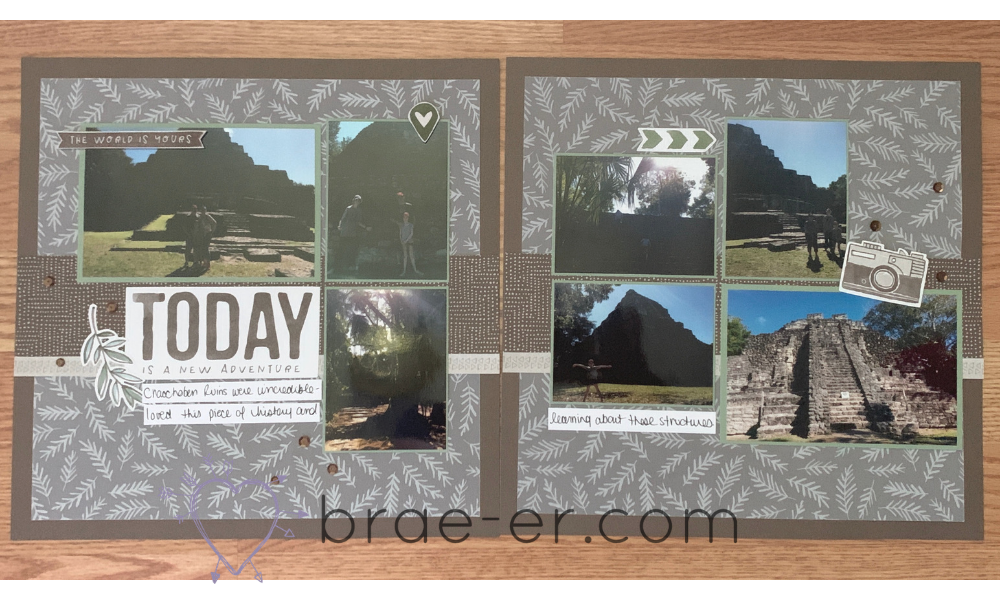
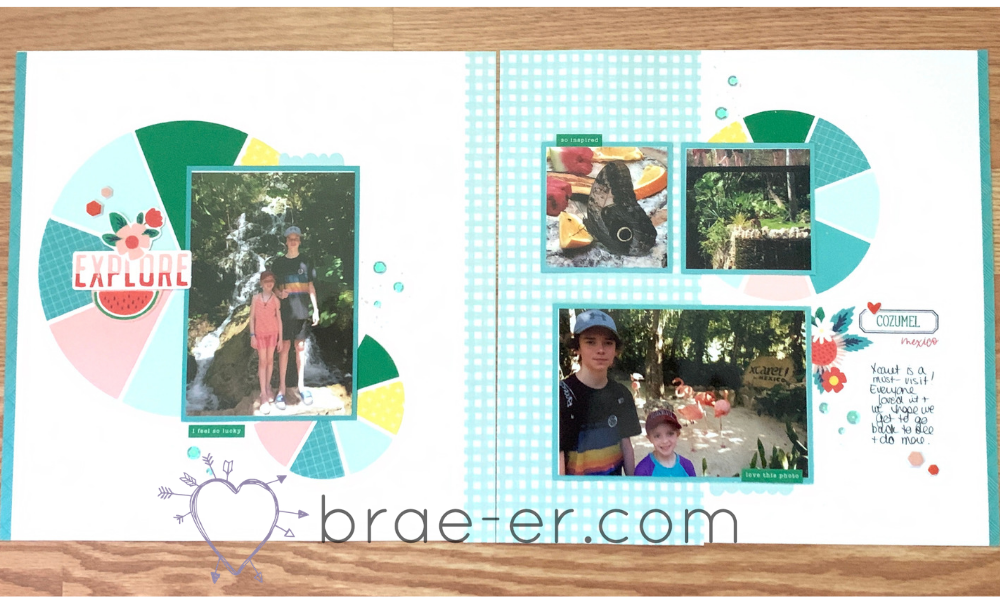
The history teacher in me LOVED this experience as well. My kids also thought it was pretty cool- they spent a lot of time looking up though (we could hear monkey’s in the trees but they were hard to spot).
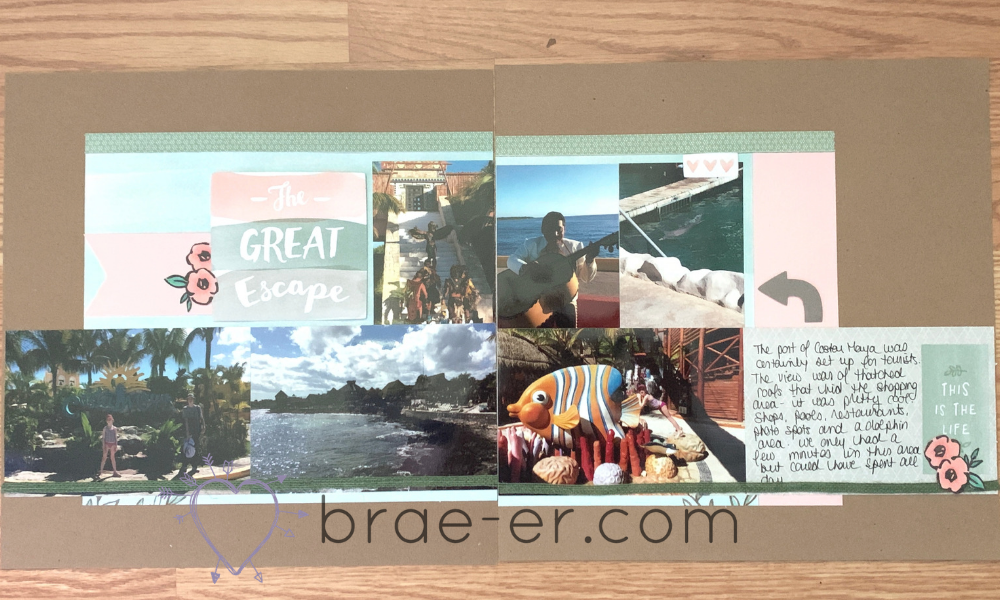
I may have documented this part of our trip twice but it was THAT MUCH FUN! If you are ever in Mexico and can experience Xcaret and the caves then DO IT! We loved it and hope to go back as that park had lots to see and do and we only scratched the surface.
How fun are these circles?! I just love how they look and the punch of colour they add to my layout.
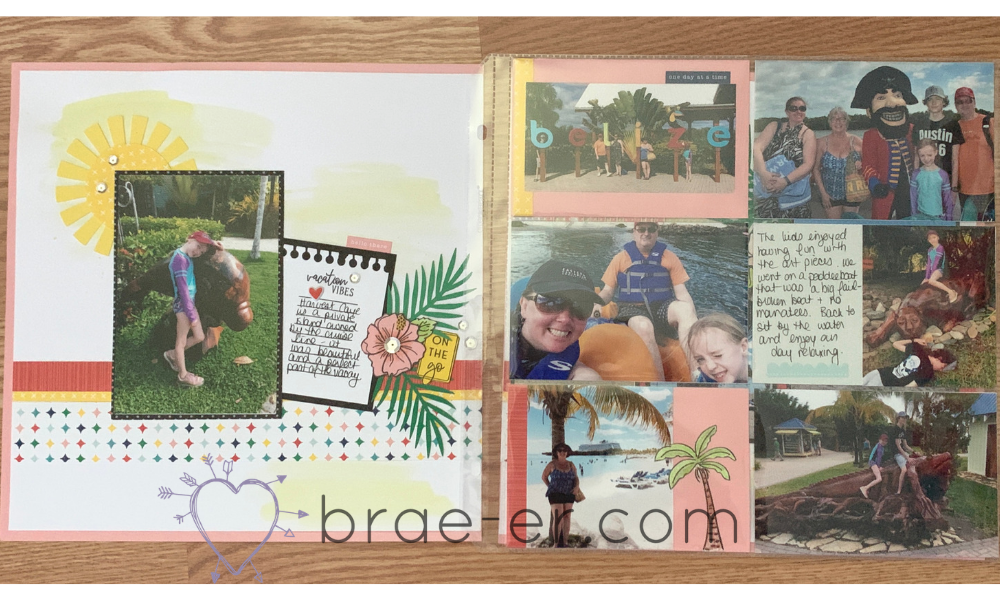
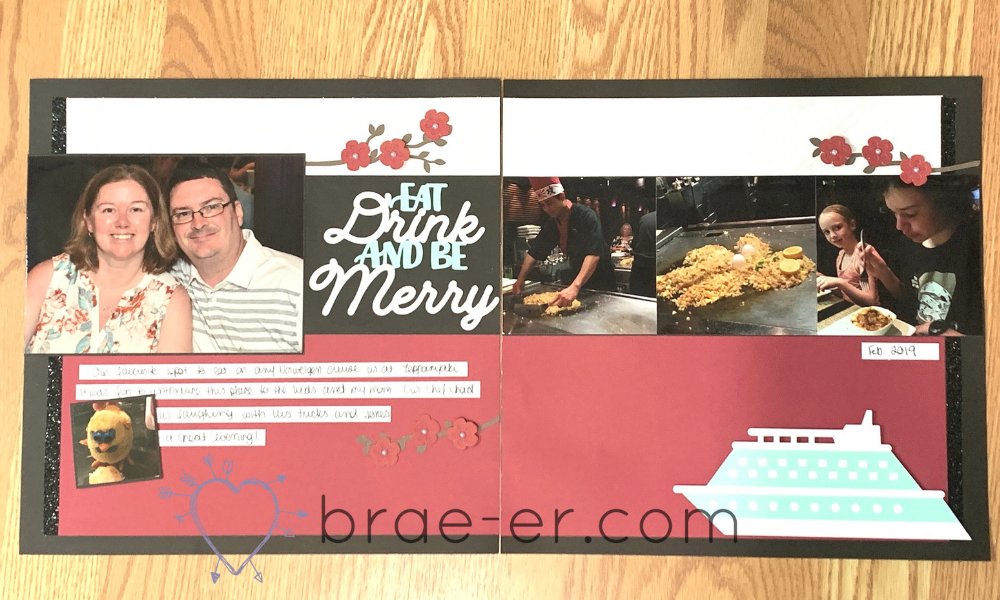
It is important for me to not just document the port fun on my trip- this restaurant experience is one of our faves and this time we were able to share it with our family. I wanted to make sure I documented that as well. Cricut cuts here are all from CTMH cartridges.
I hope you find some inspiration- feel free to scraplift any ideas that may help you out and if you have questions just comment below. I am happy to help!
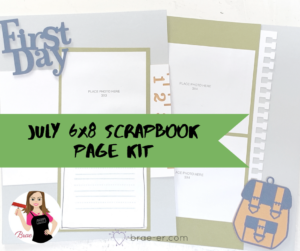
One of the biggest trends in scrapbooking is 6 x 8 scrapbook layouts! These layouts are fun and great for a variety of memories: trips, summer memories, kids memories and so much more! I am releasing TWO kits a month as part of my 6×8 Scrapbook kits. This month features Summer Sunshine and First Day.
How do you get these?
1. Purchase an Everyday Life Album and pack of 6×8 page protectors and get your first monthly kit FREE!! This is only available on your first purchase and is a great way to jumpstart your book.
2. Purchase the pre-cut kit for $20 CAD (this includes shipping within Canada).
3. Get the Cricut design space files FREE with a $20 order on my website (you will need to own the CTMH cartridges to use these files). Don’t have the cartridges but want to order them? Contact me- each purchase will get you a free month of the 6×8 kit!
P.S. I plan to get my daughter started on making her own 6×8 album- these layouts are perfect for smaller hands and I cannot wait to see her unique take on her memories!
Welcome to the August Cross Canada Blog Hop! If you have come from Krista’s blog then you are on the right path.
This month we are featuring our favourite new item- honestly I had a really hard time picking just ONE item so I kind of did a work around 🙂
My favourite thing is our NEW ‘Make it From Your Heart-Volume 3’ how-to book! If you have never seen one of our how-to books then you are missing out! These are perfect for inspiration and ideas when you need JUST the right layout! Both of my layouts featured here are from the new book (and there are so many to choose from!!!!)
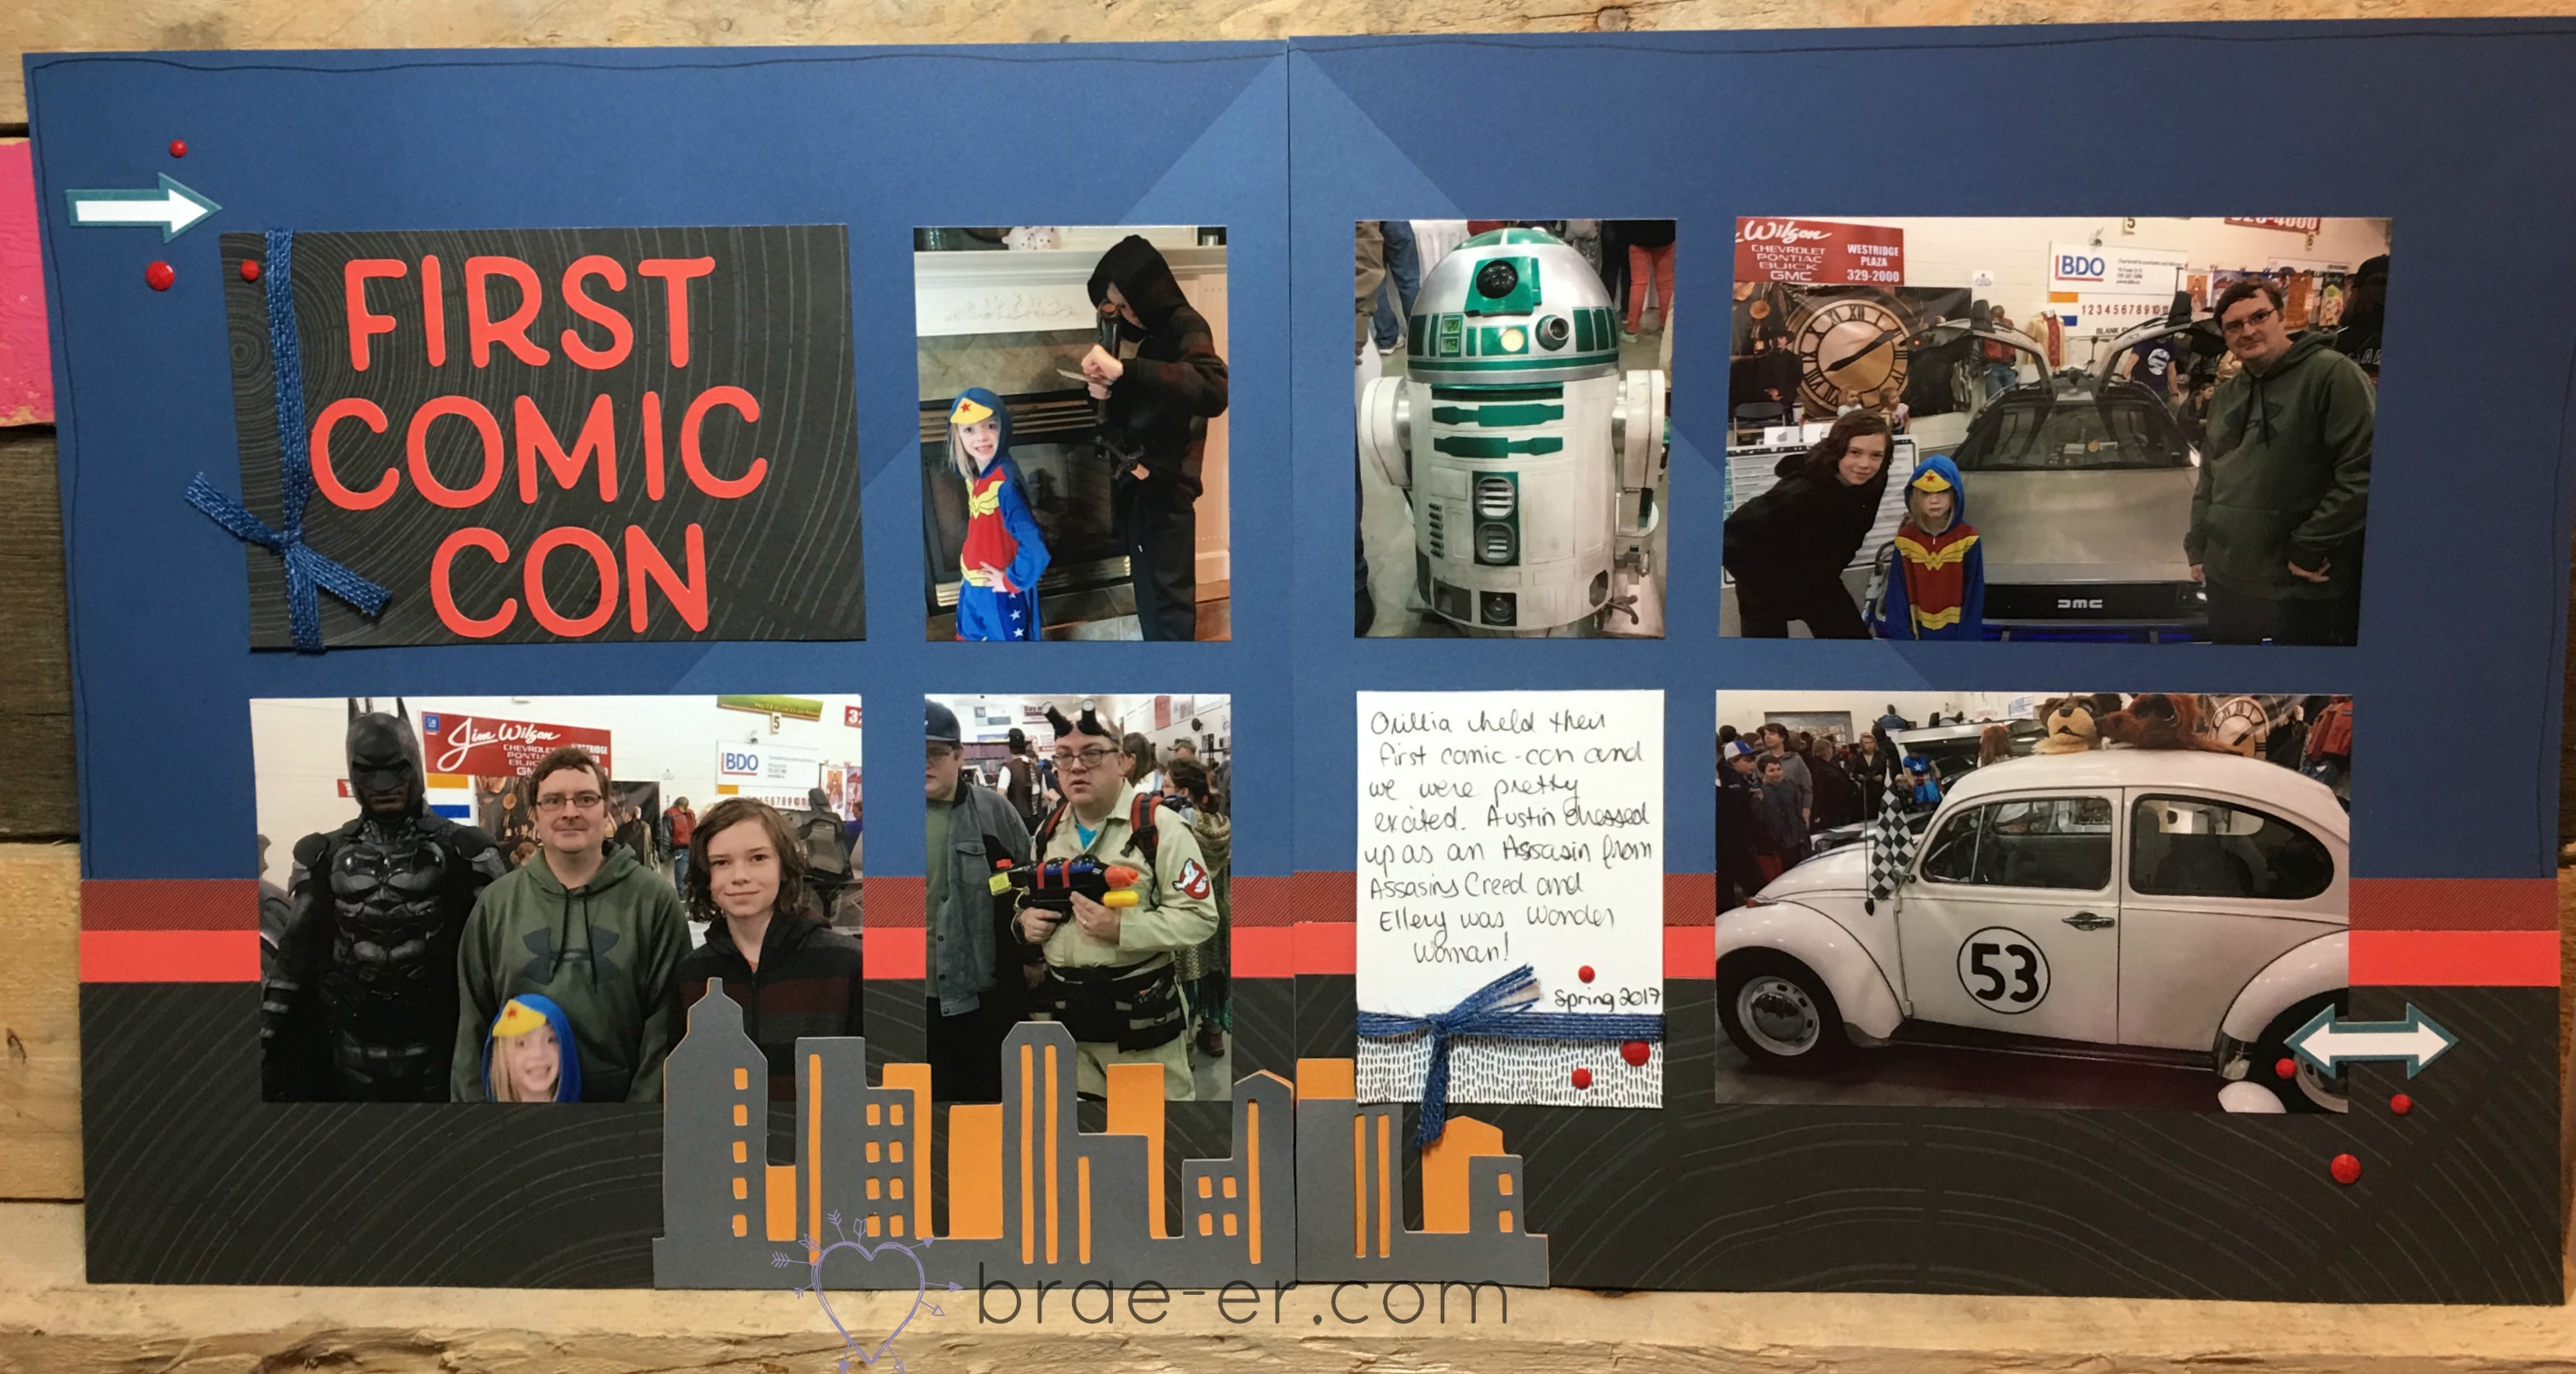
My first page also features our new Fundamental papers, Bashful (our colour of the year for this year!) and some cuts from our ‘You are Here’ Cricut Cartridge (LOVE THIS ONE TOO!)
My comic-con layout also uses new Fundamentals, the Cricut Cartridge (for font and the city skyline) BUT I also used some of the Jack Paper Pack to get just the right look.
Now, can I share a secret with you?
The ‘Make it from Your Heart’ book has some extra features in the back- patterns for pocket scrapbooking AND patterns for pages that was to use our Page Protector Plus system! BOTH the layouts I used here use of of the Page Protector Plus- you can see more in the video posted below!
SaveSave
I hope you enjoyed my favourite item!
Now hop on over to Carol’s blog for more great inspiration!
Our Flower Market Cricut Cartridge is the new kid on the block and it is full of so many amazing things! Watch this fun video all about what you can create with only one KEY- one key people!!!
In this video you examine Key 10 and see how to create an adorable baby layout and card!
Have you seen our newest circut cartridge? Flower Market is so much more than flowers (but the flowers are pretty amazing!). I will be sharing few videos a month that show just what you can do with this cartridge. Hang on to your hats ladies as this is going to be a very fun ride!
This video features Key 6 (I cannot believe how much you can create with just one key!)- watch how you can pull together a very feminine look for a layout. Perfect for a little girl page.
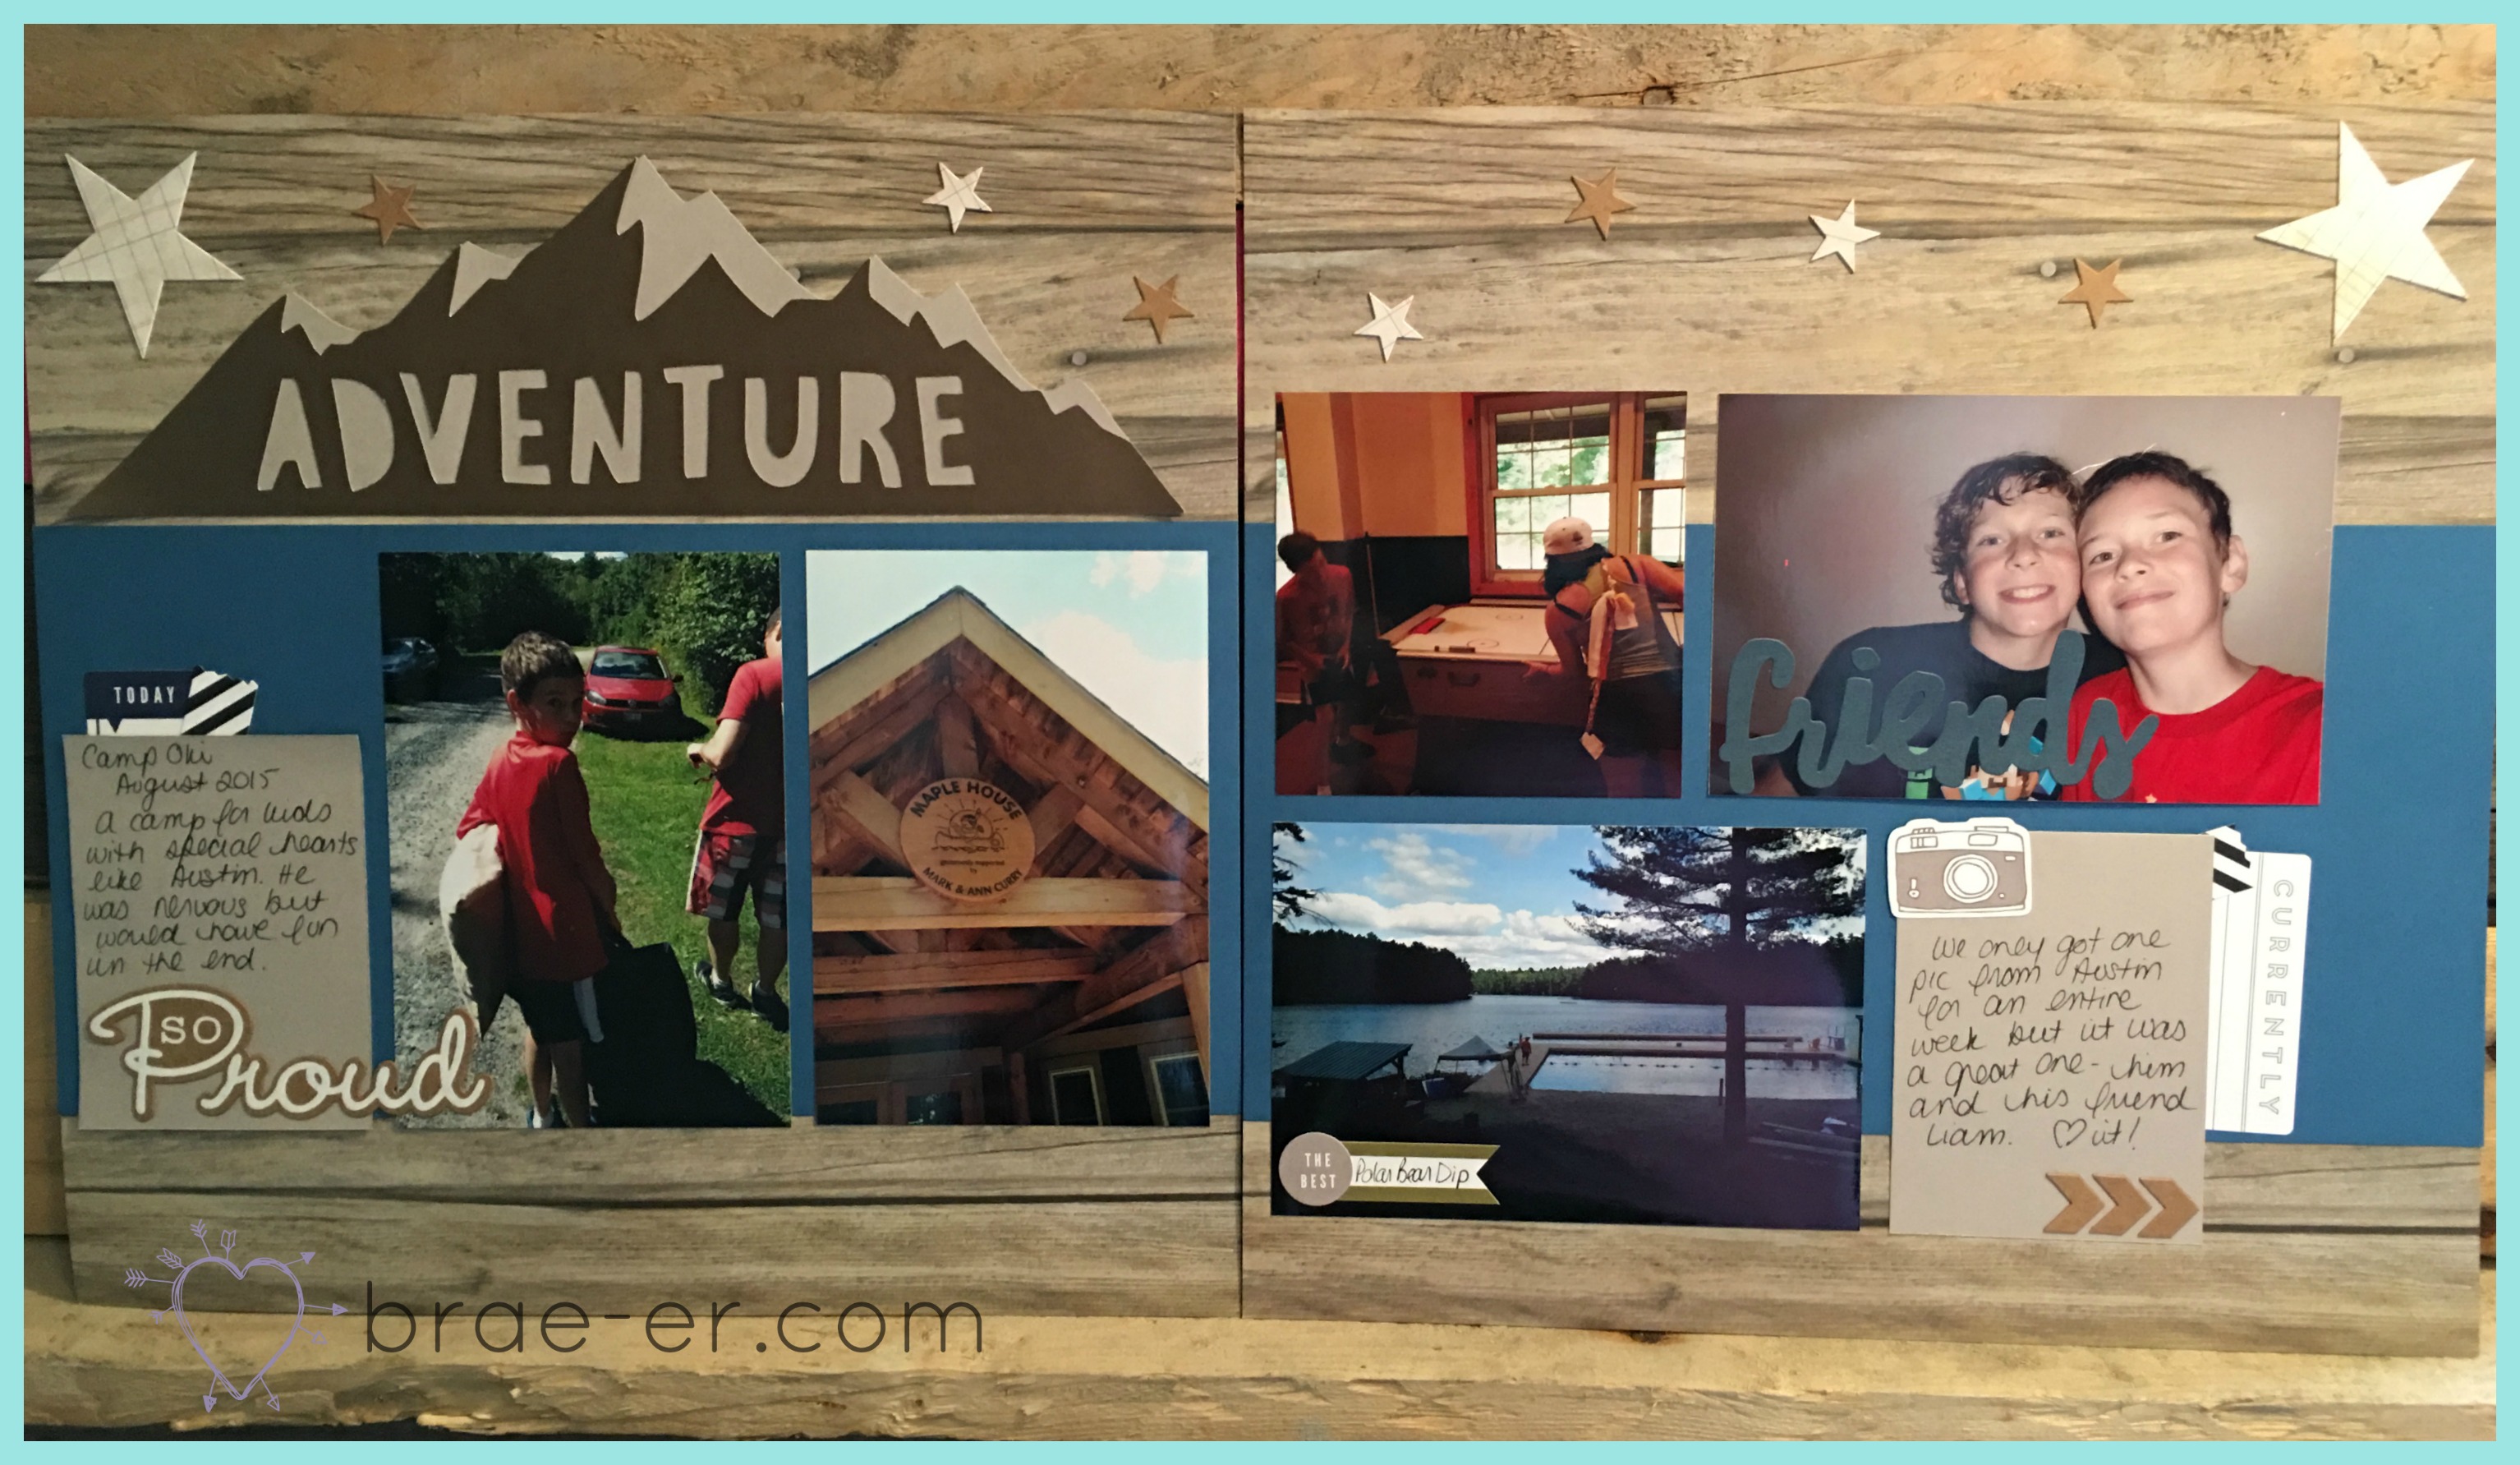
It is a right of passage for many children- the time spent at overnight summer camp. My son left yesterday for a week at Camp Oki. He was nervous (and so was I) but I know that he will have an awesome time and come home with LOTS of stories to share. To commemorate the event and remind him of the fun he had last year I created this layout just before he left. Last year was his first experience at Summer camp and he was NOT happy that I was sending him. I went when I was a kid and really wanted him to experience all the fun I remember having. He did, of course, and came back telling us all about it.
His camp is also a special camp. Camp Oki runs for only one week of summer and is free to families who qualify- they call it a camp for kids with special hearts. Kids who attend Camp Oki are patients at Sick Kids hospital in Toronto and have a variety of cardiac issues. Austin was born with an aortic stenosis that required open heart surgery a few years ago. He was given a new aorta with ‘donor’ tissue (he tells his friends he is part zombie and will live forever LOL). This camp is his opportunity to just be a kid- he can be crazy, push the limits and try the activities that cause his heart to beat! It is safe at Camp Oki- they have nurses and a Cardiologist on site for the week. I am so grateful for every person that makes this week possible for Austin and hope he continues to attend.
For now, I miss him… I missed him within minutes of leaving him at camp. Only 5 more sleeps until I pick him up!
For now we can enjoy this layout! Created with Rustic fundamentals, peacock cardstock, 7-12 School compliments and the Flower Market cricut cartridge.
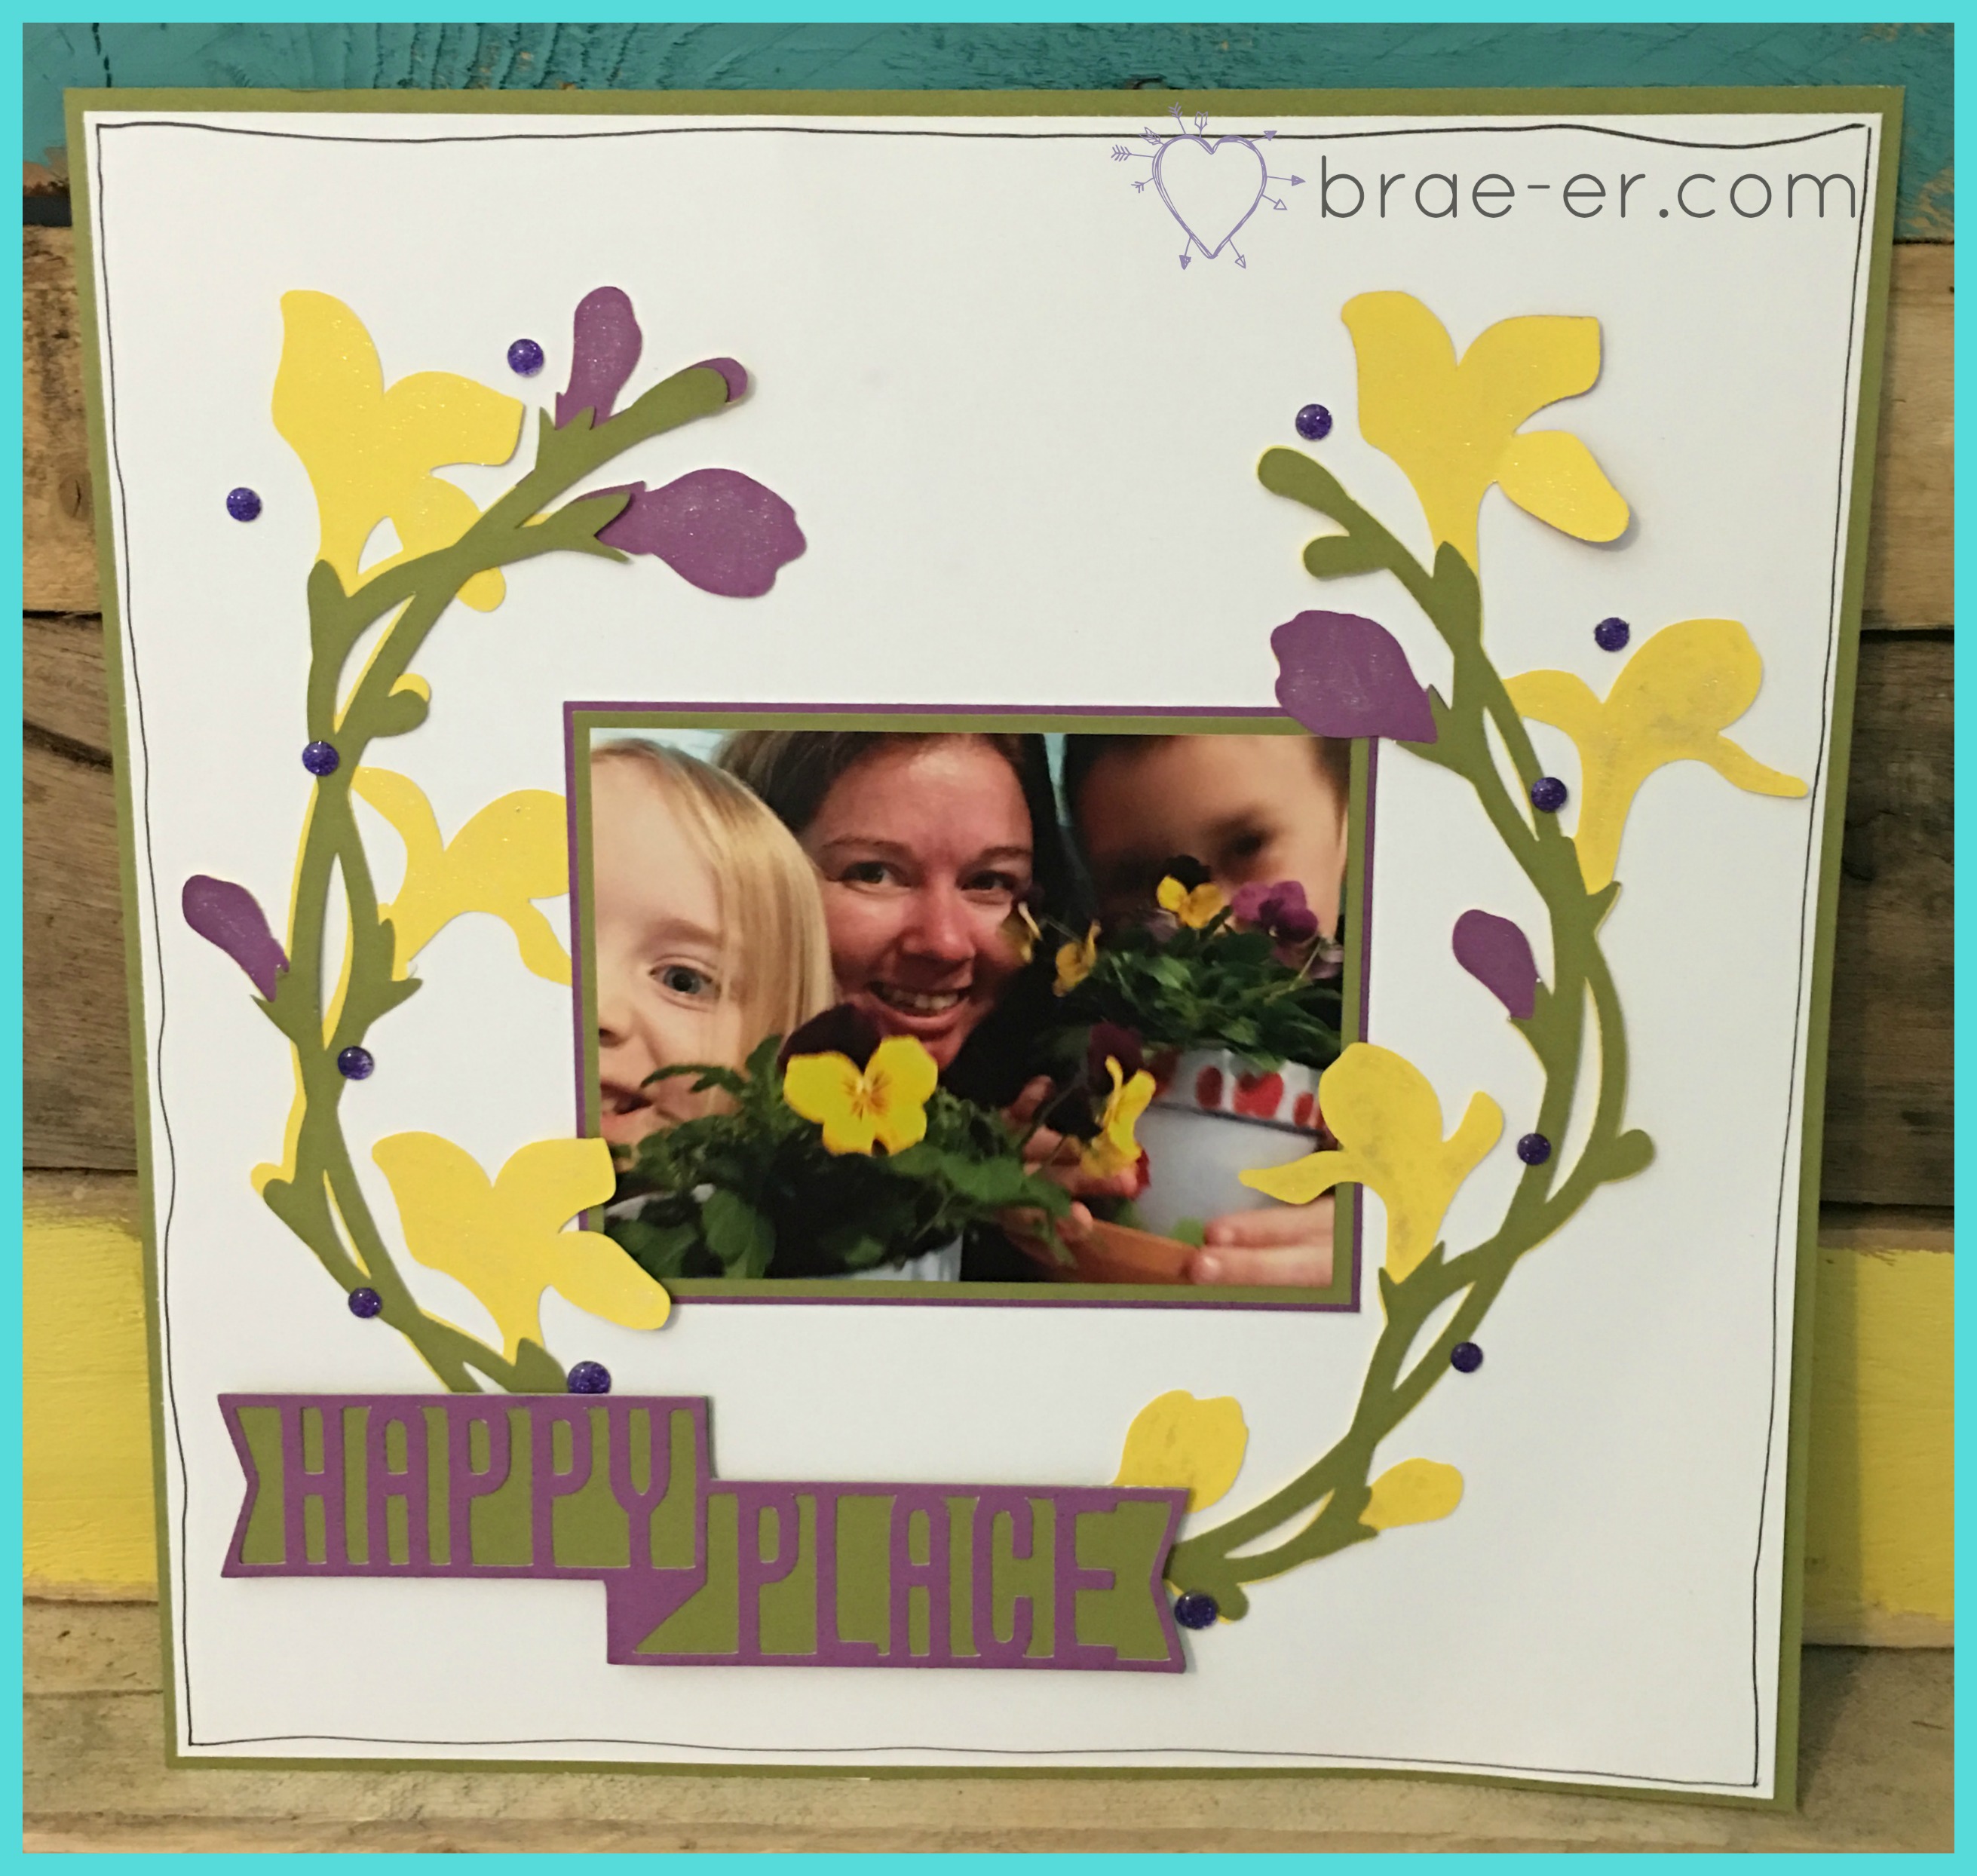
You may have already heard the news… that we have released another cricut cartridge! Crazy right?! I mean, how do we continue to find 700 different images and stay on trend and make it useful to card makers and scrapbookers AND offer all kinds of fun stuff with it! Well, despite all that we did it- the Flower Market Cricut Cartridge has arrived and it is awesome!
This layout uses the cartridge for our flower circlet and the title. I added some shimmer to the flower’s with our new shimmer brush (this thing is uber-awesome and is literally flying off the warehouse shelf!). Nice, clean and simple layout.
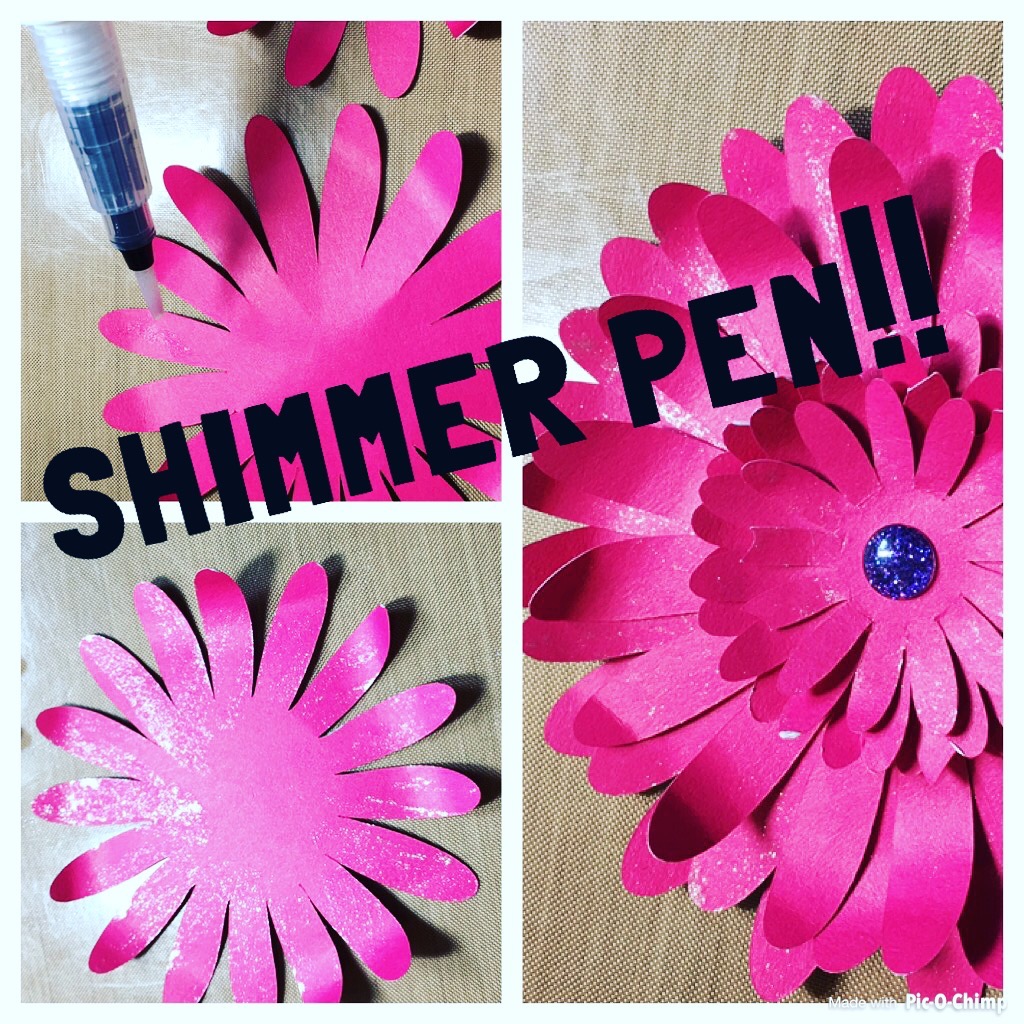
Flower market can be used for more than just flat flowers. The 3D flowers on it are also amazing (if you have seen the cover of our new Annual book – the bouquet was made with this cartridge). Here are some flowers that I cut and assembled. They were quick and easy. I added some sponging to the edges for effect and on the one flower you can see more Shimmer pen… I told ya- amazing!
Shimmer Pen magic up close… I just had too… it is likely the best thing in the new book and I cannot wait to show off some techniques with it!
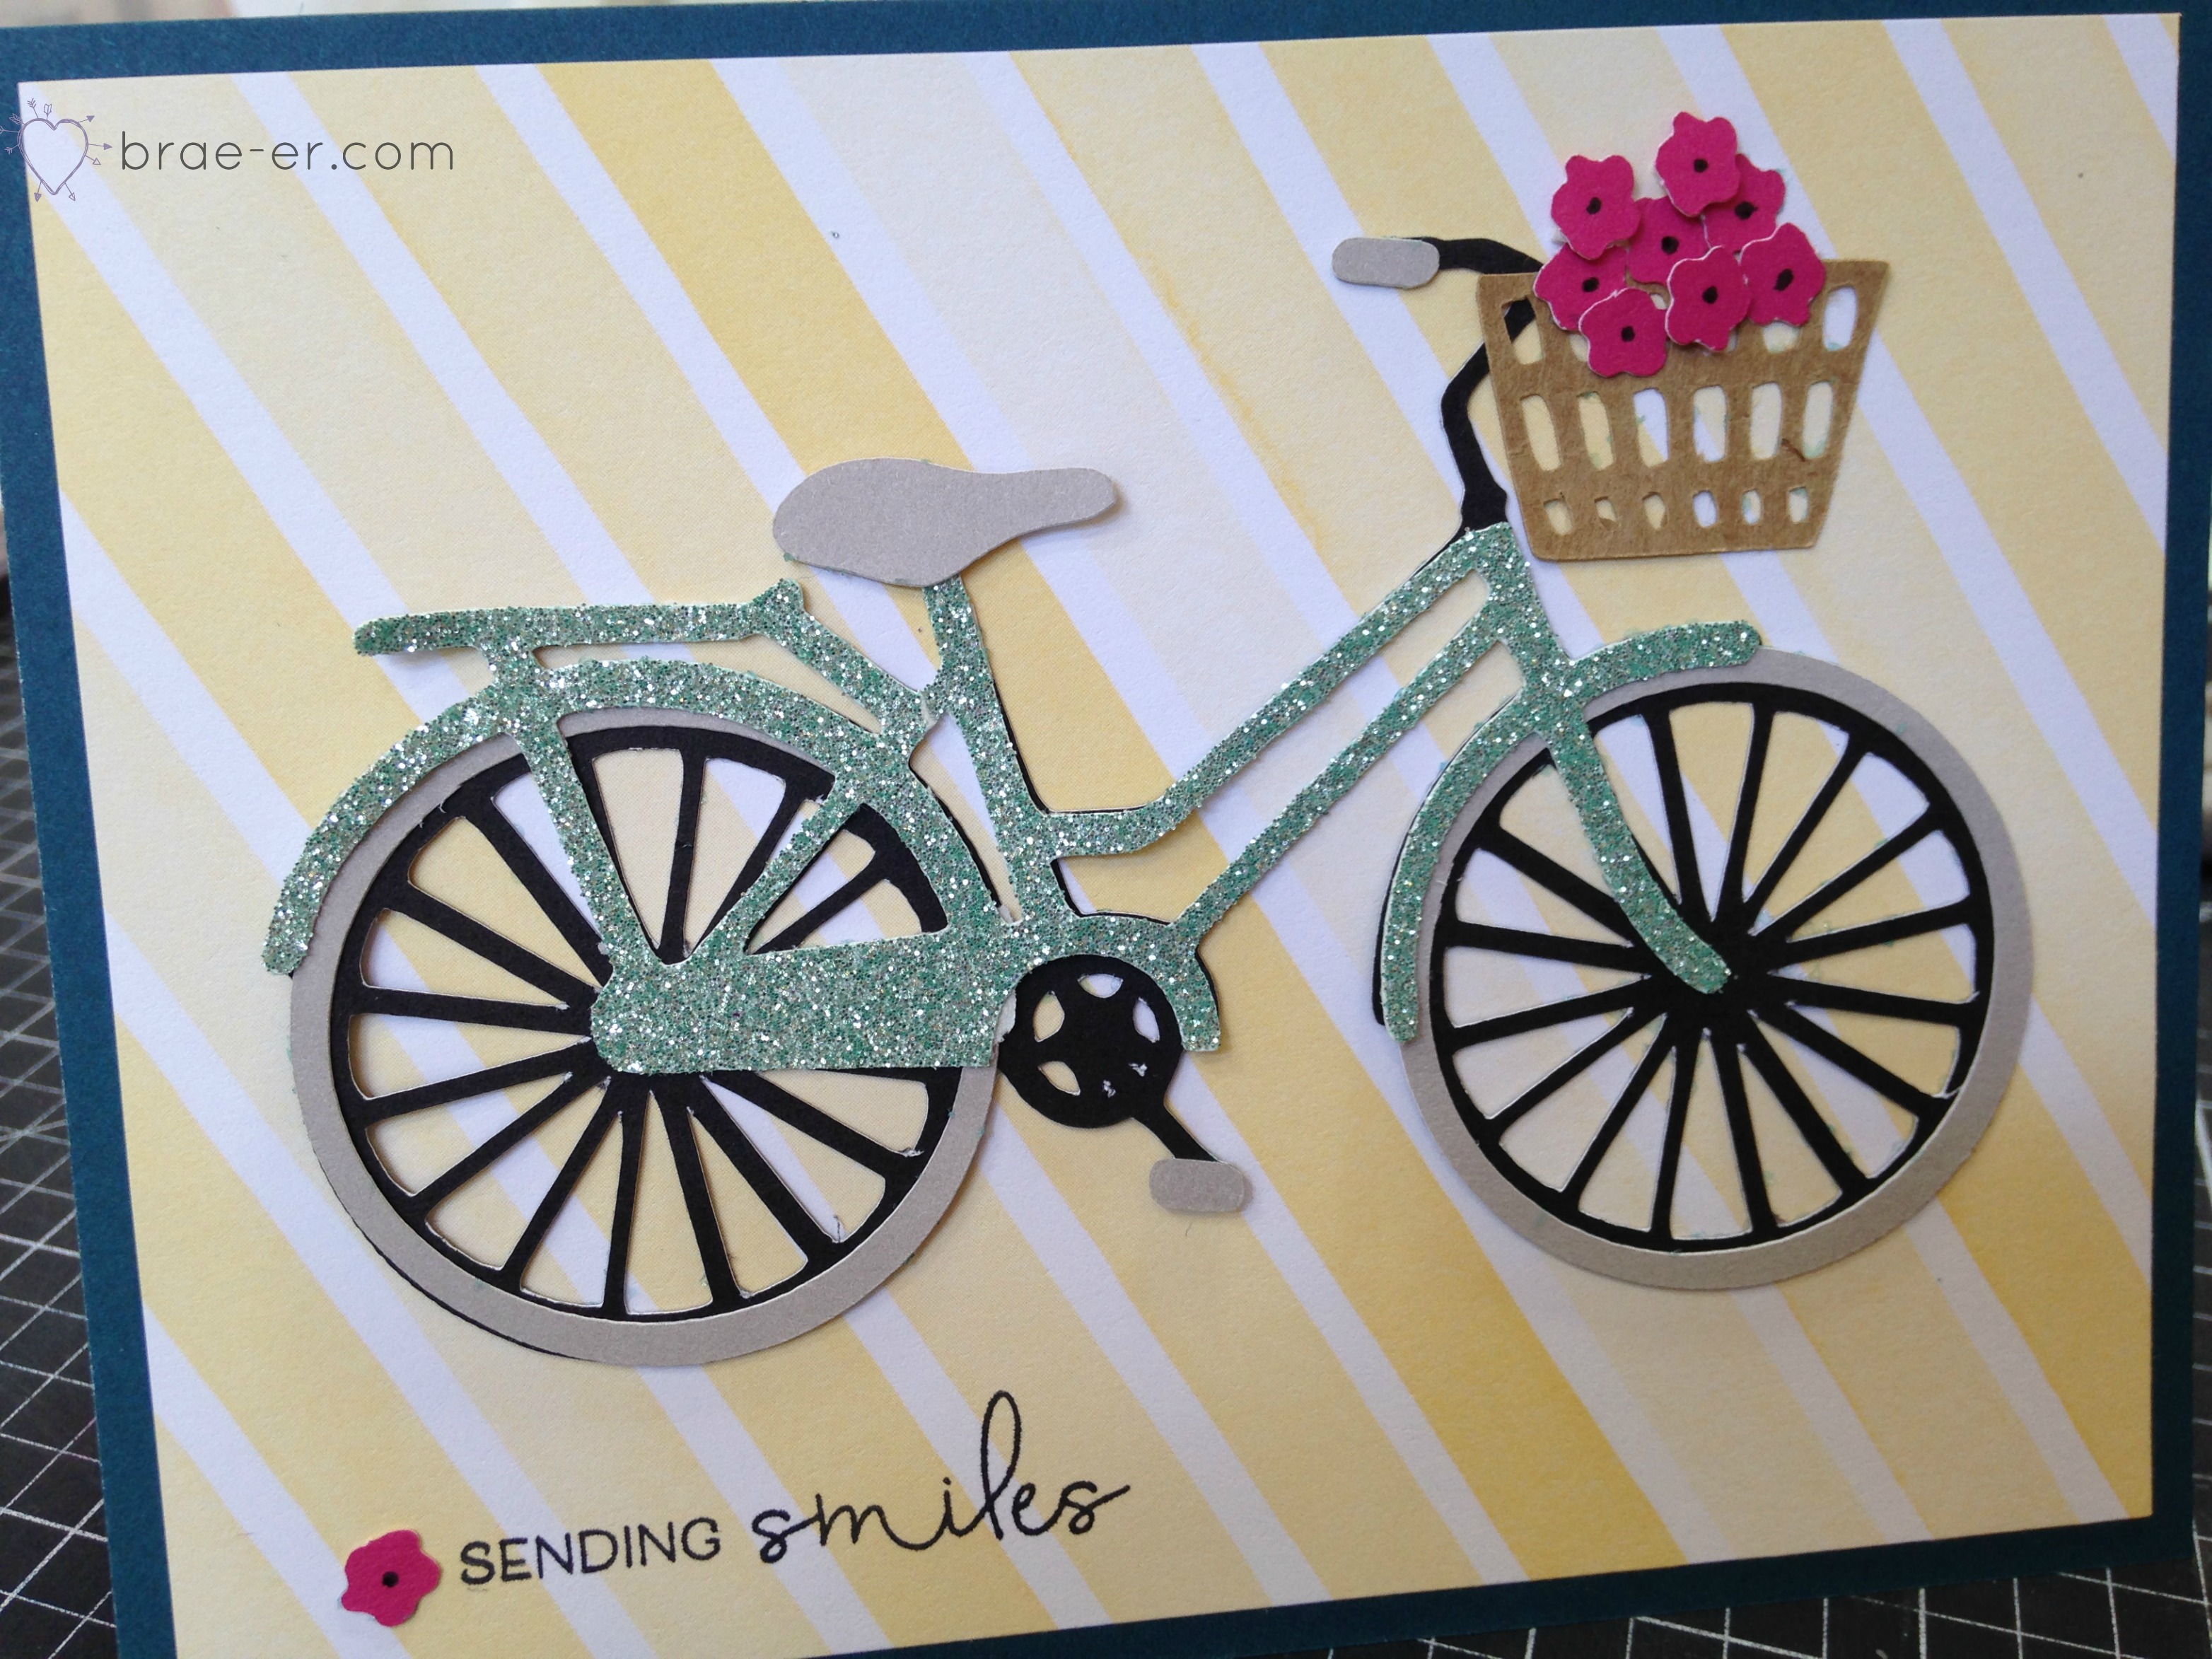
Now here is a sneak peek for you card ladies. How cute is this bicycle and basic! This image is on the flower market cartridge AND the stamped sentiment is from the one (of three) stamp sets that come with the cartridge (as well you will receive a full pack of cardstock to use in making all your pretty projects). Other items used on the bike are Whimsy fundamentals and Sea Glass Glitter paper.
So- have you fallen in love yet??
I sure have! You can get all this great stuff on your own Flower Market cartridge by visiting my SHOP.