Have you had a chance to check out our new product line? Well, Spruced Up is only one of two fantastic paper suites and I cannot get enough of it! Today I want to share two cards I have created with the items available in that suite.
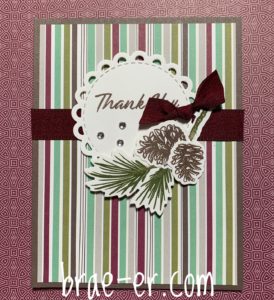
My first card uses the Spruced Up paper, The Spruced Up Cardmaking Stamp and Thin Cut, Sangria Ribbon, Bitty Sparkles, and our new Scalloped Circle Thin cut. It came together really quickly and turned out beautifully!
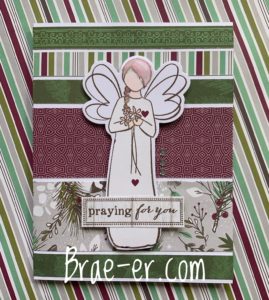
My second card was inspired by an Australian consultant, Laura Beachem. This one features different papers in the Spruced Up paper suite as well as the Angel Hugs Stamp and thin cuts (this set is just fantastic!).
What do you think? We you be more likely to make the first or second card?
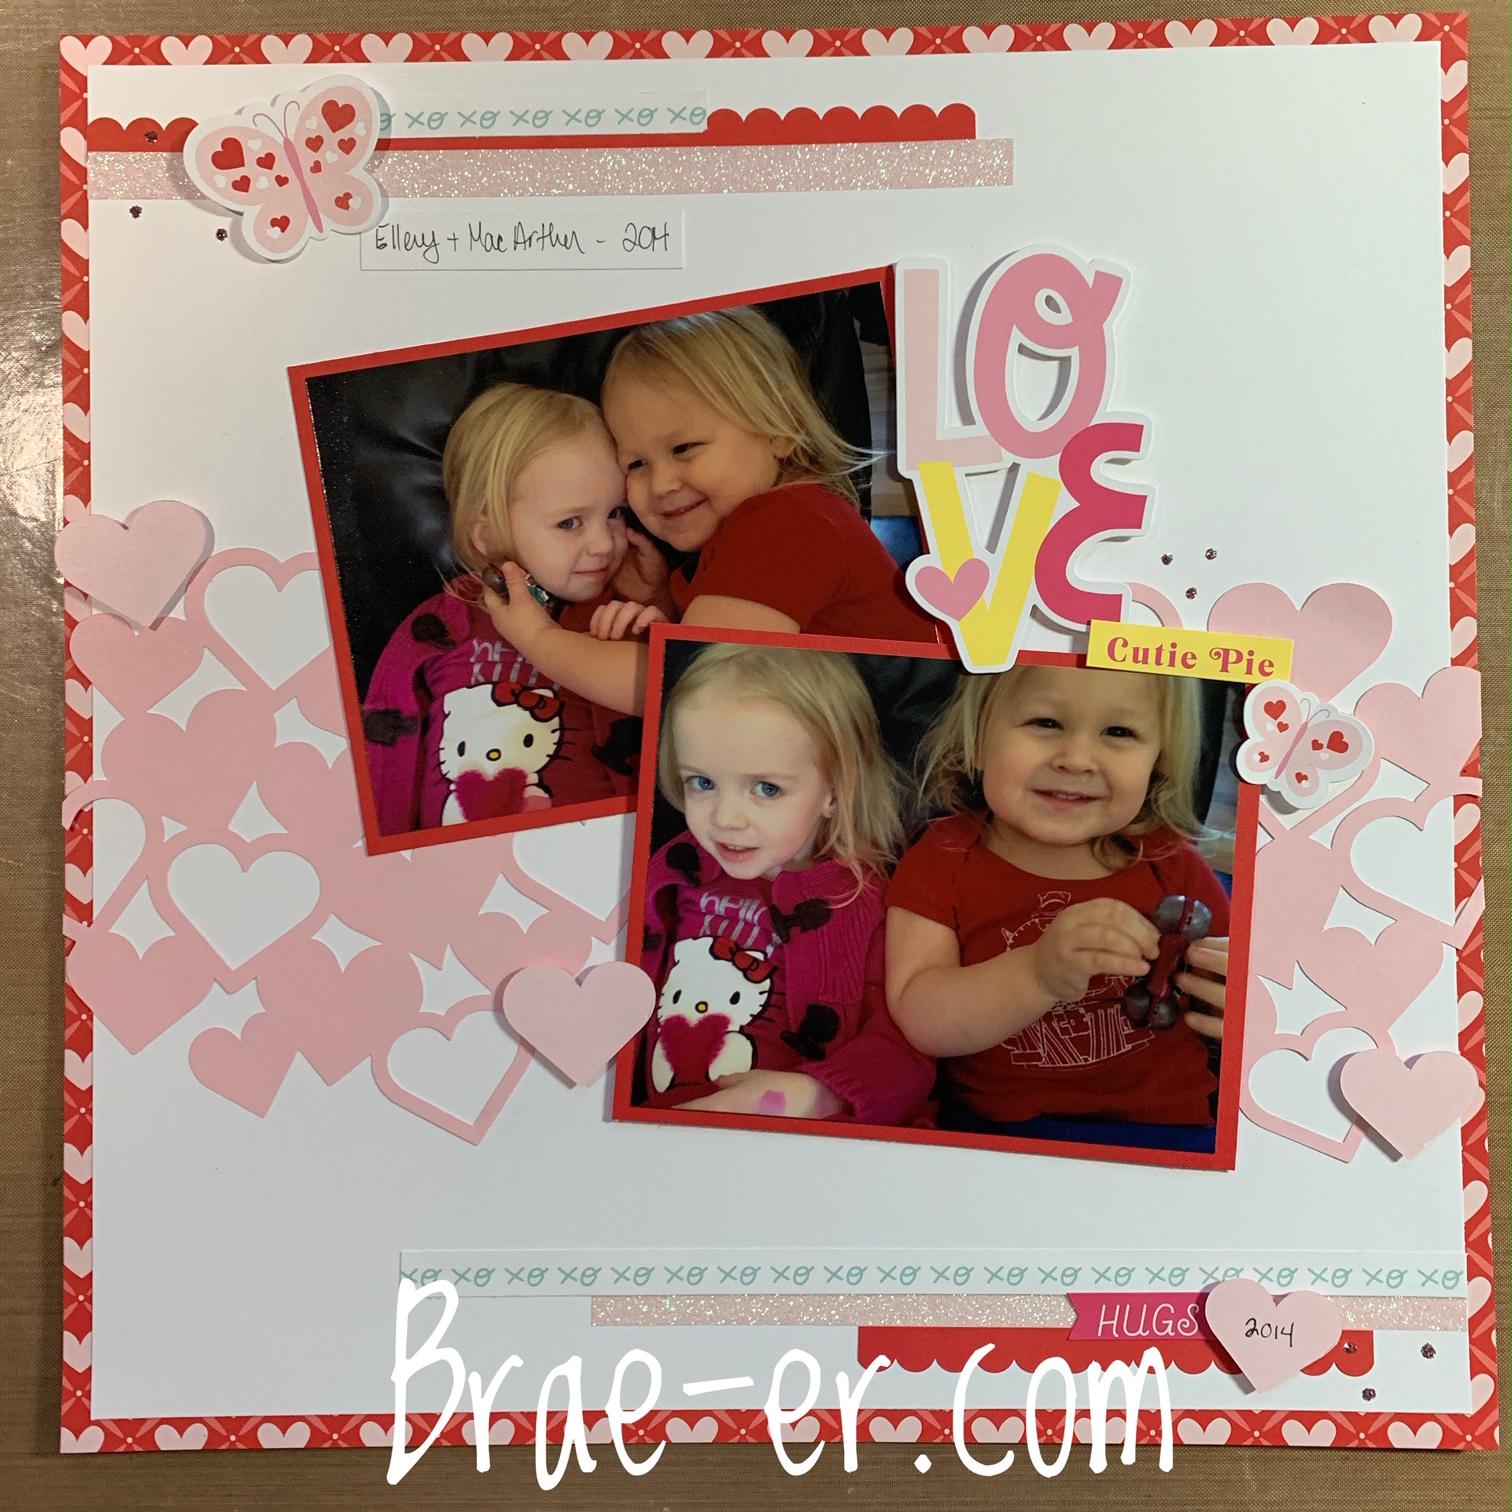
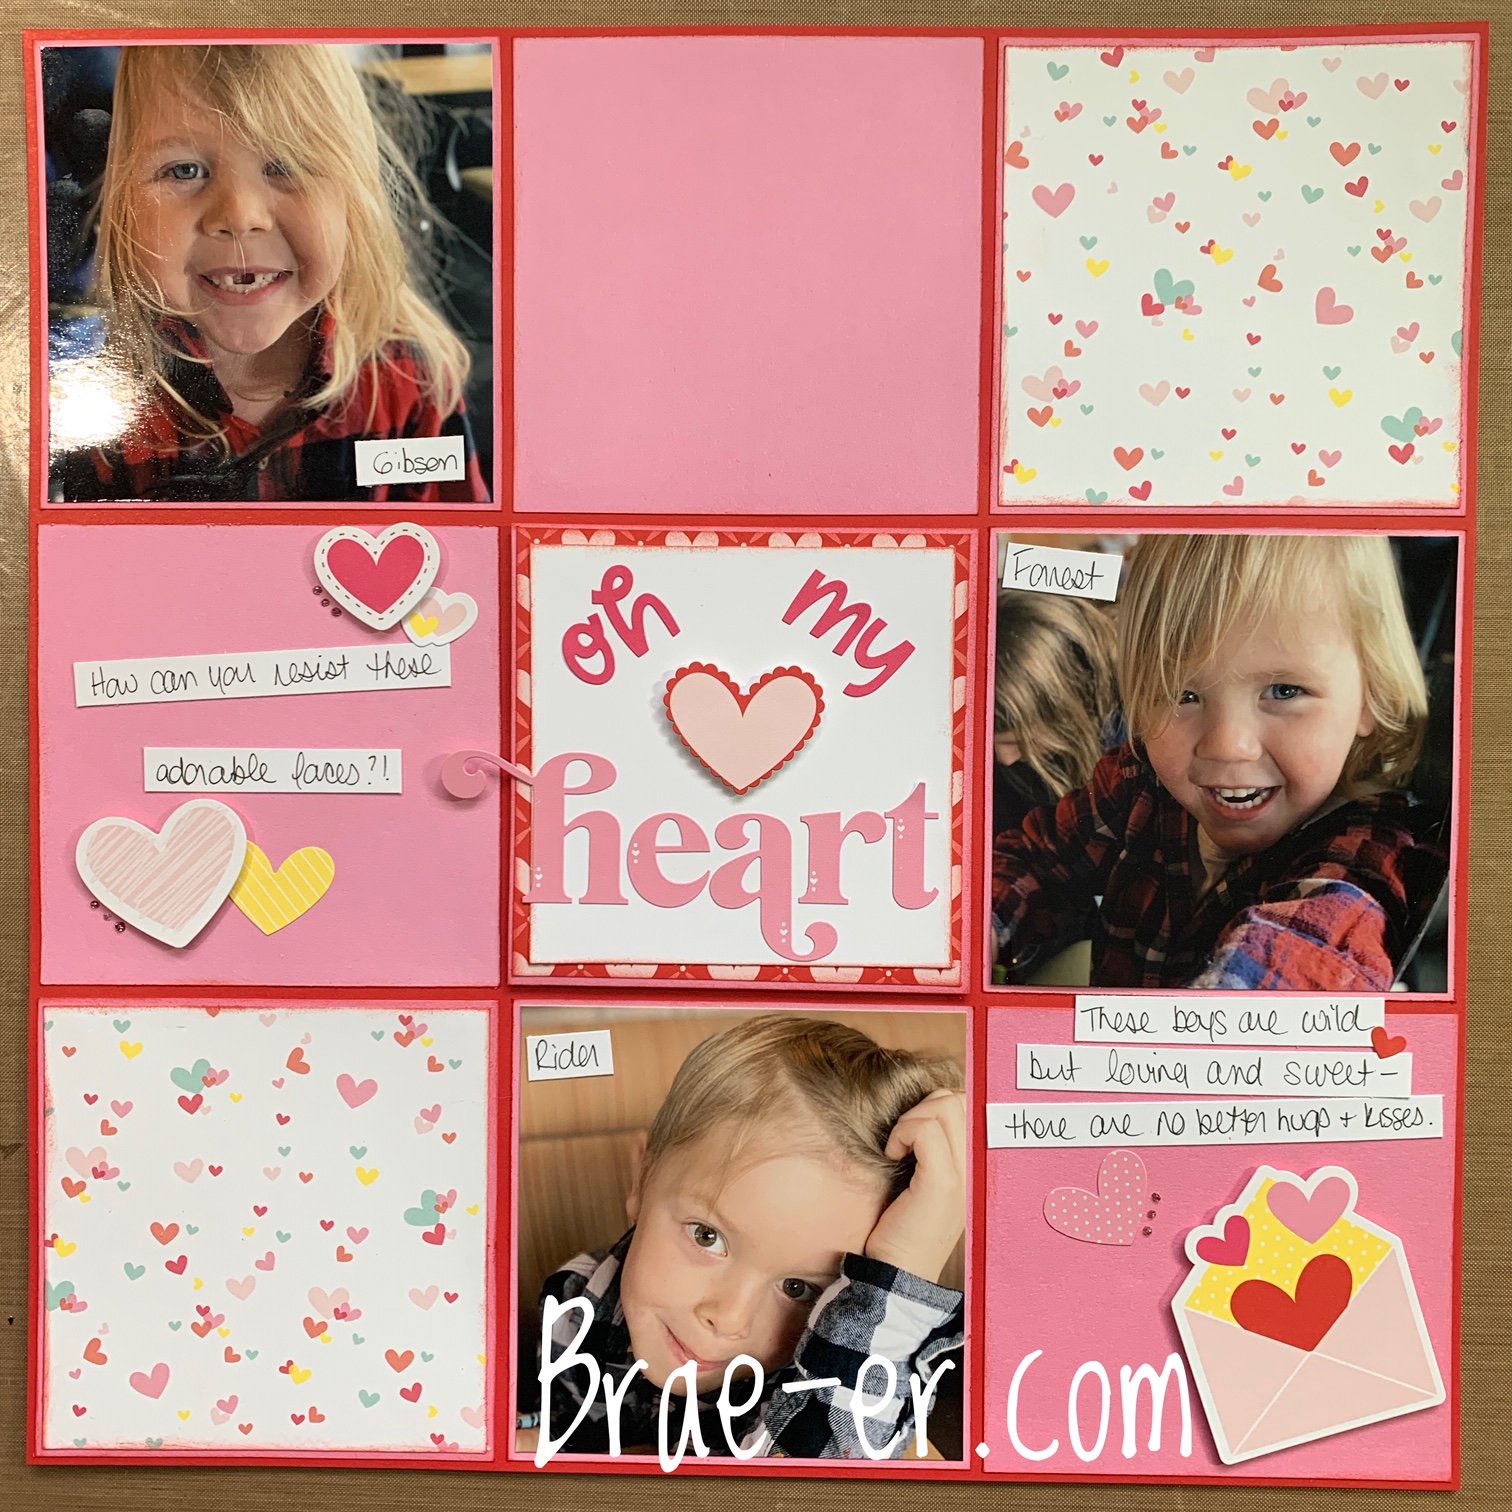
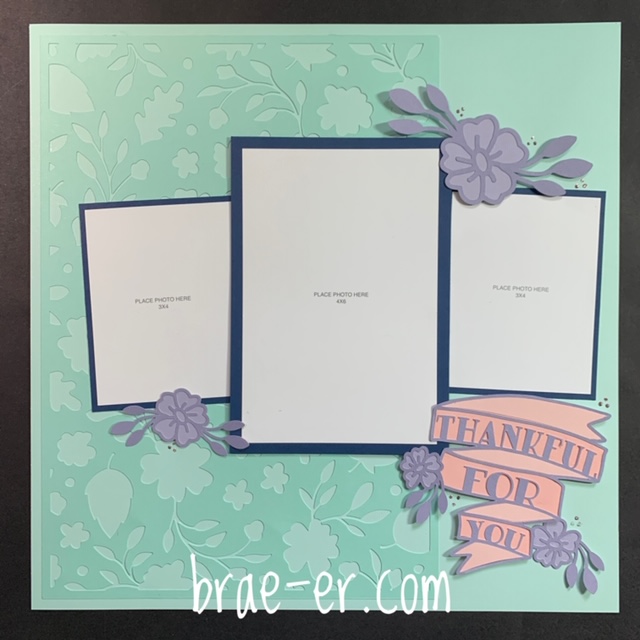
I have spoken about the great feeling (and smell) of a new paper pack. Well, we just released this new special in time for Valentine’s Day- Oh my Heart. It is super-cute and has everything you need for adorable pages and cards. Here are some of the one page layouts I have had the pleasure of creating.
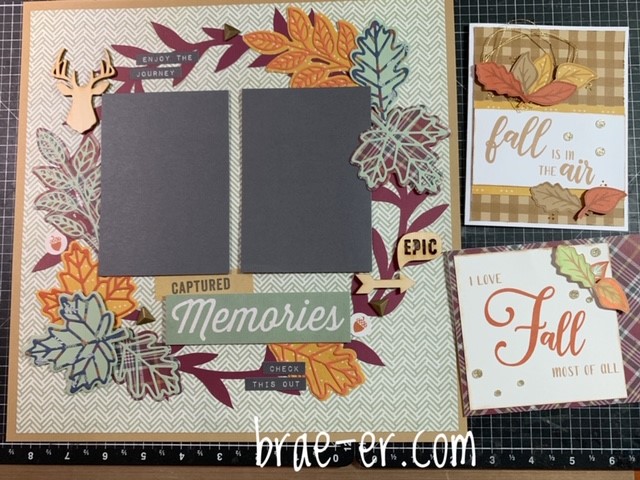
Welcome to the Cross Canada Blog Hop. This month we are featuring Hawthorn- the PERFECT collection for all things fall. If you are coming from Sheena’s blog then you are on the right path. Read on and follow the link at the bottom of my post to continue across Canada.
For these projects, I used the Hawthorn paper collection and coordinating embellishments. For the cards, I also included the October Stamp of the Month and the Build a Plaid stamp (seriously, this one is a FAV of mine!!). The leaves on the layout were created using our Layered Leaves die-cut- LOVE this as well!
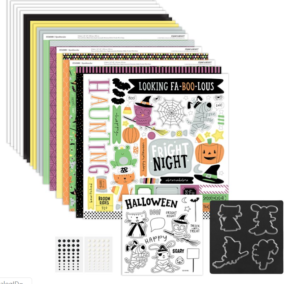
Have you seen the latest Halloween paper from Close to my Heart? It is so perfect but is also pretty versatile! You can buy the individual parts – paper, cardstock, stamp and die-cut- OR you can get a discounted bundle of all these goodies!
Want to see what you can create with these?
Watch the video below and don’t forget, you can purchase these items through my SHOP to create your own Spooktacular pages!
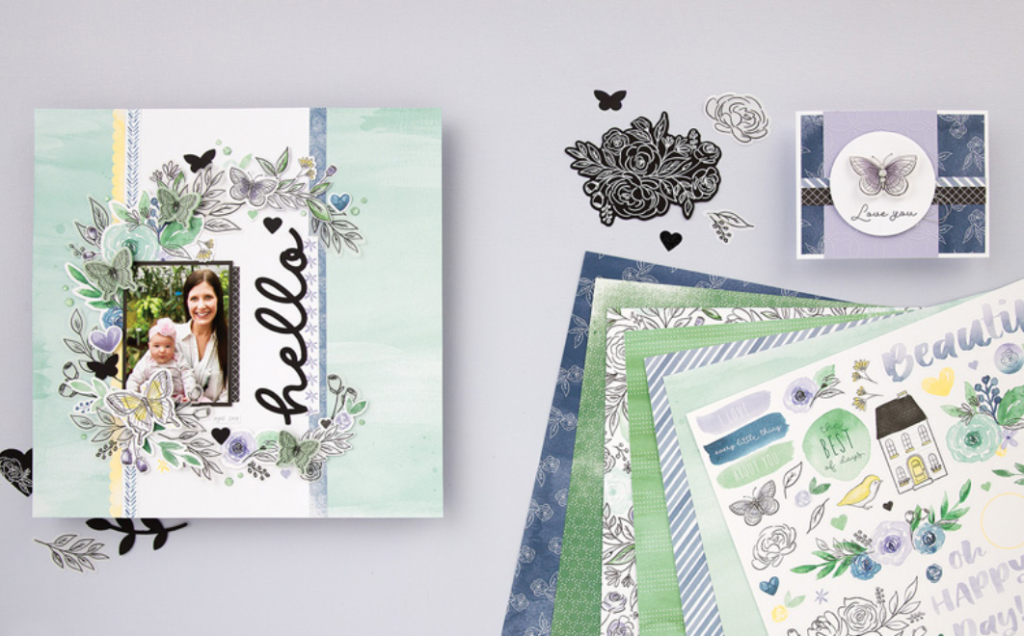
Welcome to the Cross Canada Blog Hop. If you are coming from Sheena’s blog then you are on your path across this great country of ours. This month, we are all featuring one of our new paper collections, Every Little Thing.
This collection is sure to be a hit. Why, you ask? Because it has BUTTERFLIES!!! Vellum and stamp with matching thin cuts are available with this collection and everyone loves those pretty little beings.
Here is what I have done with this collection:
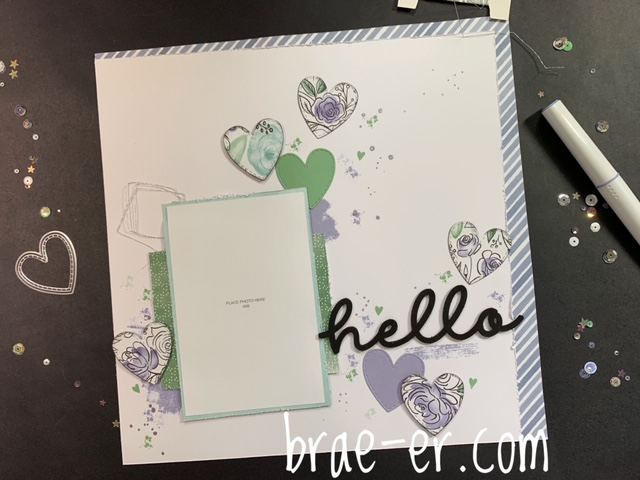
On the first layout I used parts of the Every little Thing collection and combined it with our Stitched Hearts thin cuts, Wisteria shimmer brush and the Strokes of an Artist stamp set. I stamped in Wisteria and Julep ink. Lots of layering and lots of just going with it to achieve this look- I like how it turned out and it is very different from the next look.
This layout was created using the Complete Creativity CTMH Cricut collection that was just released! It is a fantastic collection of 24 projects that can be broken up and used in so many different ways- like on this layout. In the Cricut collection all of these images are used to create a very pretty card- I ungrouped, resized and created this pretty one-page layout. My only addition was some Pink Taffeta Stickles to add some sparkle! If you want to check this cartridge out then click here.
Feeling inspired by this collection yet? You are not done yet- now it is time to hop on over to Brandi’s blog to see what she has created for you!
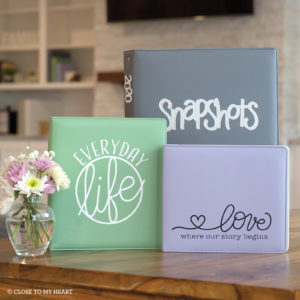
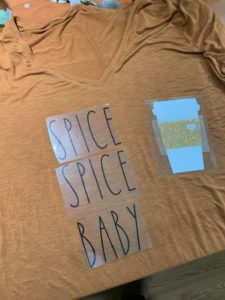
Yesterday, Close to my Heart introduced our newest line of product to the world. It is a fantastic line full of so much goodness! It is hard to pick what to share first. But I have settled on our new Heat Transfer Vinyl- why? Because I am having so much fun with it!! We have a range of colours that come in 12×12 sheets (three sheets in a pack). There are the obvious uses for heat transfer vinyl (some of which I have embraced) and there are the uses with our other products- like our albums (pictured below). If HTV (heat transfer vinyl) is new to you then this post may be of help. Read below to see how to use HTV and make the cute t-shirt I am wearing in the last photo!
Step one: Create your image. We have a number of options depending on what you would like to do. If you want to create the t-shirt I created you can find that project in Design Space.
I also recommend checking out the SVG files that we released yesterday- there are all very cute and perfect for a variety of craft projects. You can find them here.
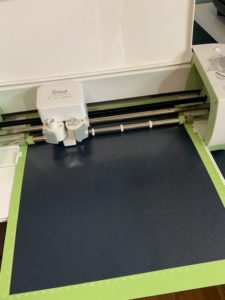
Once you have your image ready in design space you can cut it out. Here are a few, key tips.
*mirror your image
*shiny side of our vinyl is placed down on the cricut mat
*ensure that you select the right material type (your dial should be set to custom). I set my CTMH vinyl to the Everyday Iron-on setting or the Glitter Iron-on setting (depending on the material I was using).
Step Two: Then MAKE IT!
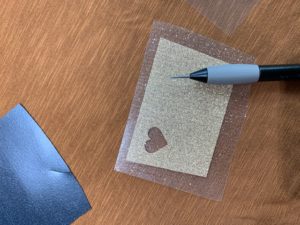
Step Three: Once your images are cut- remove any excess vinyl (set that aside for later projects). You then need to weed the image. I use my CTMH piercing tool to help pick up the bits of vinyl that are garbage. The rest of your image should be left on the clear backing sheet.
Step Four: I place all my weeded images on my shirt so that I can get a feel for where they will be once I press them. If I am happy with them then I will begin to heat set. In this project, I set them piece by piece to ensure it all lined up.
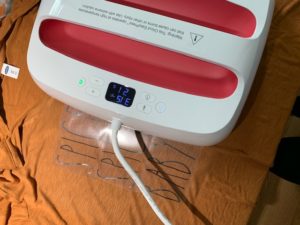
Step Five: Begin heat setting your vinyl.
To ensure I am using the proper settings I use the Cricut heat guide. This guide will tell you the time and temperature and lets you select the material you are using. It also allows you to indicate which easy press you are using. A great resource!
As I pressed each image I would remove the backing to ensure it was secure. I then protected it with the same piece of backing as I pressed each subsequent image. You can see that in the below picture.
You will need to layer the vinyl on the coffee cup (holding pumpkin spice of course). I pressed the white vinyl like all the other and then layered the glitter vinyl. I used excess backing to protect the exposed white vinyl when I pressed the glitter vinyl.
and VOILA! I could not be happier with my new fall, weekend t-shirt. Bring on all the pumpkin spice!
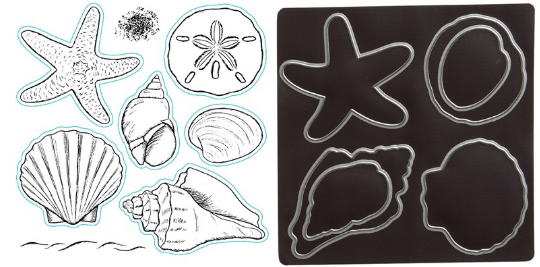
Welcome to another card series- this time I am sharing the Beach Treasures stamp set (which you can purchase with a coordinating thin cut if you prefer to have zero fussy cutting). I love this set and it can work on cards or layouts- who doesn’t spend many a summer day beach side (especially in my part of Canada where we are wedged between two lakes). Our lazy beach days inspired all of these pretty cards.
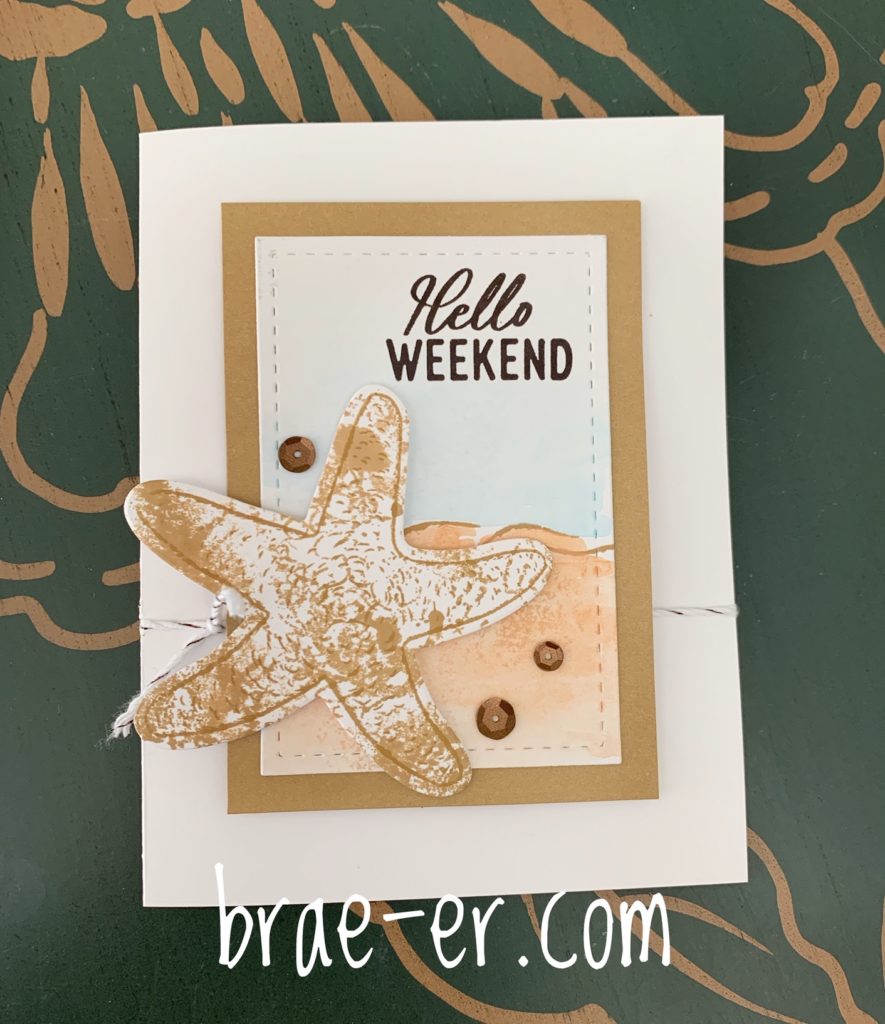
Hello Weekend card- this one is created with a water-coloured background. I cut out the stitched rectangle and stamped the sand line with toffee ink. I then stamped some of the ‘sand’ pattern in toffee. Over top of that, and the sky, I added some water-colour paints to create my background. Only when very dry did I add my sentiment with black ink.
To create my starfish I stamped in toffee ink (and cut him out using the thin cut set). I think used my toffee ink and ‘smooshed’ it on my all-purpose mat. I added a few drops of water to the ink to create some pooling and dipped my starfish in to create this patterned look.
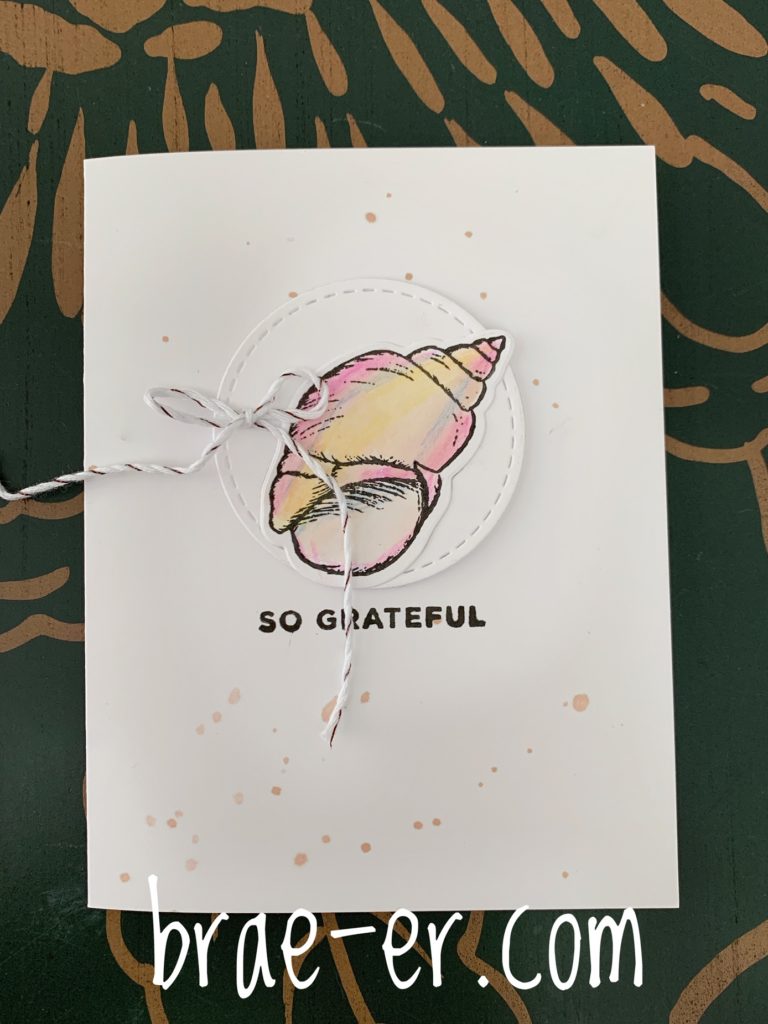
So grateful card- I love the simplicity of this card. I used my waterbrush and picked up some of the toffee ink from the lid of the stamp pad. I then flicked this ink across the card base. Using a stitched circle as a frame, I added the conch shell which had been coloured with our watercolour pencils. Some gold and white twine finished the look.
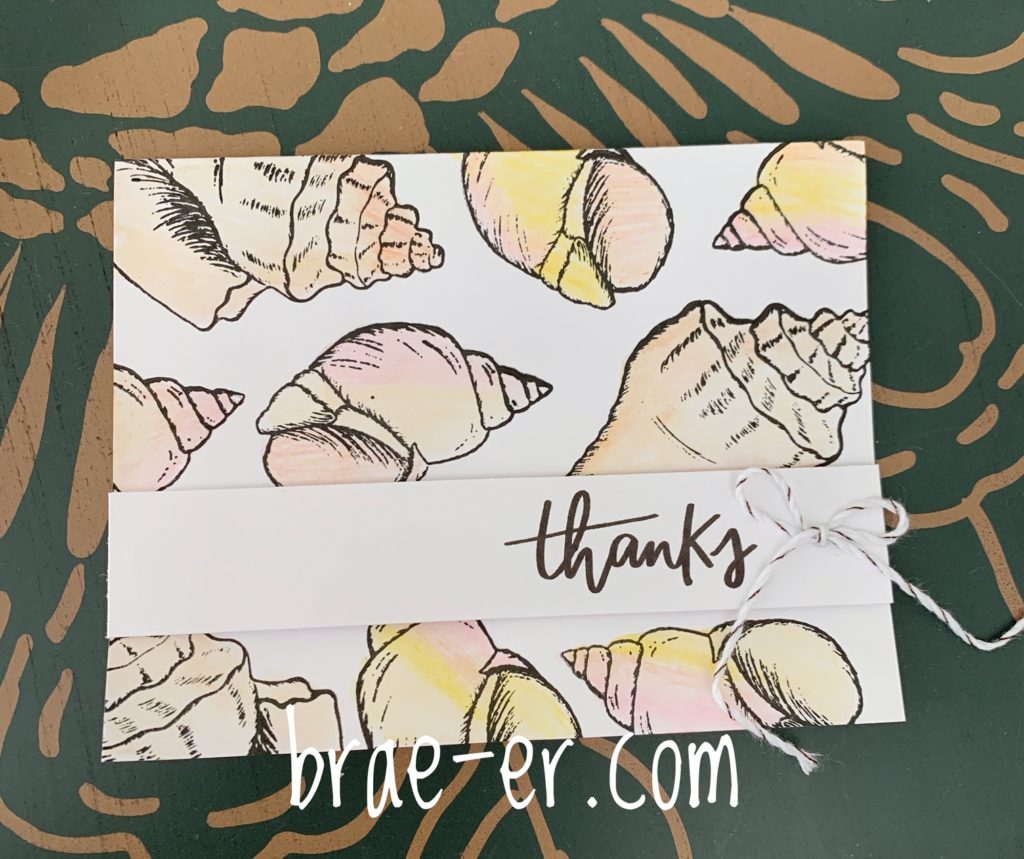
Another simple card and this one also uses very little cardstock! The background is random stamped with the seashells in the Beach Treasures set- I then coloured them in with the watercolour pencils. A simple piece of white cardstock was added across the card to hold the sentiment and some gold and white twine finishes it off.
Now what about all these sentiments? These are all from the August stamp of the month: From me to You. It is such a great stamp set!
This set, and all the other items featured on these cards, are available on my SHOP
BUT they all retire soon so don’t delay – August 31st is the LAST day of the current Idea Book.
You may be watching the calendar and checking off each day- especially if you are home with your kids every day of the summer. It is also possible that you have loved every moment and every fight and dread the routine of back to school lunches, early mornings and rushing from thing to thing.
However you feel about back to school, it is time to start prepping for the first day of school photoshoot. I created the below printable for your child to complete and accompany their first day of school photos on your scrapbook pages. My kids love looking back at their first day of school pages and seeing what they thought, who they counted as friends and what their handwriting looked like.
I wanted to share this awesome Stamp of the Month: From Me to You. Why? Well, it is a card lover’s dream – super cute fonts, on-trend verbiage, and sentiments for many different occasions. This is a set you can use time and time again- I love when we release sets like this!
Below I created a few cards using some of the current product available in my shop. When you make a purchase of $50 or more, you can add this sweet stamp set on for only an additional $6! A fantastic deal and a cherry on top of your purchase 🙂
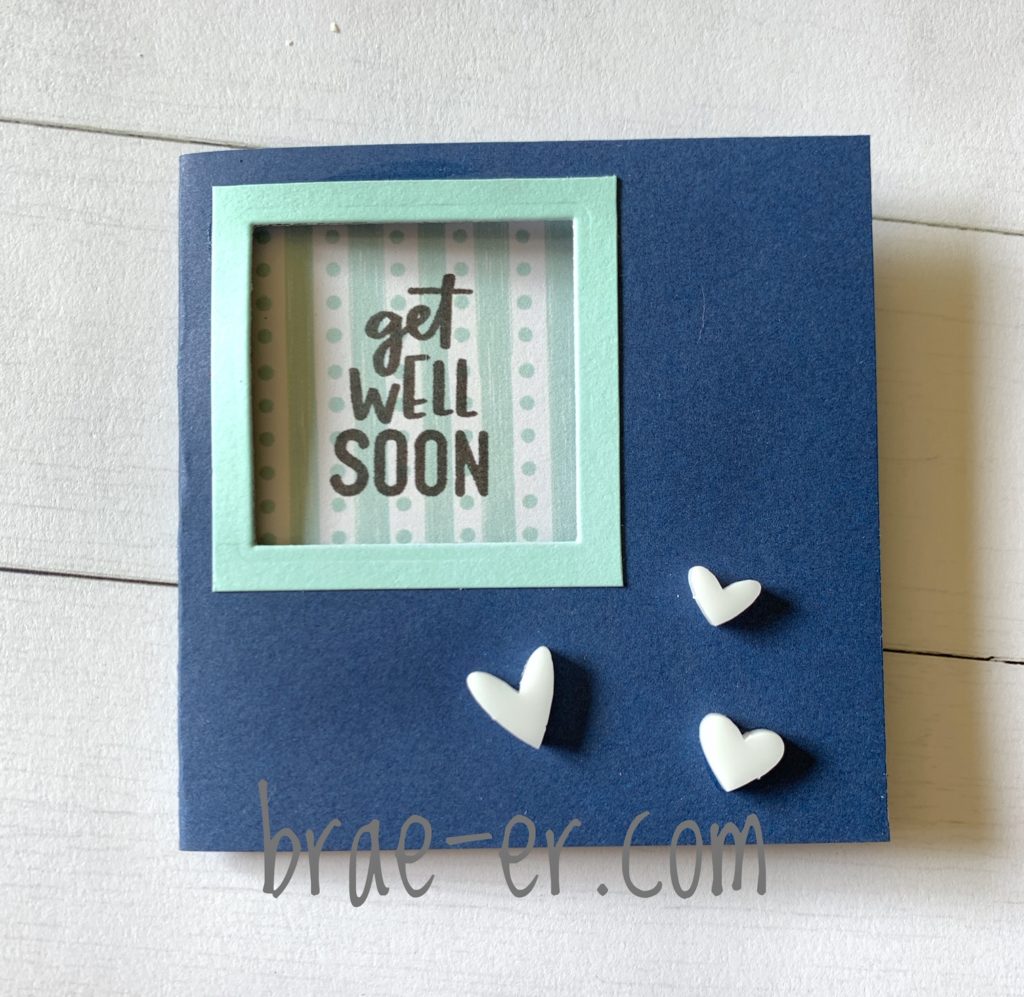
This is a little 3×3 card with a peek-a-boo window. I cut the window using one of the squares from our Stitched squares thin cut set. I placed some cute paper on the inside of the card (this was from one of our Mix-in packs) and added some acrylic hearts. Sweet and simple- this card can be used as a more masculine Get Well Soon card.
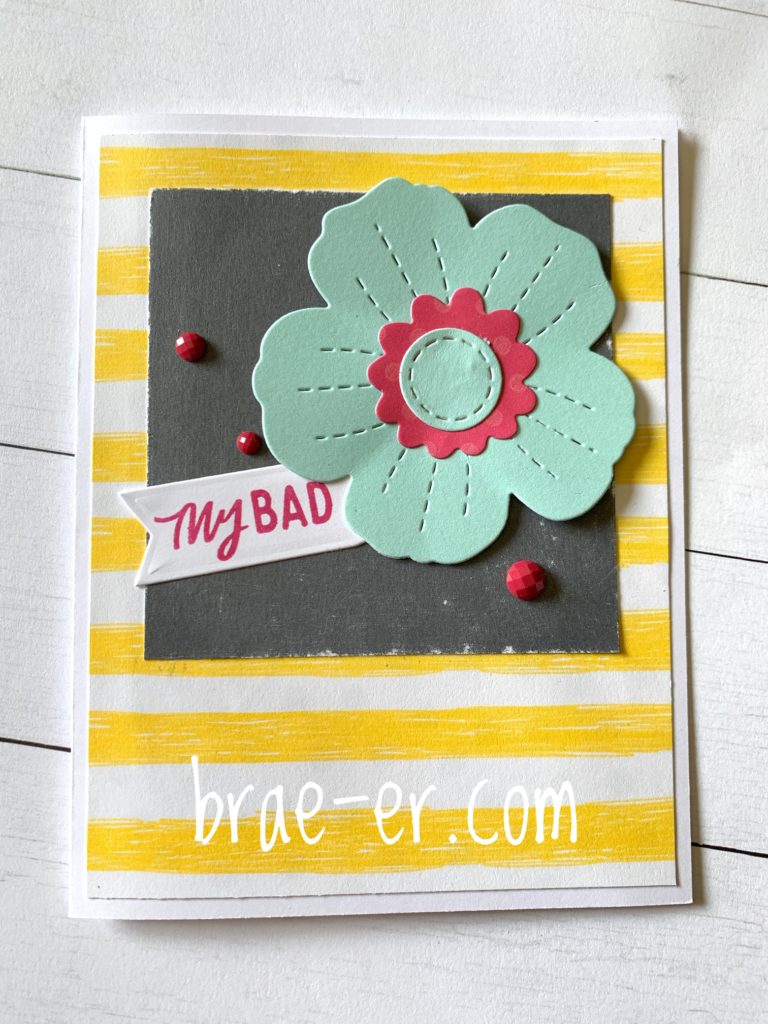
This is my FAV of this series. I love the bright yellow stripes and the flower thin cut is one that I cannot use enough- it is so versatile! The colours are bright and fun which is a nice complement for saying sorry. I also sanded the edges of the pewter cardstock – sanding is a great way to tone down a colour on a project without changing it out.
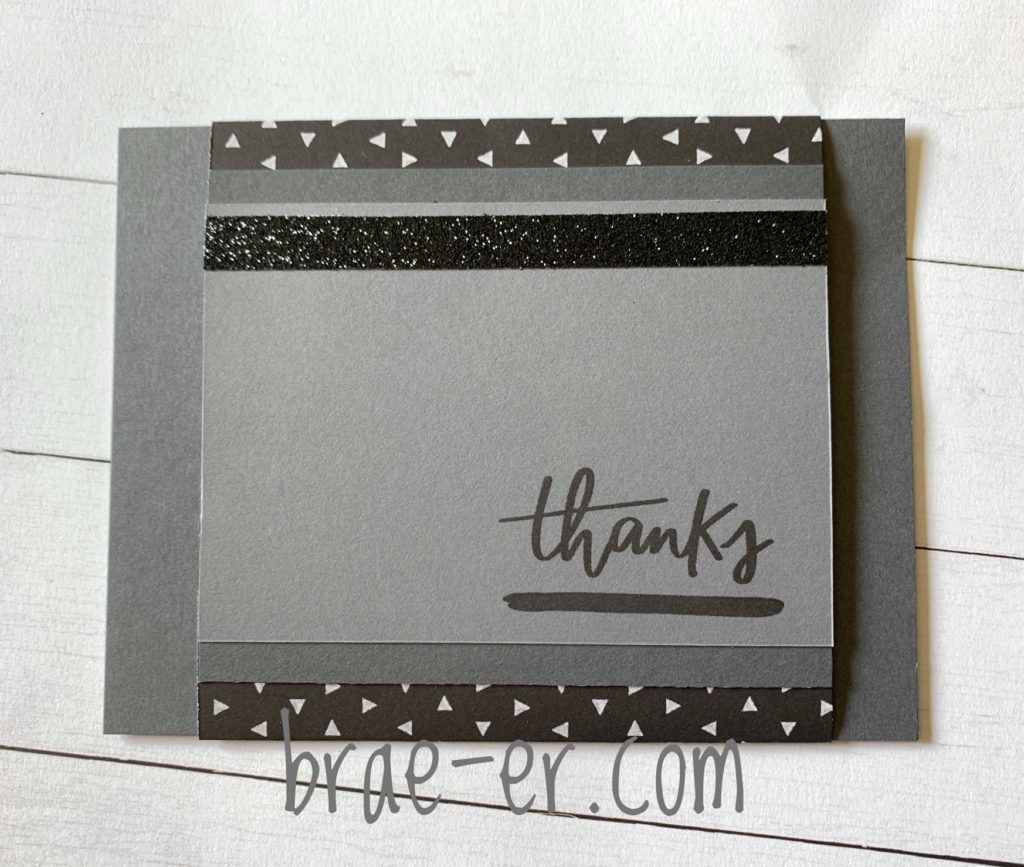
This next card is a simple thank you card that is perfect for when you need a more masculine look. The inside piece of cardstock slides out to reveal your note. The outside is a sleeve. This card is in our card how-to book Wishes and is one of my favourite designs. Mix in patterned paper and a piece of shimmer trim are also used.
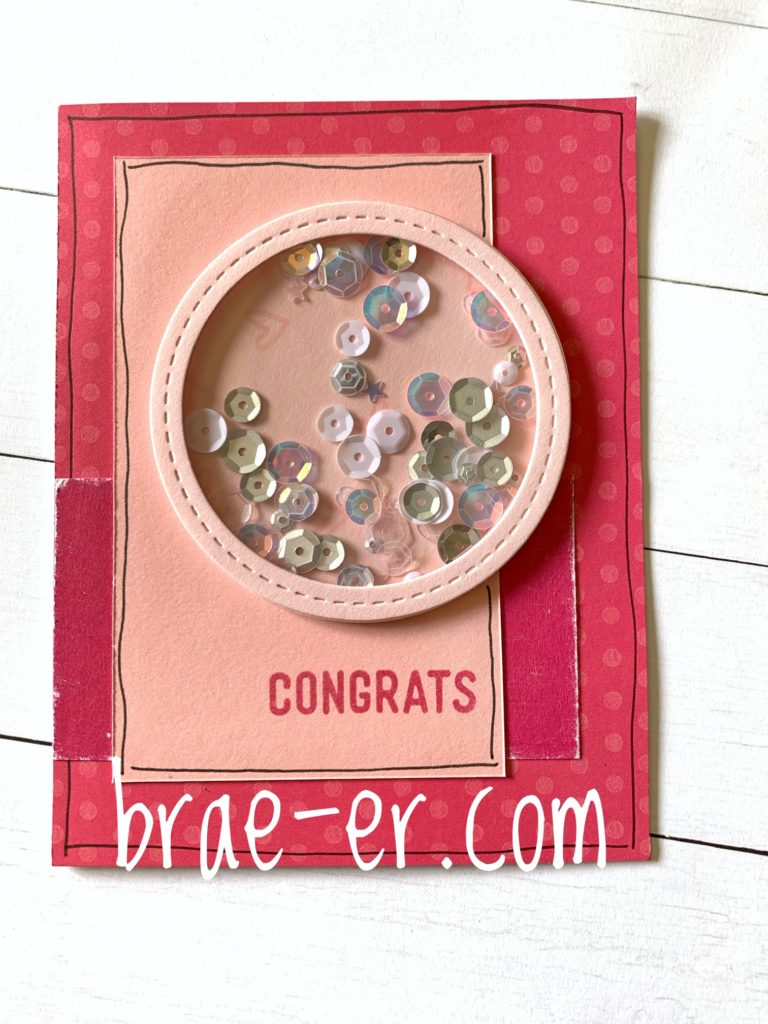
Lastly, I have this fun pink card featuring a shaker window (love me a shaker window!). Some sanding and a journaled border add some more fun to this card. Inside the shaker window I also stamped some of the hearts from the SOTM- you can just see them behind the sequins.
What sentiment would you use first if you owned this stamp set? Post your reply in the comments below.
There are so many reasons why now is the BEST time. Here are just some of the top reasons:
*you can get our 35th-anniversary no-kit option for only $35! This gets you in, gives you your website and $35 in CTMH cash.
*the fall idea books are LIVE to consultants- you can be the first of your friends to have all the new goodies!
*we have a fantastic customer special this month- that will support you in reaching reward levels and earning even MORE PRODUCT!
*we have an AMAZING selection of new product being released in September- you will be prepared to take advantage of all that this will offer.
*we earn a great commission, which also translates into a great discount for you on all the goodies you want to get. Commission is a minimum of 22% and can grow from there.
*you get to join my team! We are a pretty fun group of people and we love to add passionate, crafty peeps!
*support and training on so many levels- you don’t have to figure this out on your own. You have a whole team of people working with you and supporting you.