Category Archives: #card

You’ve Got a Friend in Me – May Blog Hop

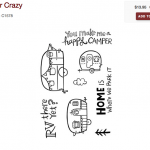
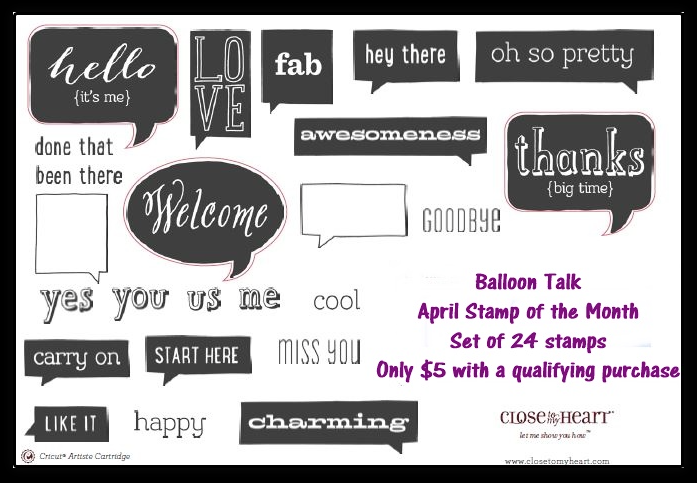
I think we are all familiar with the song from Toy Story that you are probably singing in your head right now…. and if you weren’t I likely just changed that- you are welcome!  I also welcome you to our May blog hop which will feature our stamp set of the same name and LOTS of ideas for how you can use it!   If you have come from Melinda’s Blog then you are on the right path and all you need to do is read on and click the link at the bottom of my page.you're the best free to be card

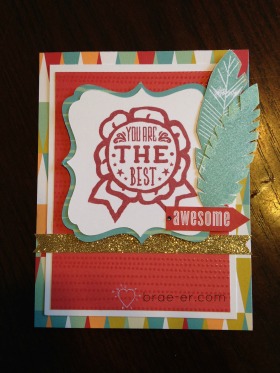
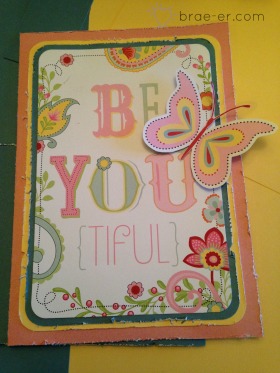
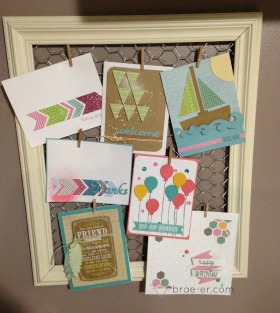
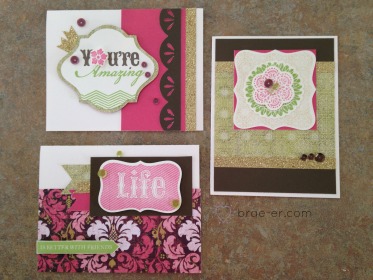
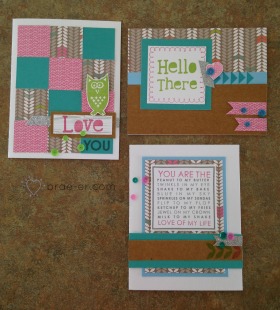
For my card I used the National Scrapbooking month paper ‘Free to be Me’.  I added some gold shimmer trim (left over from a past project) and a green sparkle for accessories.  My centre shape was cut using the Cricut Art Philosophy.  The feathers added are from the ‘Feathers’ stamp set.

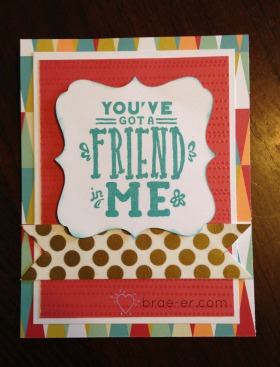
Here is a similar card but more simplified- it is what my party guests will be making this month.  The biggest difference with this one is the use of the gold polka dot washi tape to adorn the card.

friend in me free to be card


Now hop on over to Jen’s blog to see what she has in store for you!

Until we craft again, The Brae-er


Technique Tuesday: Edge Distresser

Welcome back to Technique Tuesday- I apologize that I have missed a few weeks but we are in the process of selling our home and a messy craft room is just not allowed. Add that to all the time spent out of my home and my artwork creation has gone down- hopefully we sell soon and I can get back on track!

This tuesday I would like to show you how to use an edge distresser- this is a very simple tool to use and super cheap- ours is only $2.50 and will last you a LONG time!

To use just pick it up and start by gently rubbing one of the blades along the edge of your paper.  If you want more of a distressed look then keep going and add some pressure- you can always add more but you can never take it away once there. I LOVE this look – our paper contains a white core and this really helps to frame an image and add some interest.

IMG_1309

Here is a close up on the sides of a card I was working on using this technique.

edge distress after


edge distressed finished cardAnd here is the finished card! I used one of our Picture my Life cards from out pocket scrapbooking for the main image AND another one I cut up for the butterfly.

Until we craft again, The Brae-er


Timberline Card in a Box

Recently the lady I usually deal with at my local post office told me she was retiring- she was so very excited to be setting off from her career and taking time to live in their camper at their camp site.  She told me about the RV she had just purchased with her husband and their plans for the future.  I see this lady at least once a week and she is always friendly, happy and willing to share a laugh- I will miss her! Hearing her plans set some things in action for me…. I knew I had some creating to do and this is what the result was!

Card in a box

 A card in a box (these are so fun! They are a card that folds flat and fits in a 6×6 envelope) featuring our Camper Crazy stamp set.  I used Timberline paper for by card and some of the stamps and accessories that come in the Timberline workshop on the go kit- in all honestly these pieces were leftovers from the kit that I had already put together (that is just how much you get!)

card in a box image 2

Here is a side view that should help you see how it is put together- to create one I just googled ‘card in a box’ and found a tutorial that walked me through it- they are very easy and super-fun!

Screen Shot 2014-01-25 at 4.06.54 PM  Screen Shot 2014-03-18 at 3.18.28 PM


Until we craft again, The Brae-er


Card Display using the Decor Frame

I love all the cute cards I make and receive but I find if I put them away in a box I tend to forget I have them and NOT give them away as I should.  Recently I started putting my completed cards up on one of our decor frames (this is the colonial white one that comes with a chicken wire insert) and I have to say I love it!!

It looks beautifu

It looks nice

and I now use my cards MUCH more- after all the point is not to accumulate this HUGE pile of cards but to give them away and spread joy and thoughtfulness.
decor frame card display

There are so many fun ways to use our decor frames- here are the two styles we currently sell.

Screen Shot 2014-03-15 at 12.46.26 PM    Screen Shot 2014-03-15 at 12.46.44 PM

Until we craft again, The Brae-er


Ivy Lane Card Workshop Kit

Earlier this week I introduced you to the Lollydoodle Card Workshop- every Idea book we have two wonderful card kits to chose from (or you can get both because they are so cute and who doesn’t need cards!).  This is our Ivy Lane Card workshop kit- you receive the paper, instructions, accessories and exclusive stamp set all for only $24.95.  Now the one thing to know about this one is that it does require you to own the CTMH Cricut Art Philosophy if you would like to create it as shown BUT if you don’t have the cartridge yet you can always you straight cuts to finish the card kit OR hand trim some of the images (these ones are not so bad for that).  This kit is worth it! The cards are very beautiful!ivy land card workshop

 Here are the images as they appear in the kit- feel free to click on the link if you would like to order this kit!

Screen Shot 2014-03-14 at 8.37.42 AM

Until we craft again, The Brae-er


April Stamp of the Month Blog Hop: Balloon Talk

Welcome to the April Stamp of the Month Blog hop!   This month we are showcasing the stamp set “Balloon Talk” a great set that has SOOOOOOOOO many options!  If you have come from Maureen’s blog then you are on the correct path in our circular hop.

Screen Shot 2014-03-13 at 8.27.49 PM

I used the stamp of the month to create my ‘you and me’ card below.  I used re-inker in one of our spray pens to add some texture to my white cardstock- I kept all my colours in the teal and orange family (I love the look this gave the card).  For my pennants I used a mix of patterned papers from Skylark, cardstock and some of our current background and texture stamps to stamp a pattern.  I finished it off with some bakers twine and a sparkle- LOVE it!

april stamp of the month card


Now hop on over to Joy’s blog but before you do please share some love and SUBSCRIBE to my blog

[widgets_on_ pagesid=”Subscribe!”]

Until we craft again, The Brae-er


Lollydoodle Card Workshop Kit

Whoooo doesn’t love a really cute card kit??

This workshop on the go kit will not disappoint- the kit includes all the paper, cards and envelopes, accessories, exclusive stamp set and a workshop guide to give you step by step instructions so that you can create the cards seen here (5 of each design)- and all for only $24.95!!

lollydoodle card workshop


If you would like to order this owl-dorable set- the click on this image to go straight to it!


Screen Shot 2014-01-25 at 4.16.04 PM

Until we craft again, The Brae-er


Paper Fundamentals: Masculine Birthday Card

Another paper fundamentals project today- this one showing a masculine birthday card.  In this project I used the beige paper (it has little embosses hearts on it) to create my pennant and the piece behind the patterned paper from timberline.  I stamped happy Birthday and added some epoxy bubbles and natural bakers twine to finish it off.

masculine bday card with fundamentals

Come back friday for another project- this one a layout!

Until we craft again, The Brae-er


Emboss it Blog Hop

Welcome to our Emboss it Blog Hop that is celebrating the release of CTMH embossing folders! I am so happy to add these to my stash (I had a few others but rarely used them) and to dig out my cuttlebug once again!  If you have hoped over from Melinda’s blog then you are on the correct path and I hope you enjoy the experience!

embossed easter card

To create my card I used the Dot embossing folder and one of our new M sized stamp sets- coloured egg.  I cut my card base on our Cricut Artiste cartridge and then layered some of our glitter paper (LOVE the glitter papers) with some slate cardstock that I embossed.  My egg image was stamped and then coloured with our markers as well as paper piecing some glitter paper onto it.  Then to add to the detail of the egg I outlined the image with a black marker (fine tip).

 Here is some of what I used:

Screen Shot 2014-02-25 at 10.46.46 AM  Screen Shot 2014-03-14 at 10.48.41 AM  Screen Shot 2014-03-14 at 10.56.19 AM

Now hop on over to Toni’s blog to see what she has in store for you!

Until we craft again, The Brae-er


Jubilee Cards

In every Idea Book there is a paper pack that is my least favourite- Jubilee was that one for the Idea Book…. but, like every time, once I start to play with it I love it! The bright, warm colours work for so many things… like my two cards here that would not have been the same if I had not used the Jubilee paper!
jubilee friend card

For the first card I used the Jubilee paper, some bakers twines, epoxy bubbles and an upcoming stamp of the month for the sentiment.  I love how it turned out!
jubilee card with pop up

This card features a fun flower popped off the top and lots of scalloped edges! Jubilee paper, Jubilee compliments and some of our Green Chevron ribbon finish this card off!

Until we craft again, The Brae-er