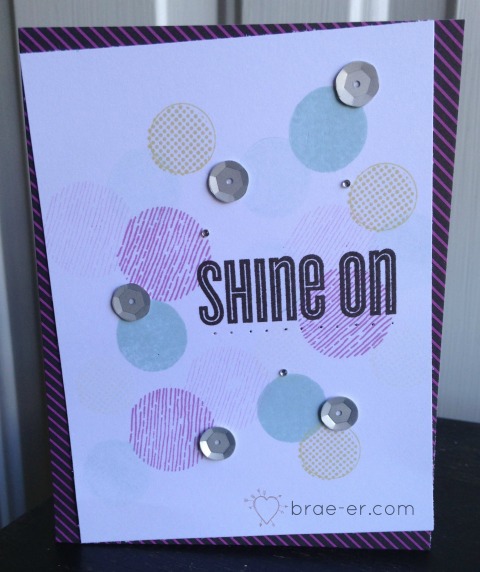
I love this card and I love the stamp set I used to create it- so simple and turned out perfectly! For this card I used the Glitter Girl stamp set (seen below) and a piece of our Scaredy Cat paper (not just for Halloween). I stamped my circles in thistle, flaxen and glacier (some of these were done in second generation stamping). One of my circles is the backside of the stamped image- did you know you can stamp with the backside?? Great way to add an image to your set!
I added silver sequins and bitty sparkles. Stamped the sentiment in black and then used our piercing ruler to add the pierced dots below the sentiment.
WELCOME to my team blog hop! My fabulous ladies have been working hard to create some beautiful projects to share our new line of product with you. As you read on you will want to click on the name I leave below to visit the next blog- keep doing that and at the end you should end up back here. If for any reason you get lost along the way, just come back to my post and you will find the FULL list of participants at the end of this post.
I am going to share with you a trio of fall cards I created.
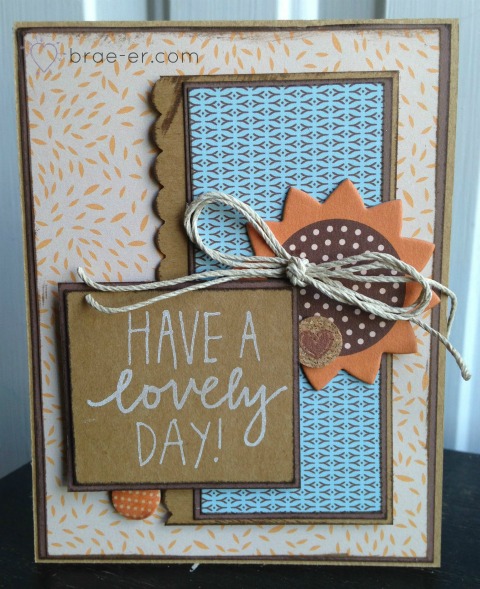
Fall Card #1: I created this using Pathfinding paper, complements and assortment. I added some natural hemp (from my stash) and stamped the sentiment from Lovely Birthday stamp set. I added some Kraft paper to the mix and finished the edges of my paper with our scallop border punch and chocolate ink.
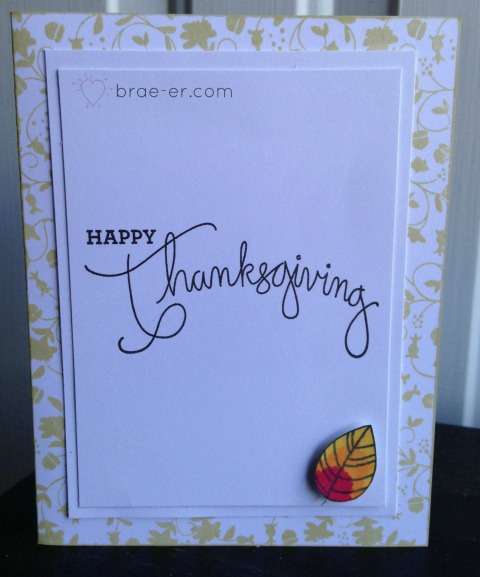
Fall Card #2: This card is made up of a lot of white daisy paper. The back piece I stamped in flaxen ink with the Season of Thanks stamp set. I also stamped my sentiment and single leaf with the Thankful Heart stamp set. I coloured in my leaf with our ShinHan touch twin markers.
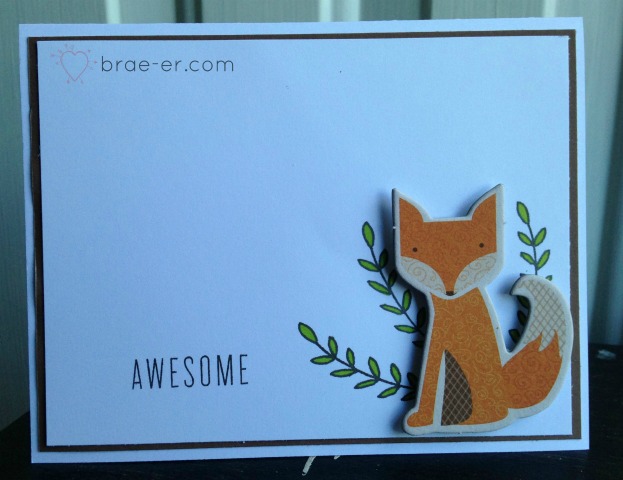
Fall Card #3: THIS is my favourite of the three and was the easiest! I used the fox that was part of the Pathfinding complements and stamps from the Lovely Birthday stamp set and the Hello Summer stamp set.
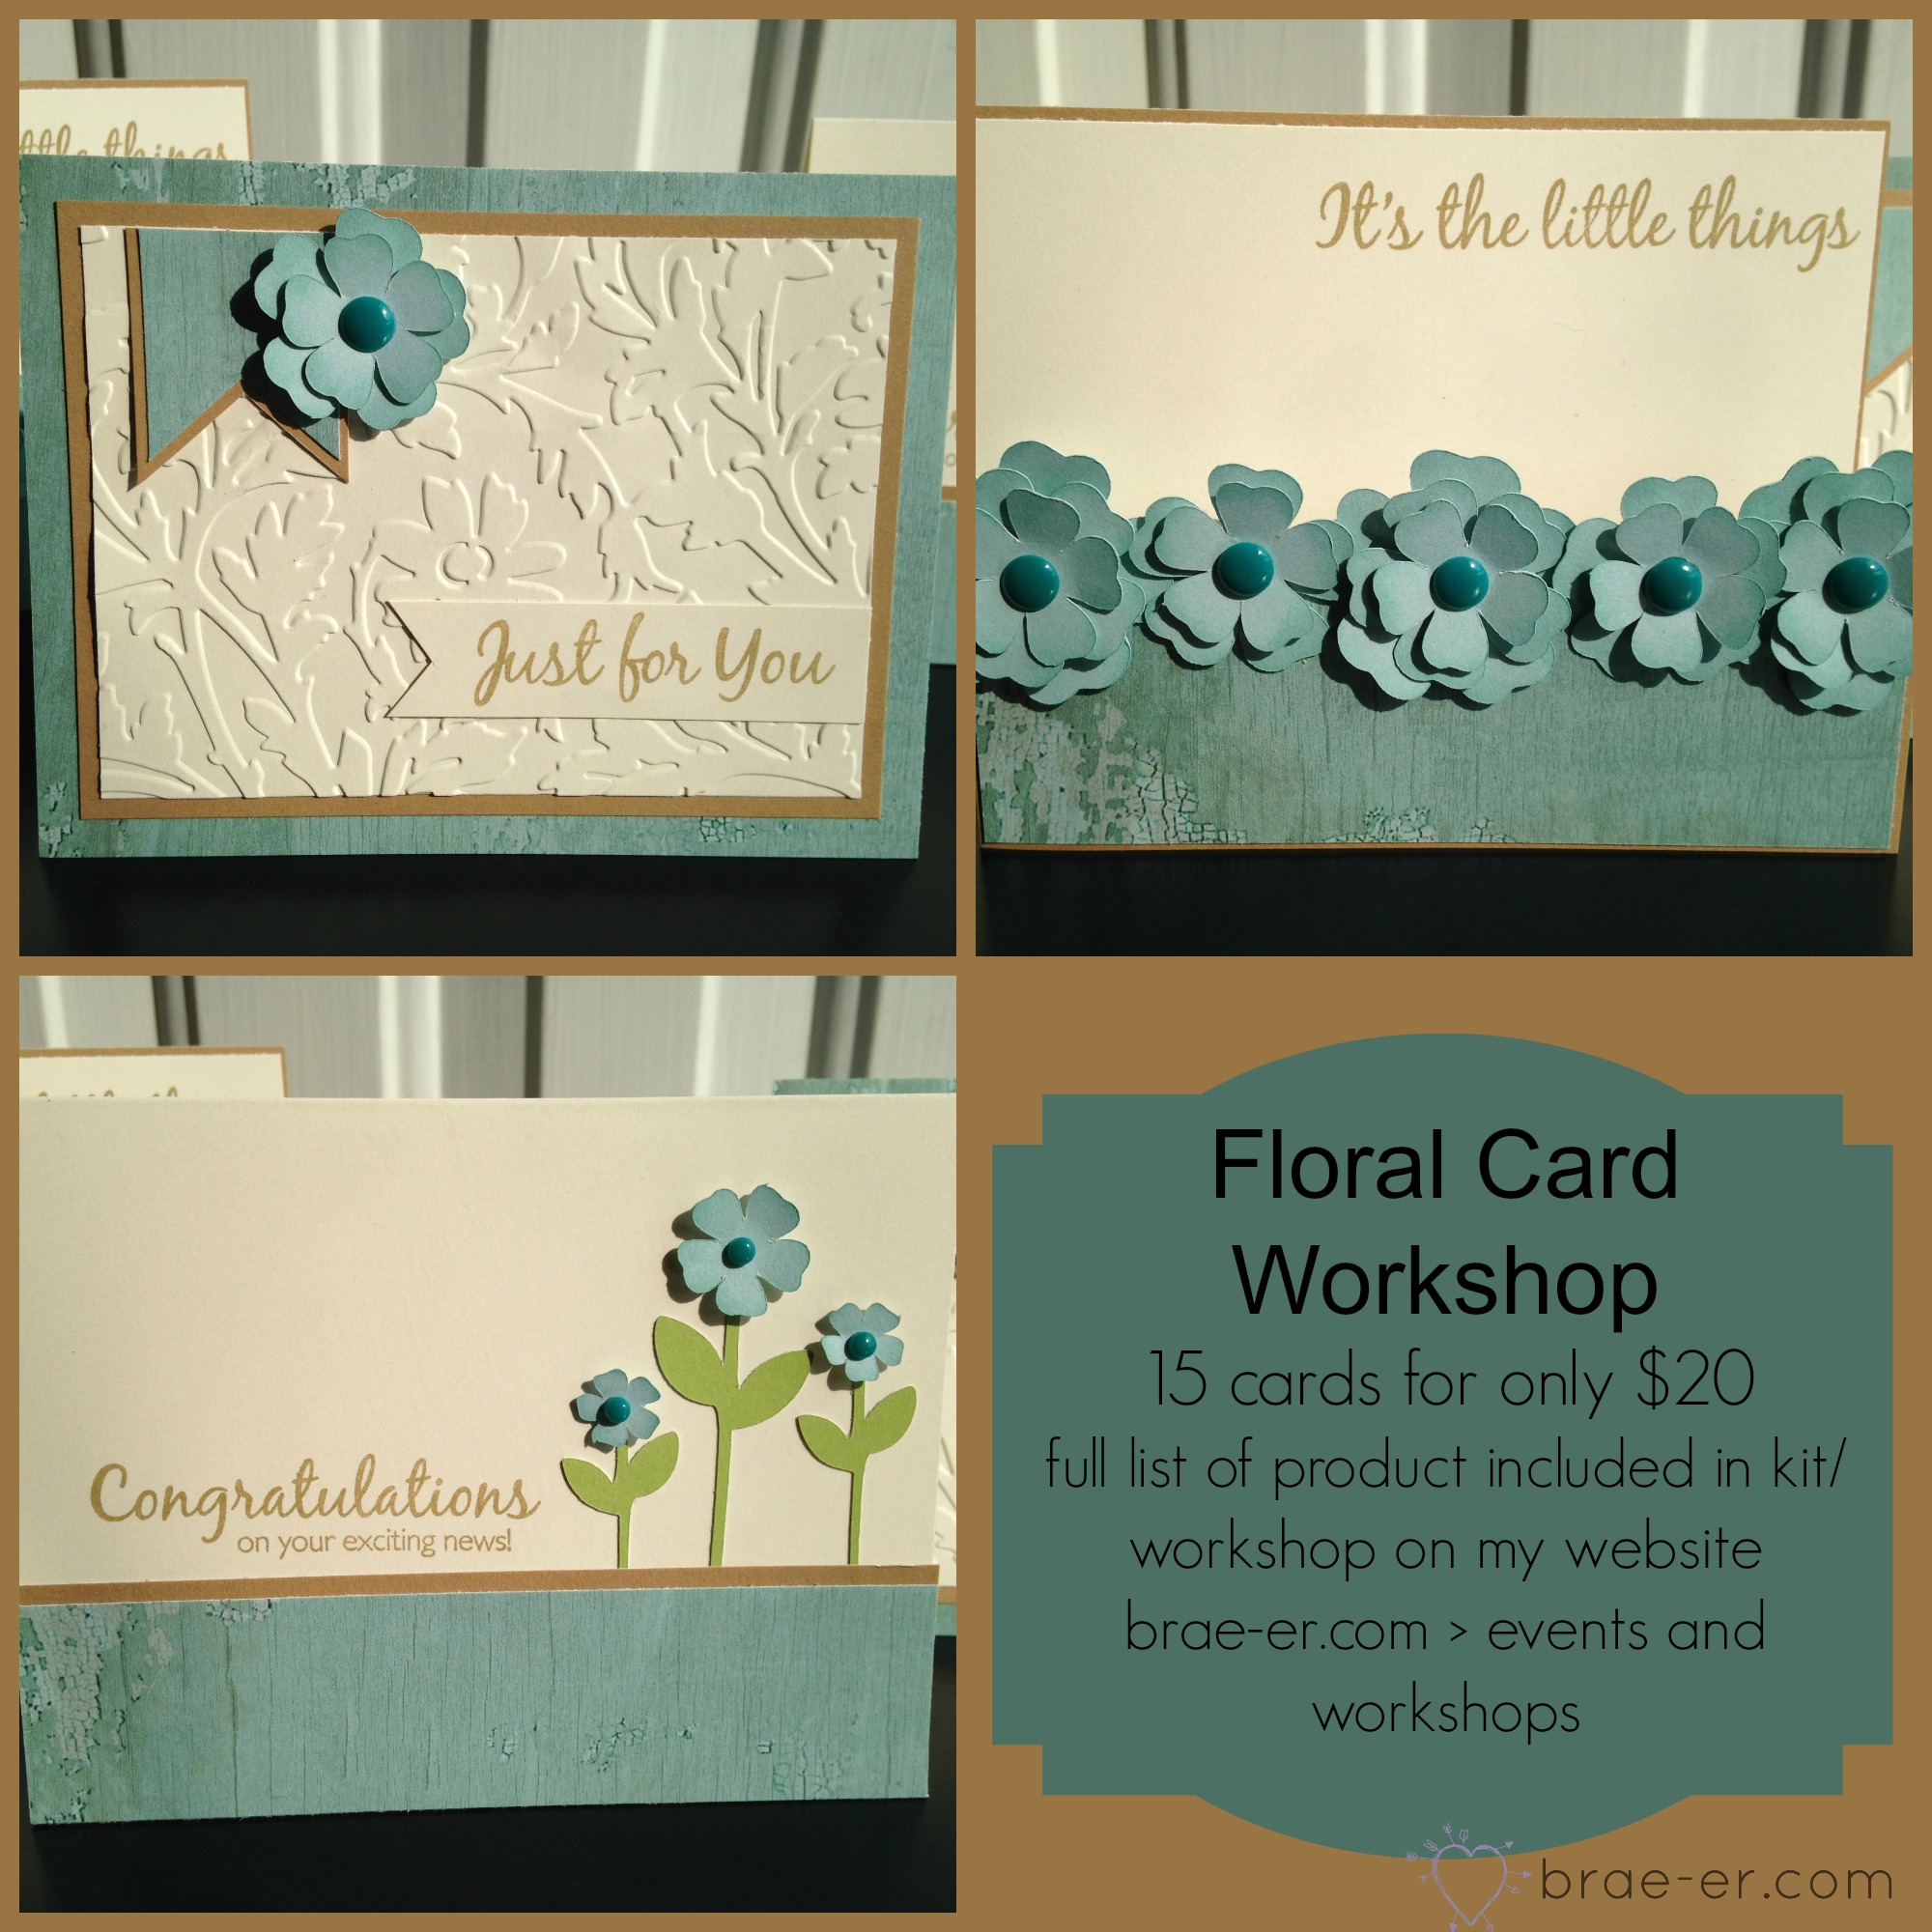
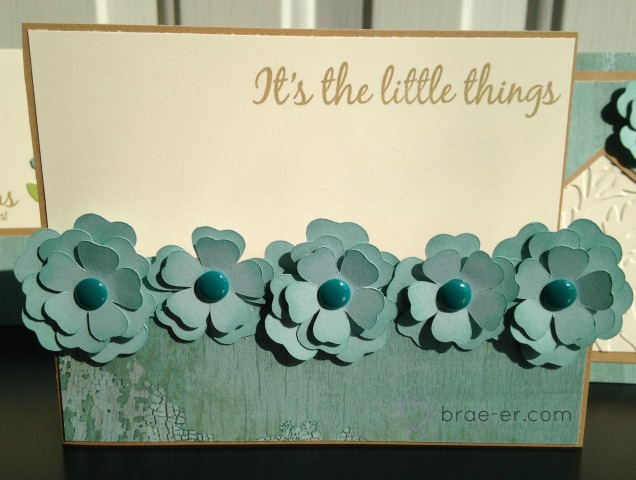
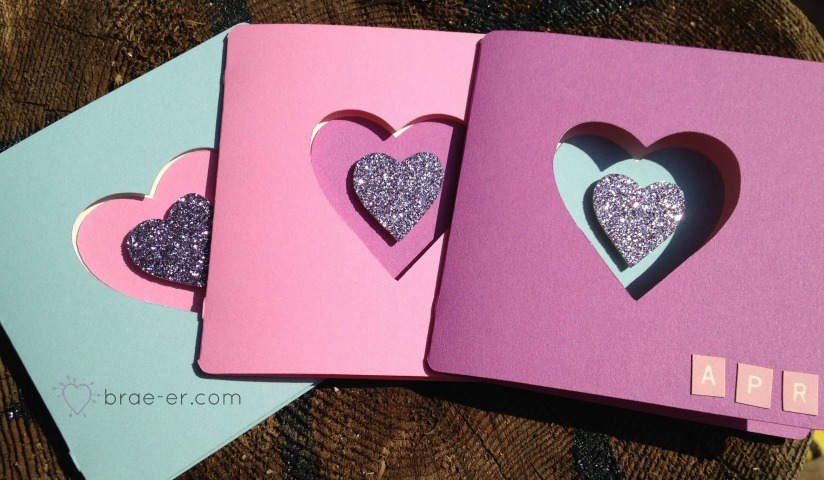
I wrote earlier this week about my new schedule of kits and workshops- this is one for the carmakers and I could NOT be more excited- especially with how these beautiful cards turned out (they were inspired by my very creative friend Lisa Stenz).
In this kit/workshop you create 5 of each of the 3 designs and end up with 15 cards in total- cards that are perfect for any occasion.
Here they are up close:
If you want to purchase one of these kits or attend my workshop then click HERE to be directed to the BUY NOW option.
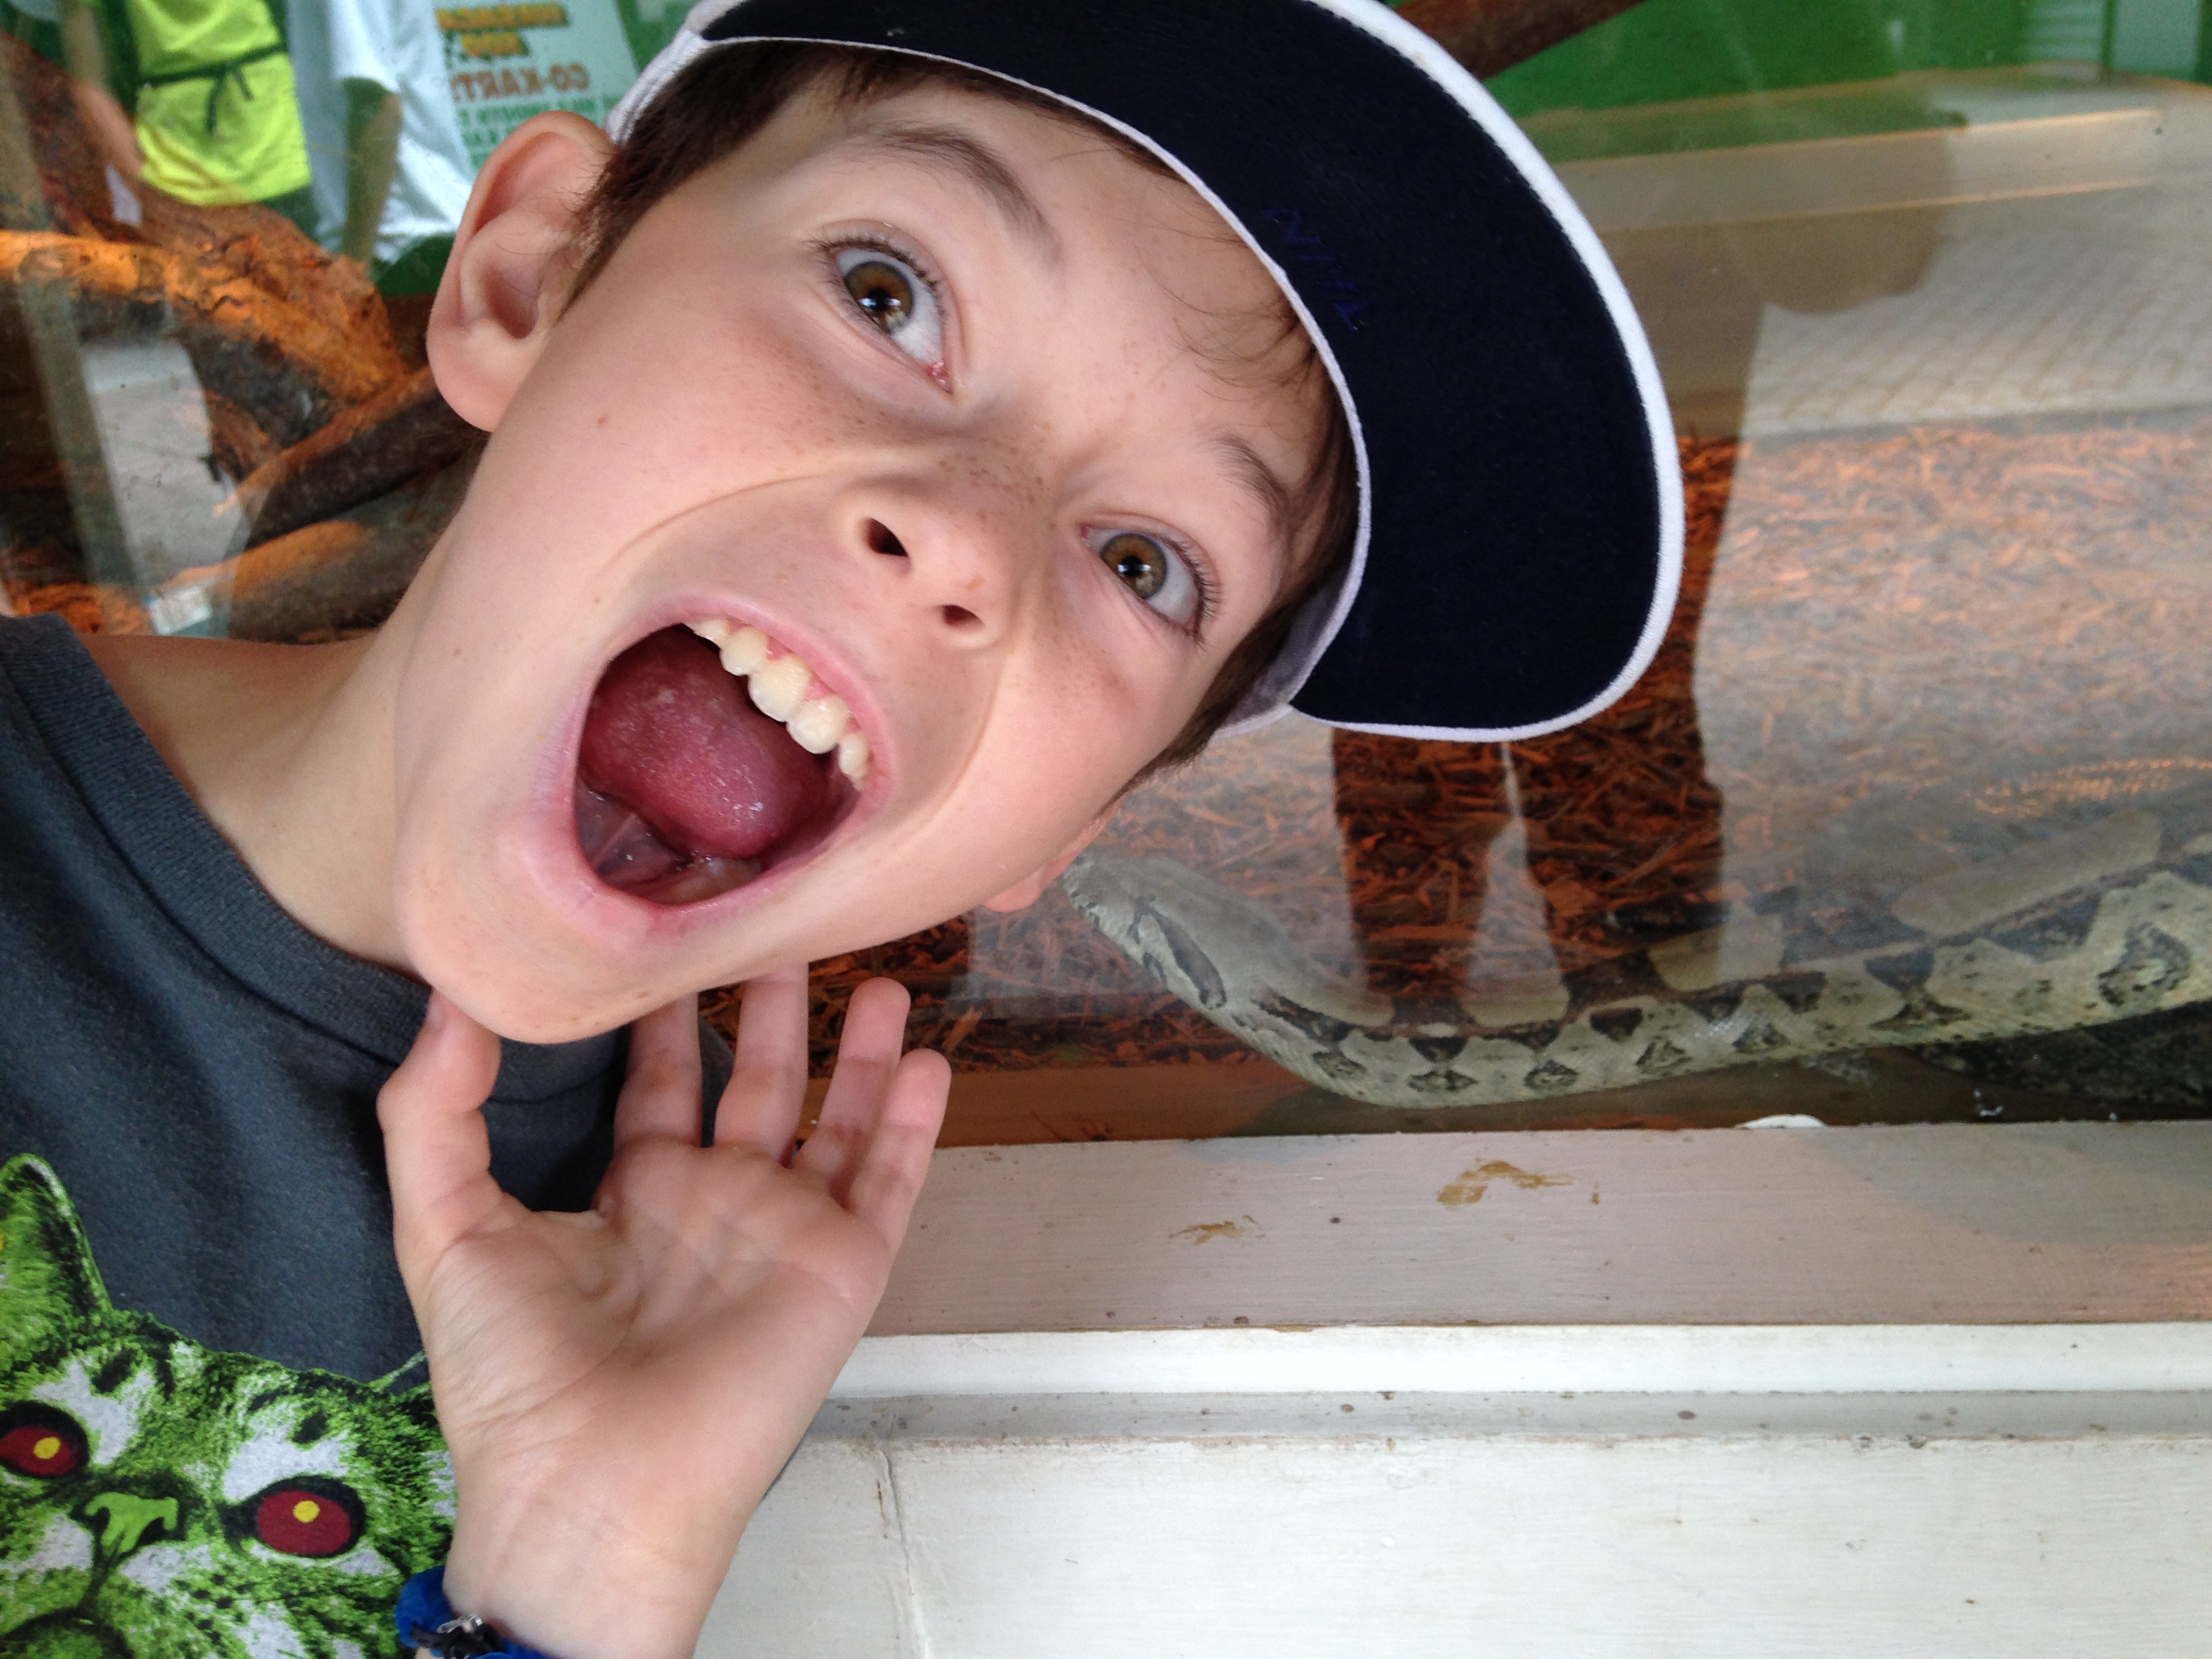
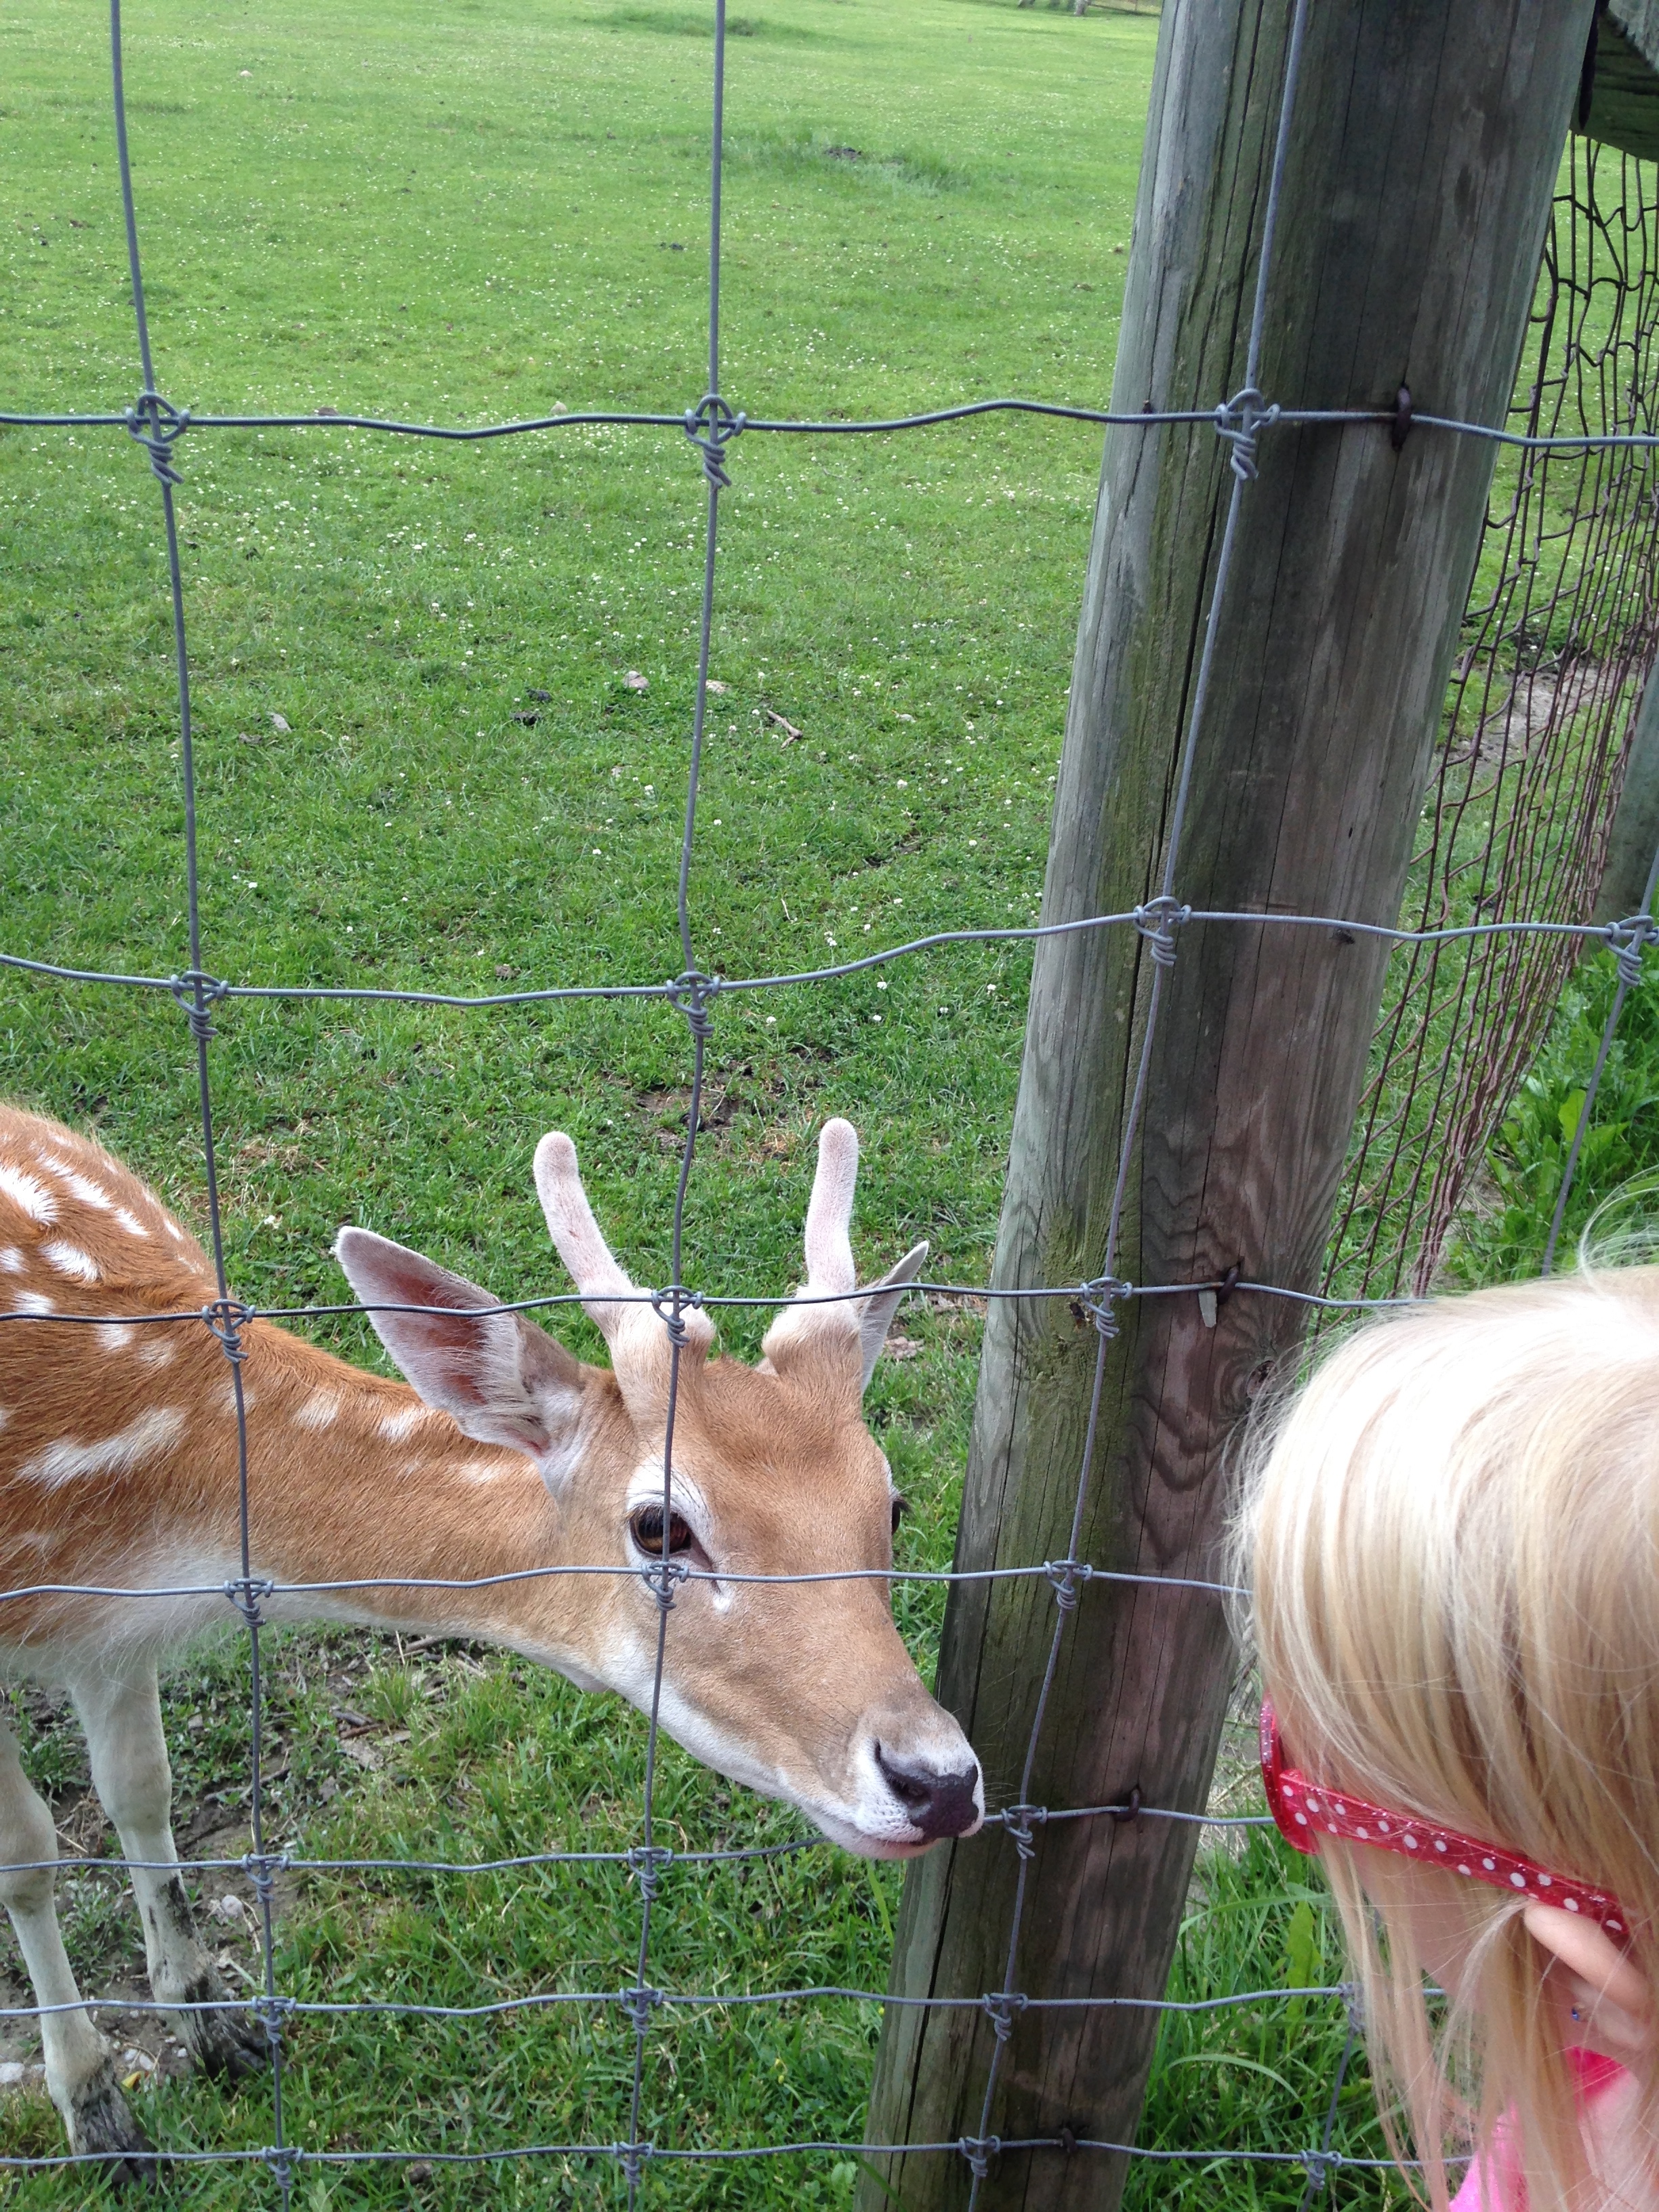
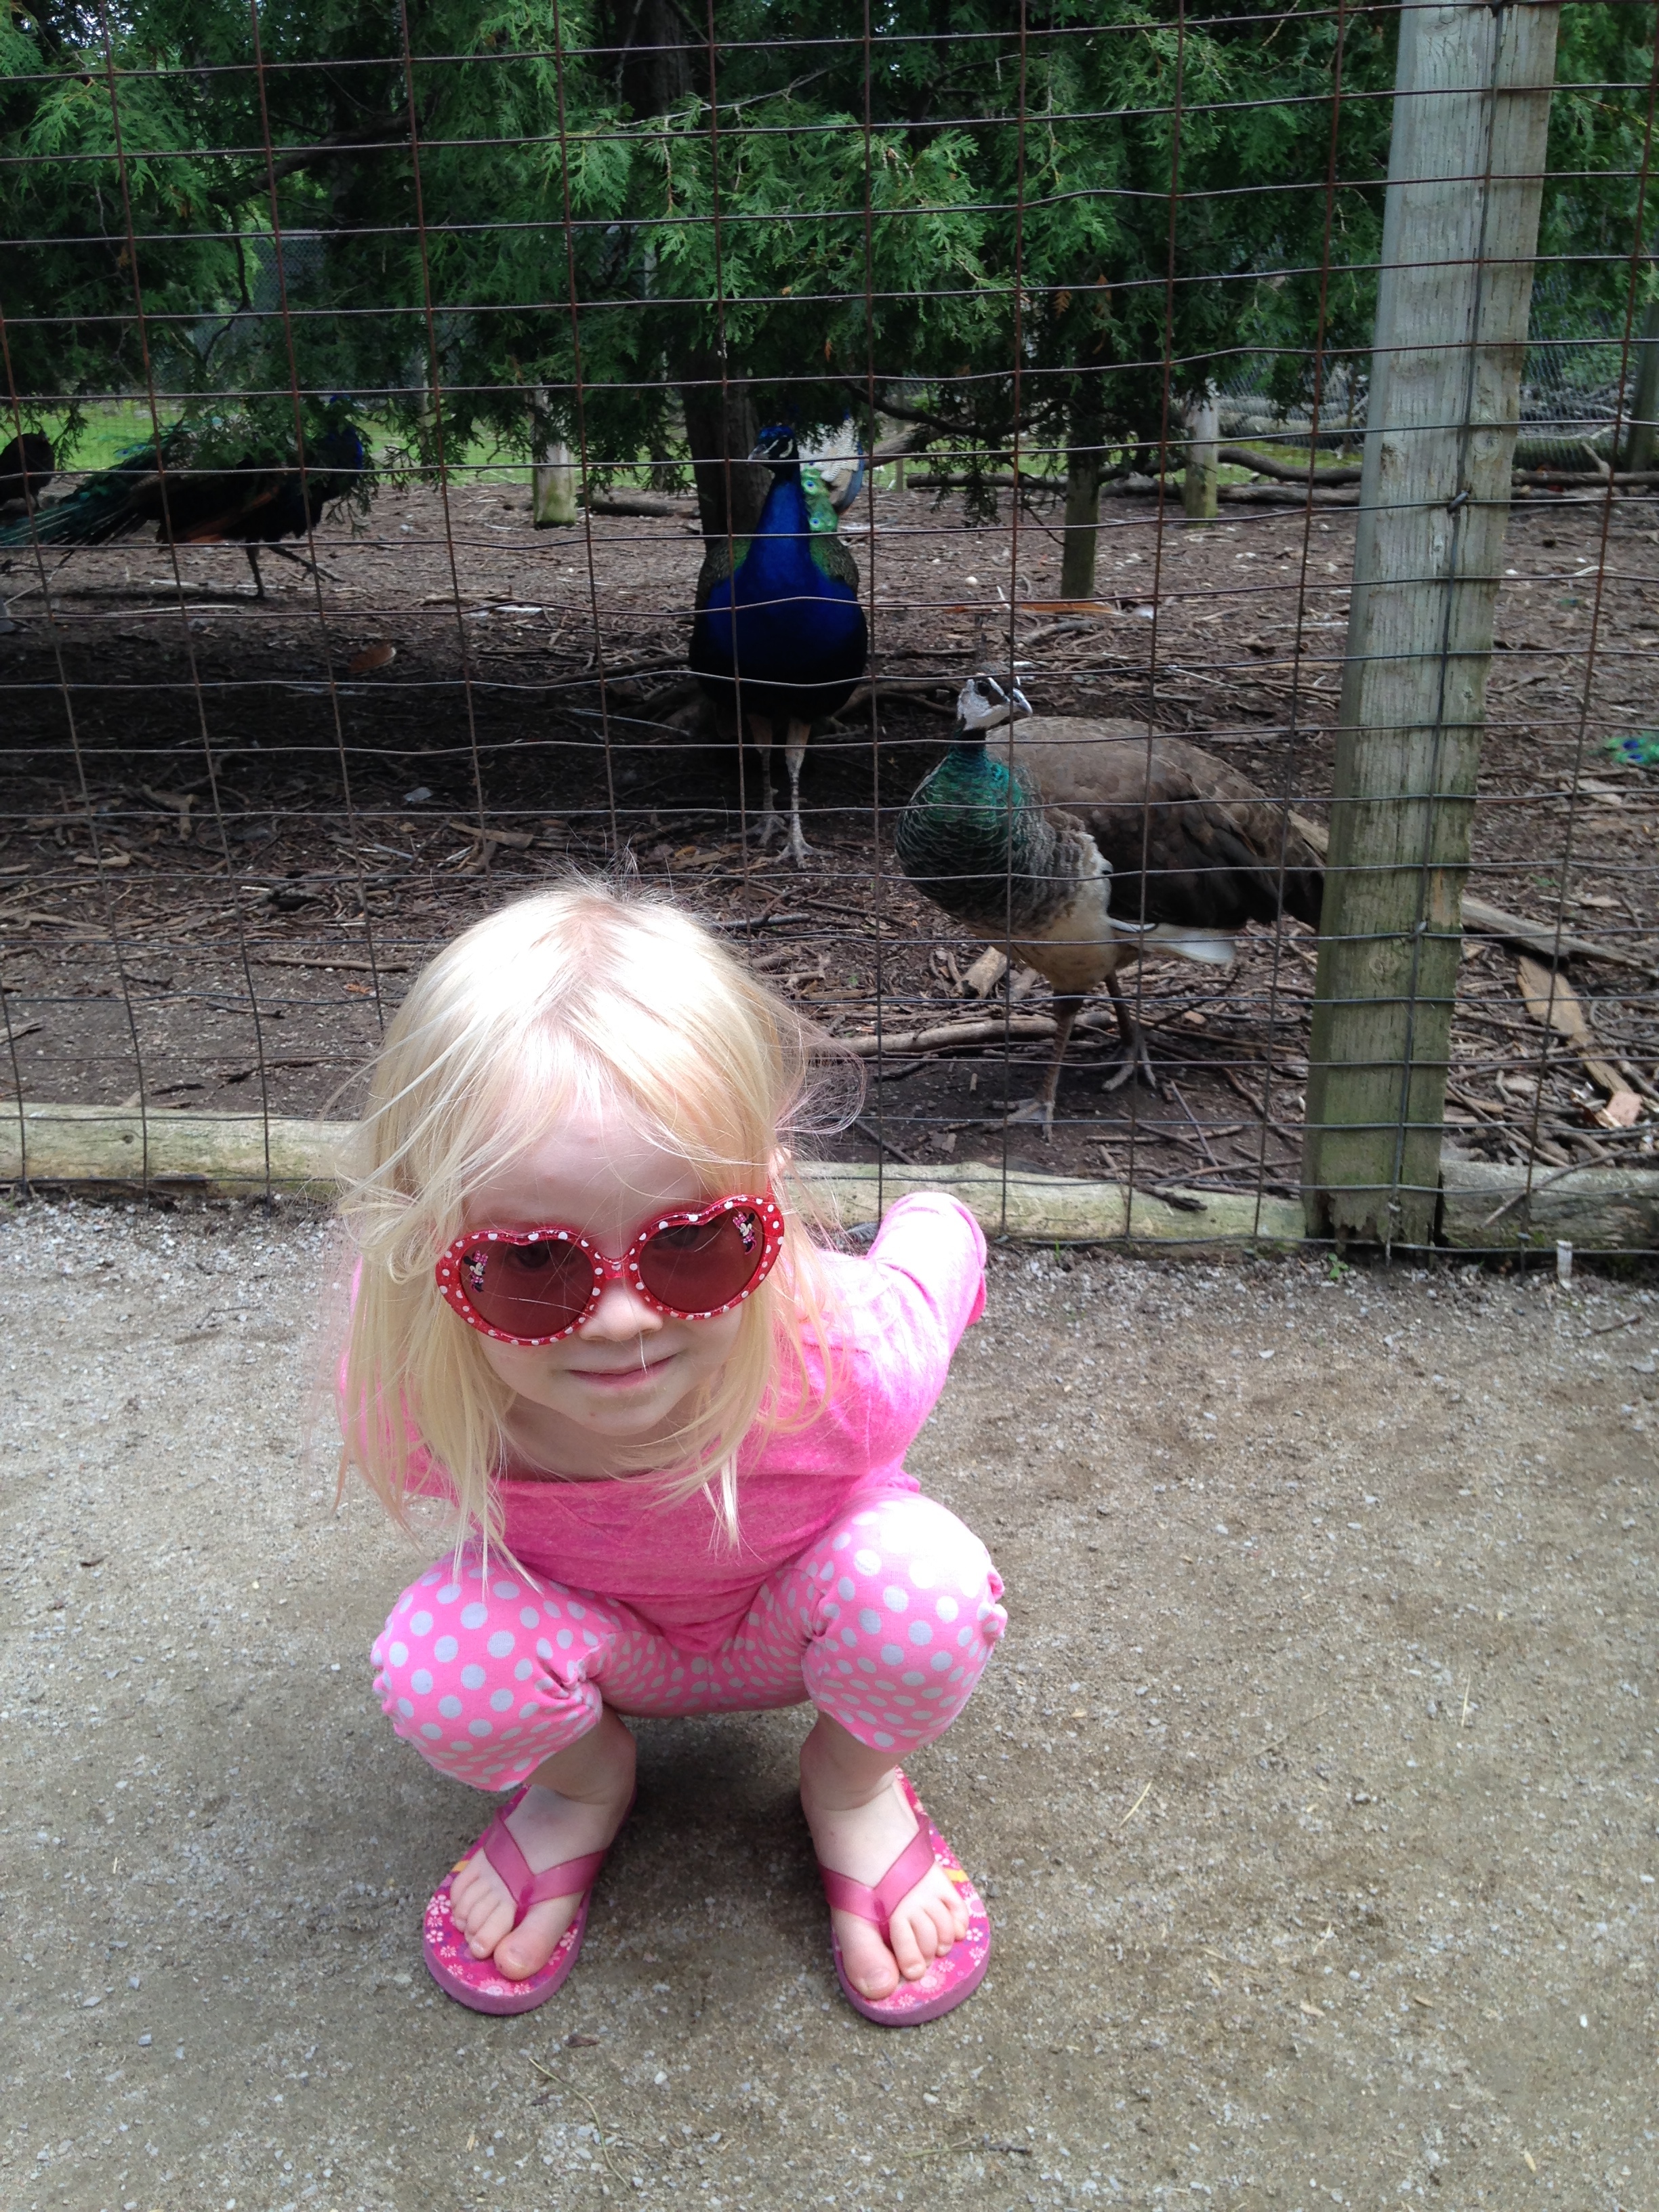
A fun family day at the Zoo (well minus Daddy who had to work)- what could be better?
This is a local zoo, small but perfect for a quick visit (especially if you have young kids as there is not much walking here). Ellery has never been to the zoo (well she went to the Toronto Zoo at 9 months but I doubt she remembers any of that). She was excited and so was Austin. He acts like the big, tough guy but he LOVES animals (especially birds of prey).
They were excited to get started- we bought some food to feed a few of the animals and that was definitely a highlight. Did you know that giraffe’s love banana peel??
Highlight for Ellery was riding the horse- she had to have the purple one. Threw me for a loop until I noticed the purple blanket. (Cause purple and pink are her favourite colours).
Love summer fun- and one more thing checked off from the summer bucket list!
I am very excited to announce the return and addition of some new workshops/kits to my monthly line up. I few weeks back I asked my customers to fill out a survey and the information that I received back was used to inform my decisions for the upcoming year- it was pretty unanimous- layout and card workshops/kits PLEASE!!
Now if you look up top you will see a new tab on the blog- PAPERCRAFTING WORKSHOP/KITS- each month the information will be updated to showcase what is new. Workshop dates will be listed for local customers and kits prices listed for those who are not able to attend or are not local to me- all prices include tax and shipping to your home!
One layout, two looks is a workshop/kit designed to fit your style of scrapbooking! You can pick between the looks to get a supply list and instructions that fit your style. Chose one that uses the paper and complements OR chose the one that uses paper and cricut cuts!
Here are the August layouts using our Seaside paper! If you want to purchase a kit or attend a workshop then click HERE to go to the page and click the BUY NOW button!
WELCOME!! To our NEW CTMH PRODUCT BLOG HOP! If you have come from Carol’s blog then you are doing this right (LOL)… just keep following along and click on the link at the end of my post.
and who doesn’t love new product… I am very excited to share my project with you. I decided to focus on the NEW COLOURS we have (five in total) and our new My Designer creations CUPCAKE BOX!
Our new colours are thistle, flaxen, canary, pixie, and glacier. In my project I focused on pixie, glacier and thistle (I love this colour combination!). You can see them in my cupcake box below:
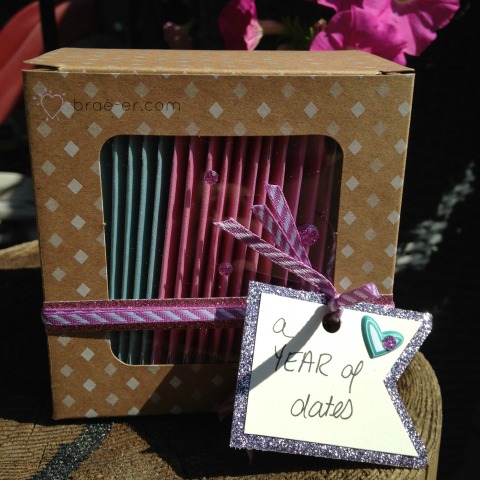
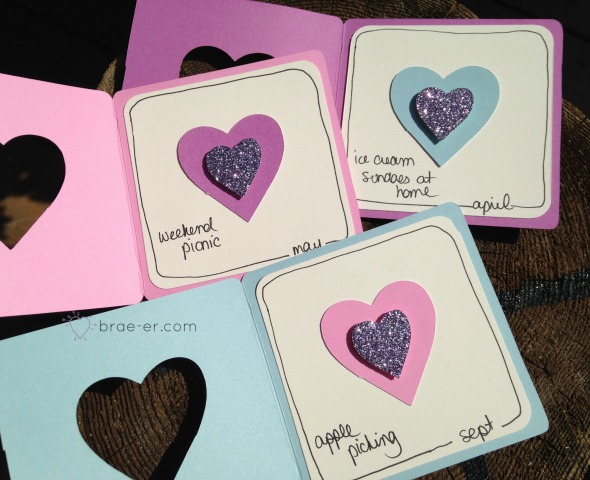
So – what is a year of dates? Well this is going to be a Christmas gift for my hubby. In the box I have created a series of small cards (two for each month) and in each card is a date for the two of us. Some dates are stay at home things and some are spend a day or an evening out. I tried to really mix it up and include things we both like. Here are some of my ideas:
ice cream sundaes at home
picnic at the park
ice skating
sledding
movies (at home or at the theatre)
apple picking
go to a ball game
go to a hockey game
have a board game evening…
I created my cards to follow through on the colour palette I shared above. I cut all these cards using the CTMH cricut artiste cartridge. I cut the matching hearts in glitter paper using the same cartridge.
The inside of the card is similar for them all- some simple line detail around the inside piece to frame it up (hand drawn) and then the month and date activity.
NOW hop on over to Wendy’s blog to see what she has to show you!
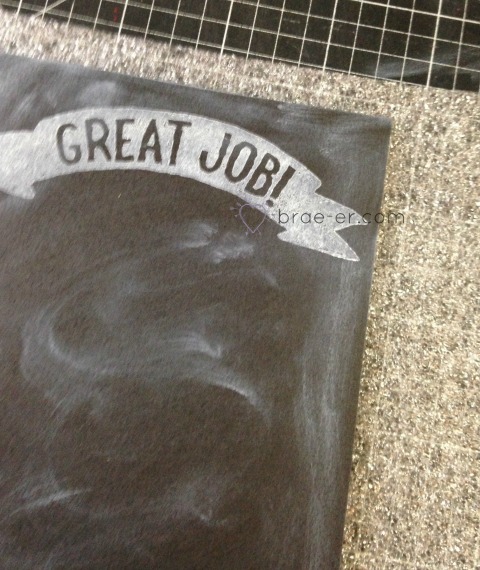
You see the look all over Pinterest and in stores – the chalkboard look is totally IN!
Did you know that you can also achieve that look on your card (and fairly simply I might add).
What you will need:
Stamp
White Pigment Ink
Tissue
Black cardstock
Take your piece of black cardstock (should be cut to preferred size already) and rub the tissue (dipped in your white pigment ink) in the corners and around the cardstock- you want to give the paper the look of the chalkboards at school when they had seen a lot of use.
Next stamp your images onto the cardstock with the same white pigment ink. Now give the ink time to dry- pigment is wet and will need a few minutes but it is worth it!
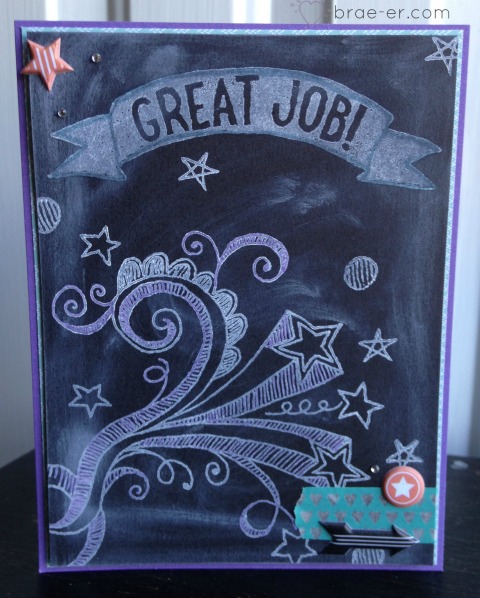
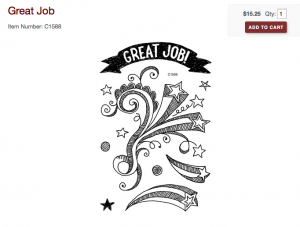
I LOVE how this turned out!
Now you may be able to tell (or may not) but I added some colour to the chalk stamping (I mean really, who didn’t play with the coloured chalk in school every chance they got!?). I added some purple to the star burst and some blue to outline the ‘Great Job’ sentiment. I coloured over the white pigment ink with my ShinHan Touch Twin markers – and it worked AWESOME!! I then finished this guy up with some Chalk It Up Assortment stickers, some bitty sparkles and some new washi tape!
You may have heard.. and if you haven’t let me be the first to tell you! We have a NEW cricut cartridge coming out and like all the rest this will be one of your go-to cartridges!!
Artfully Sent is designed with 700 new images and the BEST part- over 400 of these images combine into fantastic cards!
Build a scene cards, swing cards, border cards, gift cards and soooooo much more! Watch this video for details.
Artfully Sent won’t be available till late August but watch for a special customer incentive when you place your order with me.
I think by now you are ready to see some new paper?
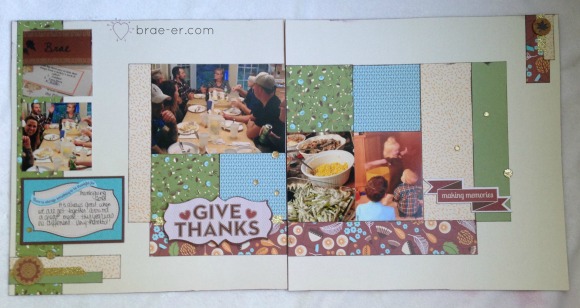
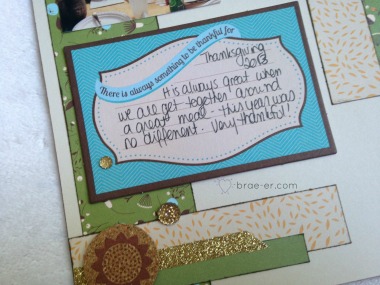
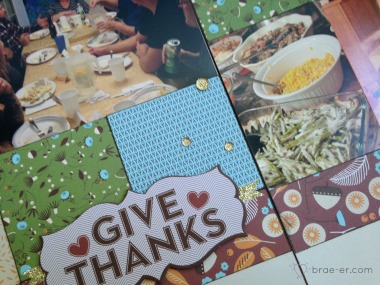
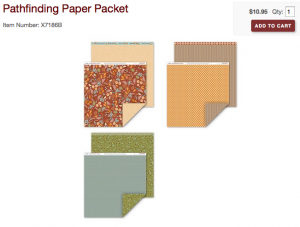
Welcome Pathfinding to the Annual Inspirations Idea Book! This lovely paper is perfect for fall photos, family get together and so much more! Like all out papers it has a few patterns that you could use for just about anything! Here I used it, and the Pathfinding Complements, to create a two page layout. The pattern for the layout comes from the Make it from you Heart book.
I accessorized with some gold shimmer trim (I LOVE this colour addition to the shimmer trim line), the pathfinding complements (and for this kit they are chipboard), the pathfinding assortment (some wooden and cork pieces) AND some bling gems in gold.
Here is the full paper pack and what it contains (and you can click the picture to go right to it in my SHOP!)
But wait… remember…. add your orders to my “Annual Inspirations Launch Party” so that you don’t miss out on winning the hostess rewards! More details on that can be found here!
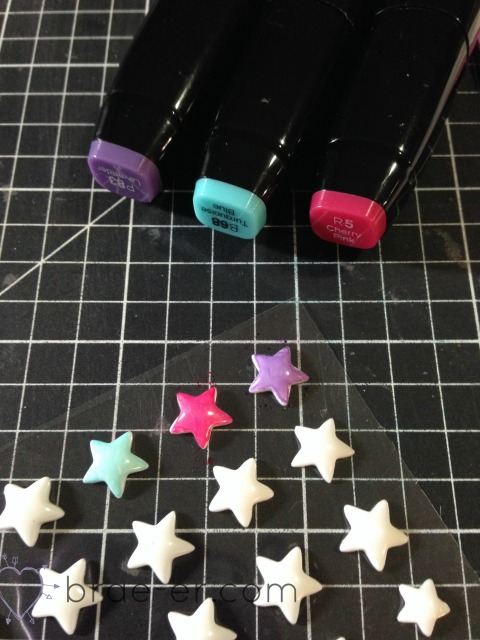
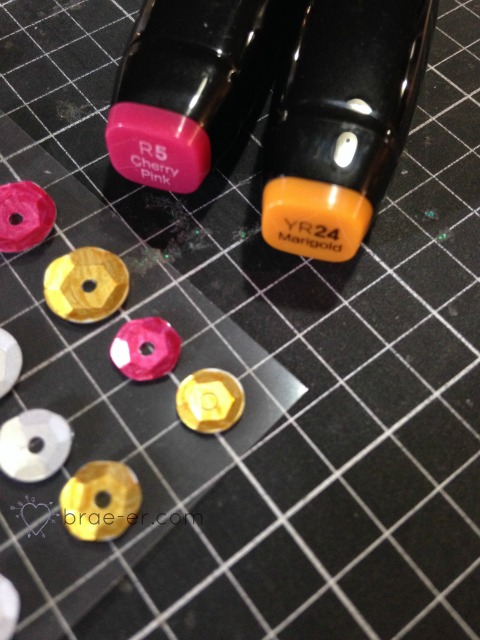
I am really pleased to share this first product with you- clearly there is a reason why I have chosen to share them with you FIRST…. CTMH has decided to carry Shin Han Touch Twin alcohol markers and I wanted you to be the first to know!
Why is this exciting? Cause these markers are amazing!
You can do so much with alcohol markers (now you may have heard about Copic markers? these are the SAME top of the line quality that comes from those- just a better price point).
We will be carrying 24 of these markers and YES they are refillable (if you ever need to refill them).
So, what can these markers do?
Alcohol markers are fast drying- colour embellishments (like my stars and sequins) and the colour stays!
Alcohol markers blend beautifully- you won’t see stroke marks when colouring with these!
The colours are bright and long-lasting.
You can blend the colours together to get a truly lovely look (and we have a colourless blender that helps achieve a blended look).
I first trailed these markers at convention and I was impressed right away! Not only do they sit in my hand nicely (they are ergonomically designed) but they are so smooth! The other thing I immediately noticed- there is NO NASTY SMELL! Some alcohol markers make my head swim with the smell they give off but these ones don’t!
Needless to say… I ordered all 24 right away! I couldn’t resist and I have been happily playing with them all month (and I still LOVE them!)
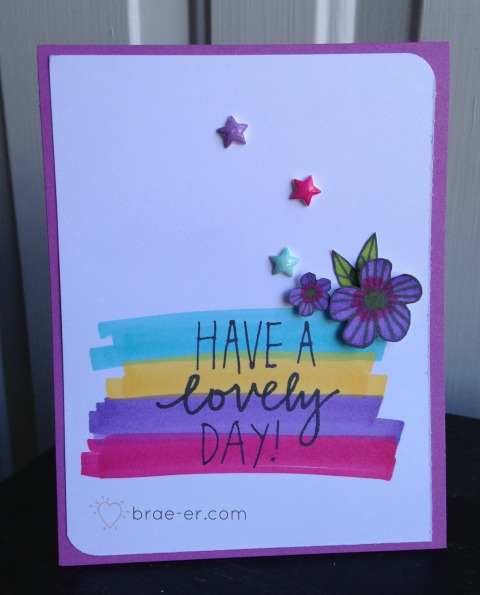
Here is VERY easy card I created using the markers. I chose 4 colours and just did a big colour across the cardstock- random and yes I did allow the colours to overlap. I then stamped in black ink (our dye based- I have had ZERO problems with this ink bleeding on me) a sentiment. I added some flowers that I coloured and my white enamel stars (also coloured with the markers) and I was done!
I highly recommend you get a marker and try it out BUT I know you will want MORE so if you order 6 markers from me this month I will buy you a colourless blender!!