Monthly Archives: November 2013

25 Days of Christmas: Day 12, JOY blocks

I really enjoy it when I find a new use for my scrapbooking supplies- when what was just paper and accessories becomes home decor that my whole family can enjoy! 

For my block I used the following items:
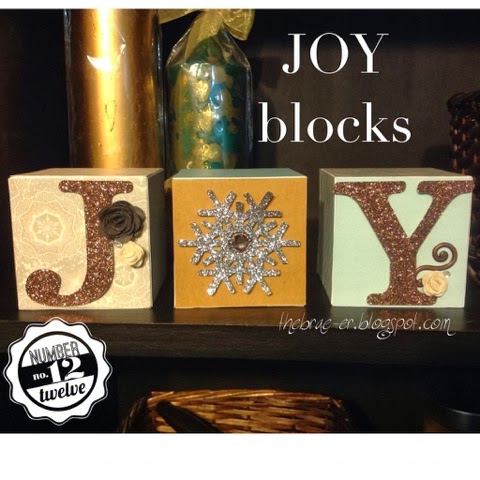
my creations cube (3 of them)
Frosted paper
Kraft paper
glitter paper (both a brown and a silver piece)
Rosewood mini-medley
Frosted assortment

To glue my pieces of paper onto the blocks I used liquid glass (and if you wanted ultimate durability you could coat the blocks in mod podge before you add the letters and pieces).  I then used liquid glass to adhere all the accents and letters. My letters, and the snowflake that replaces the letter O, are all cut from the CTMH Art Philosophy cartridge.


Until we craft again, The Brae-er


25 Days of Handmade Gifts: Day 11, Muslin Drawstring Bags

I know… I love this bags that we have. There are sooooooo many things that you can fill them with!
  • gift card
  • money
  • cookies or other baked goods
  • jewelry
  • keys to a new car
  • coal (ha ha)
Seriously thought there are so many different uses for gift bags- these ones in particular are really fun because of the thinner material- to decorate these you can simply stamp right on them (as I did in this picture). For these images I used the exclusive stamp that comes in the Frosted Cardmaking Workshop on the go Kit.  I also used a flower accent from our red mini medley collection to adorn the bag on the far left.  


Until we craft again, The Brae-er


25 Days of Handmade Gifts: Day 10, Santa and Rudolph Treat Tubes

Okay I have BIG plans for this cute creation- here I used the Close to my Heart treat tubes and a mix of cricut images, stamps and accessories to make Santa and his most famous of reindeers!  

The reindeer is off the CTMH Artbooking cartridge- I used the real dial size and cut him at 6 inches.  I used our foam tape to stick him to the treat tube and a red glitter gem for his nose- easy and cute!

Santa is a mix of cricut and stamp- the base is cut from the CTMH artiste cartridge.  I added some of our black glitter paper around the middle for Santa’s belt and a metal accent from an older mini-medley set for his buckle.  Santa’s face is from the new Santa Claus stamp set (featured in the Holiday Gift Guide and only available for a few more weeks).  

Can anyone guess my big plans? I only had two treat tubes in my stash when i made this…. and our Elf on the Shelf arrives soon!  I think I feel some fun antics in the works! Last year our Elf got into all sorts of trouble- you can see much of it here on my blog!

to order any of these materials please visit 

Until we craft again, The Brae-er


25 Days of Handmade Gifts: Day 9, Frosted Handmade Cards

Welcome back to Day 9! I hope you have been enjoying all the inspiration on my blog the last few days (and I am pretty sure I have some VERY exciting stuff in store for you the next few days!)
Today I am featuring some handmade cards- these cards actually come from a workshop on the go kit that I see through Close to my Heart- for 24.95 (plus ship/tax) you will receive the card bases, envelopes, stamp set, paper, accessories and workshop directions.  It is a great deal and people LOVE to receive handmade cards during the holiday season- they just mean a little bit more than one that was simply bought in a store!
as usual if you would like to purchase any of these supplies please order at braemontgomery.ctmh.com and it will ship directly to you!
Be sure to come back tomorrow!

Until we craft again, The Brae-er


25 Days of Handmade Gifts: Day 8, Baby Pocket Album

Welcome! I am so excited to share with today’s project- a Baby Pocket Album!
I adore how this album turned out and, as this is a very real gift, I am equally excited to see the reaction of the gift recipient this holiday season!

Below I have featured a few of the pages in my album but at the end of the post is the video I created that outlines more of the steps involved.  A list of supplies used is also below- imagine giving this sweet book as a gift! 


Supplies used:
CTMH artbooking cartridge
CTMH art philosophy cartridge
Babycakes paper
Babycakes stickease
Bronze shimmer trim
Babycakes assortment
lagoon cardstock
Kraft Pocket Album
Stamp set from the Babycakes WOTG
Lagoon Houndstooth Washi tape

And now for my video! Enjoy!!  And remember to come back tomorrow for more fun inspiration!

Until we craft again, The Brae-er


25 days of Handmade Gifts: Day 7, Reindeer Treat Cup Card

Yes! This is the cutest card EVER!!! My kids flipped out when they saw this card sitting on our counter. I think that shows that any kid would LOVE to receive this as a little gift or as a card accompanying a gift.  Want to know how to make this fun card- I used our CTMH Cricut Cartridges and a variety of ‘shapes’ to get him all together!

Face- I used chocolate cardstock. 
Artiste Cricut Cartridge
Accent 1 on page 48 cut at 4″

Ears- chocolate and ruby cardstock
Art Philosophy cartridge
Shape 11 on page 28- cut at 1 3/4″ for chocolate 
cut at 1 1/2″ for ruby

Nose- ruby cardstock
Art Philosophy cartridge
Circle 1 on page 21, 1 3/4″

Eyes- white, black and chocolate cardstock
Art Philosophy cartridge
Circle 1 on page 21, 1″ in white
Circle 1 on page 21, 1/2″ in black
Cirlce 1 on page 21, 11/4″ in chocolate and cut in half for eyelids

Antlers- cocoa cardstock
Artbooking cartridge
Icon page 57, cut fit to page (cut 2)
only use the antlers on these images

Piece your Rudolph as pictured above and add a treat cup for his nose- fill it with some yummy red candy! 


AND if you are on facebook be sure to ‘like’ my facebook page- there just might be a giveaway coming up!


Until we craft again, The Brae-er


25 Days of Handmade Gifts: Day 6, Personalized Journal

Welcome back! Today I want to share with you a personalized journal- so many people put their thoughts into some special place.  I have a almost-adult sister who is one of those people. This journal may be too mature for her taste but I have some ideas for that! To decorate this canvas journal (which I purchased off my website in the ‘while supplies last section’- check it out for some amazing deals!) I used our Huntington paper and one of the overlays from the Cricut Artbooking cartridge.  I cut the same image a few times on different paper so that I could piece together the tree- this tree is one of my favourite images on this cartridge!

I also stamped on the journal- for durability I used our pigment ink to do this.  Then I added a sparkle from the Rosewood mini-medley collection.  Easy, quick and a beautiful gift!!

What do I have in mind for my almost-adult sister? Well she is young and funky and full of life! She needs something that reflects that and for this reason I think I will be gifting her one of our Crush books and assortments for Christmas- it is much more reflective of her! Hope she likes it!


You can purchase these and more at 


Until we craft again, The Brae-er


Cross Canada Blog Hop- Holiday Gift Guide

Welcome to our November Blog Hop featuring creations made with products from the Mini Holiday With Heart Gift Guide.   To purchase any of the items seen in our blog hop today feel free to visit my website at braemontgomery.ctmh.com- we ship direct anywhere in Canada!
We hope that you will take the time to leave comments on our posts, as we love to get feedback from our viewers….whether it was something that you really liked or some new technique that was used that you would like to learn how to do….by leaving us comments, we get to hear what you like, and what you want to see. Thank you… now on to our hop! 
If you have just hopped onto my blog, you can start here as this is a circular hop.  If you came from Sheri of sherisays-justscrapit.blogspot.ca then you are in the right place!
This month I kept my project simple- a made a little 3×3 gift tag that can be attached to a holiday gift! I used the Remarkable Wreath stamp set, silver shimmer trim, Sparkle and shine washi tape (it makes my background paper) and a piece of ruby cardstock.  

If you want to see some of the BIGGER projects I have been working on this month then check back each day (and look back on my blog as well) as I have been running a 25 handmade gifts of Christmas blog event- lots of inspiration every day!


Your next stop on the Cross Canada Hop is Carol.

Thanks for hopping along with us – we hope we were able to inspire you to get creative using some of the designs, products and techniques seen along the way. Join us again in December when we will be featuring projects that would make great gifts.  We hope you will join us again on December 15th.

Until we craft again, The Brae-er


25 Days of Handmade Gifts: Day 5, Season’s Tweetings Gift Bags

Yes, if you have been following you may now see I bit of a theme to the last two days- I LOVE making gift bags.  They are a quick project that can be used in so many ways.  These ones I plan to fill with some of my yummy Christmas Cowboy Cookies! 

These bags came just a cute as you see them- what I created was the tags that adorn them.  I used the CTMH Cricut Art Philosophy cartridge for the tag and the Remarkable Wreath stamp set for the stamped images (stamped in chocolate, ruby and juniper).  I popped up my ‘4 you’ image with some of our foam tape but backed the image with some of our sparkle and shine washi tape OR some of our silver shimmer trim (love me some glitter!).  

How are you enjoying the handmade days? Have ideas for gifts that you would like to see? I would love to hear them- many of these days are planned far in advance but you may just catch me in time for me to create something new!

Are you on facebook? Be sure to like my facebook page to get lots of other fun updates, access to exclusive hostess rewards and chances to win prizes

 to order these featured products or others you have seen in this series

Until we craft again, The Brae-er


25 Days of Handmade Gifts: Day 4, Burlap Gift Bags

Welcome back!

Today I want to share some gift bags- we give so many gifts during the holiday season that need some cute packaging to really shine- gift cards are one very popular item that really should be packaged in a really cute way!
I did three different things on my bags:
1. Used CTMH alcohol marker in Ruby to colour the bottom of the burlap.  Closed the bag off with a length of our red chevron ribbon.
2. Used one of our chalkboard shapes and adhered it to the bag with liquid glass (I used this for everything as it is a very strong adhesive).  I then attached one of the pink felt flowers from the frosted assortment and two of the sparkles from the Black Base and Bling assortment.  
3. I used some of the pieces of the Rosewood mini medley- the flourish and two of the large sparkles- and added one of the grey felt flowers from the frosted assortment.

These are certainly going to make some of my gifts SHINE!!!

Order at 

Until we craft again, The Brae-er